Kubernetes in a Microservices Approach: How We Configured the Deployment of Dynamic Environments to Optimize Development
This text is a translation of an article originally published on DOU.
My name is Ihor Prokopiev. I’m a Back-End Solution Architect at Plarium, where we specialize in developing games and other products for players and employees.

My team develops platforms for game publishing and user engagement. We work on the Plarium Play desktop application, the Plarium.com gaming portal, the Plarium player forums, and other projects.
In this article, I will talk about how Kubernetes is used in a microservices approach, how the deployment of dynamic environments is configured, and why it significantly improves workflows in the team. I will also demonstrate how we optimized the development and scaled it to several parallel versions.
This article will be useful for backend developers and DevOps engineers who have mastered Kubernetes at a basic level and plan to work with it further. If you're thinking about migrating your hosting to Kubernetes and looking for ways to make project management easier, this article will also come in handy.
Why we decided to switch to Kubernetes
The Plarium game platforms we’re currently responsible for have approximately 50 microservices. Their number gradually increased over time, and eventually it became difficult to manage them.
Because of this, we had the following goals:
1) Simplifying the management of microservices and facilitating their assembly and deployment
Large numbers of microservices require detailed planning, coordination, and control of the deployment process. Coordination and supervision are an important part of each service.
Another aspect of managing microservices is the challenge of scaling their individual components to ensure high availability and performance.
Errors and malfunctions may sometimes appear in the microservice. If this happens, the microservice must be restarted or moved to another node to ensure system stability. Automation of these processes makes work much easier and faster.
2) Streamlining continuous integration and continuous delivery (i.e. CI/CD processes)
Continuous Integration (CI) and Continuous Delivery (CD) is an approach to software development that automates and simplifies the processes of building, testing, and deploying an application. All of this is aimed at quickly and reliably delivering new features, updates, and bug fixes to the environment.
For CI/CD, you need to set up an infrastructure that ensures that the application is automatically built, tested, and deployed. Various tools and services may be needed to implement CI/CD processes, such as build systems (e.g. Jenkins), version control systems (e.g. Git), containerization (e.g. Docker), etc. In addition, it is important to ensure that the environments are synchronized.
3) Parallel development of several sprints at the same time
We have a large development team, so many tasks were included in one sprint at once and it was difficult to test and release it. For example, on the Plarium Play project, sprints are tied to platform versions. The optimal solution to this problem is to do several parallel sprints at once – that is, to start developing a new version before the current one is released. This is how we speed up the process and distribute tasks between versions.
In order to work simultaneously on several versions, we needed to set up a fast and automated deployment of new environments with all the necessary microservices at once.
It would also enable it to quickly make hotfixes – to fix bugs in the version that’s already out. In order to not stop the development process of other versions, you can create a separate environment for the one in progress and quickly solve the problem.
4) Ability to run automated tests to verify integration between services
We ran into another problem related to the large number of microservices. Sometimes a developer does a task and accidentally ends up breaking the finished functionality. To prevent this from happening unit tests are used, but they do not test the integration and interaction between microservices. We needed integration tests that, in the case of a pull request, deployed a full-fledged dynamic environment. This would protect us from "broken" environments and not slow down the development process.
After analyzing the available tools, we chose Kubernetes. It's a container orchestrator that lets you build, balance, scale, and manage projects in one place.
Kubernetes allows you to manage multiple clusters simultaneously and reuse configured infrastructure using a local minikube cluster.
In order to meet requests for parallel development of several sprints at the same time and to run automatic integration tests between services, we decided to develop a mechanism of dynamic environments. Next, I will explain and show how Kubernetes’ capabilities were used for the setup.
Deploying a new dynamic environment with all dependencies
An environment is an isolated set of microservices and supporting infrastructure – such as a database, Redis caching system, or RabbitMQ queuing system – deployed in a separate environment and accessed through unique domain addresses.
The main problem with deploying new environments is that there are too many actions to complete. We need a database, a queuing system, a cache, additional dependencies, and new domain addresses with registration for each environment. Deploying a new environment for Plarium Play would take about two weeks of DevOps engineer and developer work. Therefore, before switching to Kubernetes, we did not do this at all.
Creating new environments is necessary for parallel development and flexibility in testing new functionality. We are currently creating a separate environment for each release of Plarium Play – using the example of a test service, I will show how it’s done.
We create a Gateway entry point and five microservers that Gateway depends on. We make the Gateway dependent on MS SQL Server, RabbitMQ, and Redis.
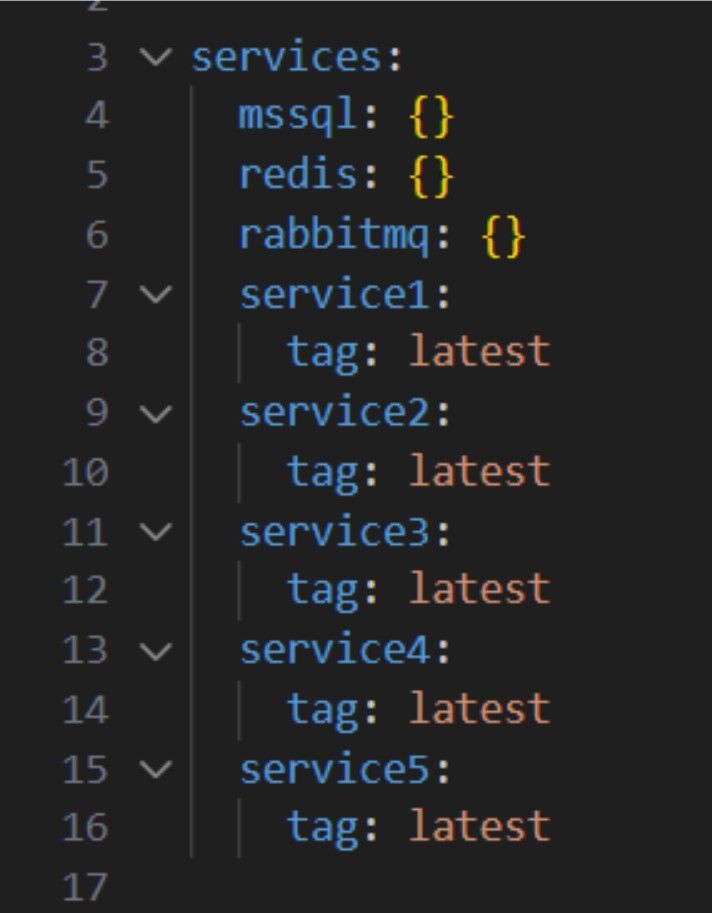 Gateway microservice dependencies
We have developed a custom Jenkins Pipeline to create dynamic environments. Helm is used to describe Kubernetes microservices resources. Helm is a project template manager for Kubernetes. The description of each microservice resource template is called a Helm chart.
This Pipeline loads all available Helm charts from our chart repository and lets you choose which combination of services to deploy. If a Helm chart is selected, the project's dependencies from other projects are also pulled. After selecting the charts and uploading the dependencies, Jenkins Pipeline prompts you to select a Git branch in each microservice from which the dynamic environment will be deployed.
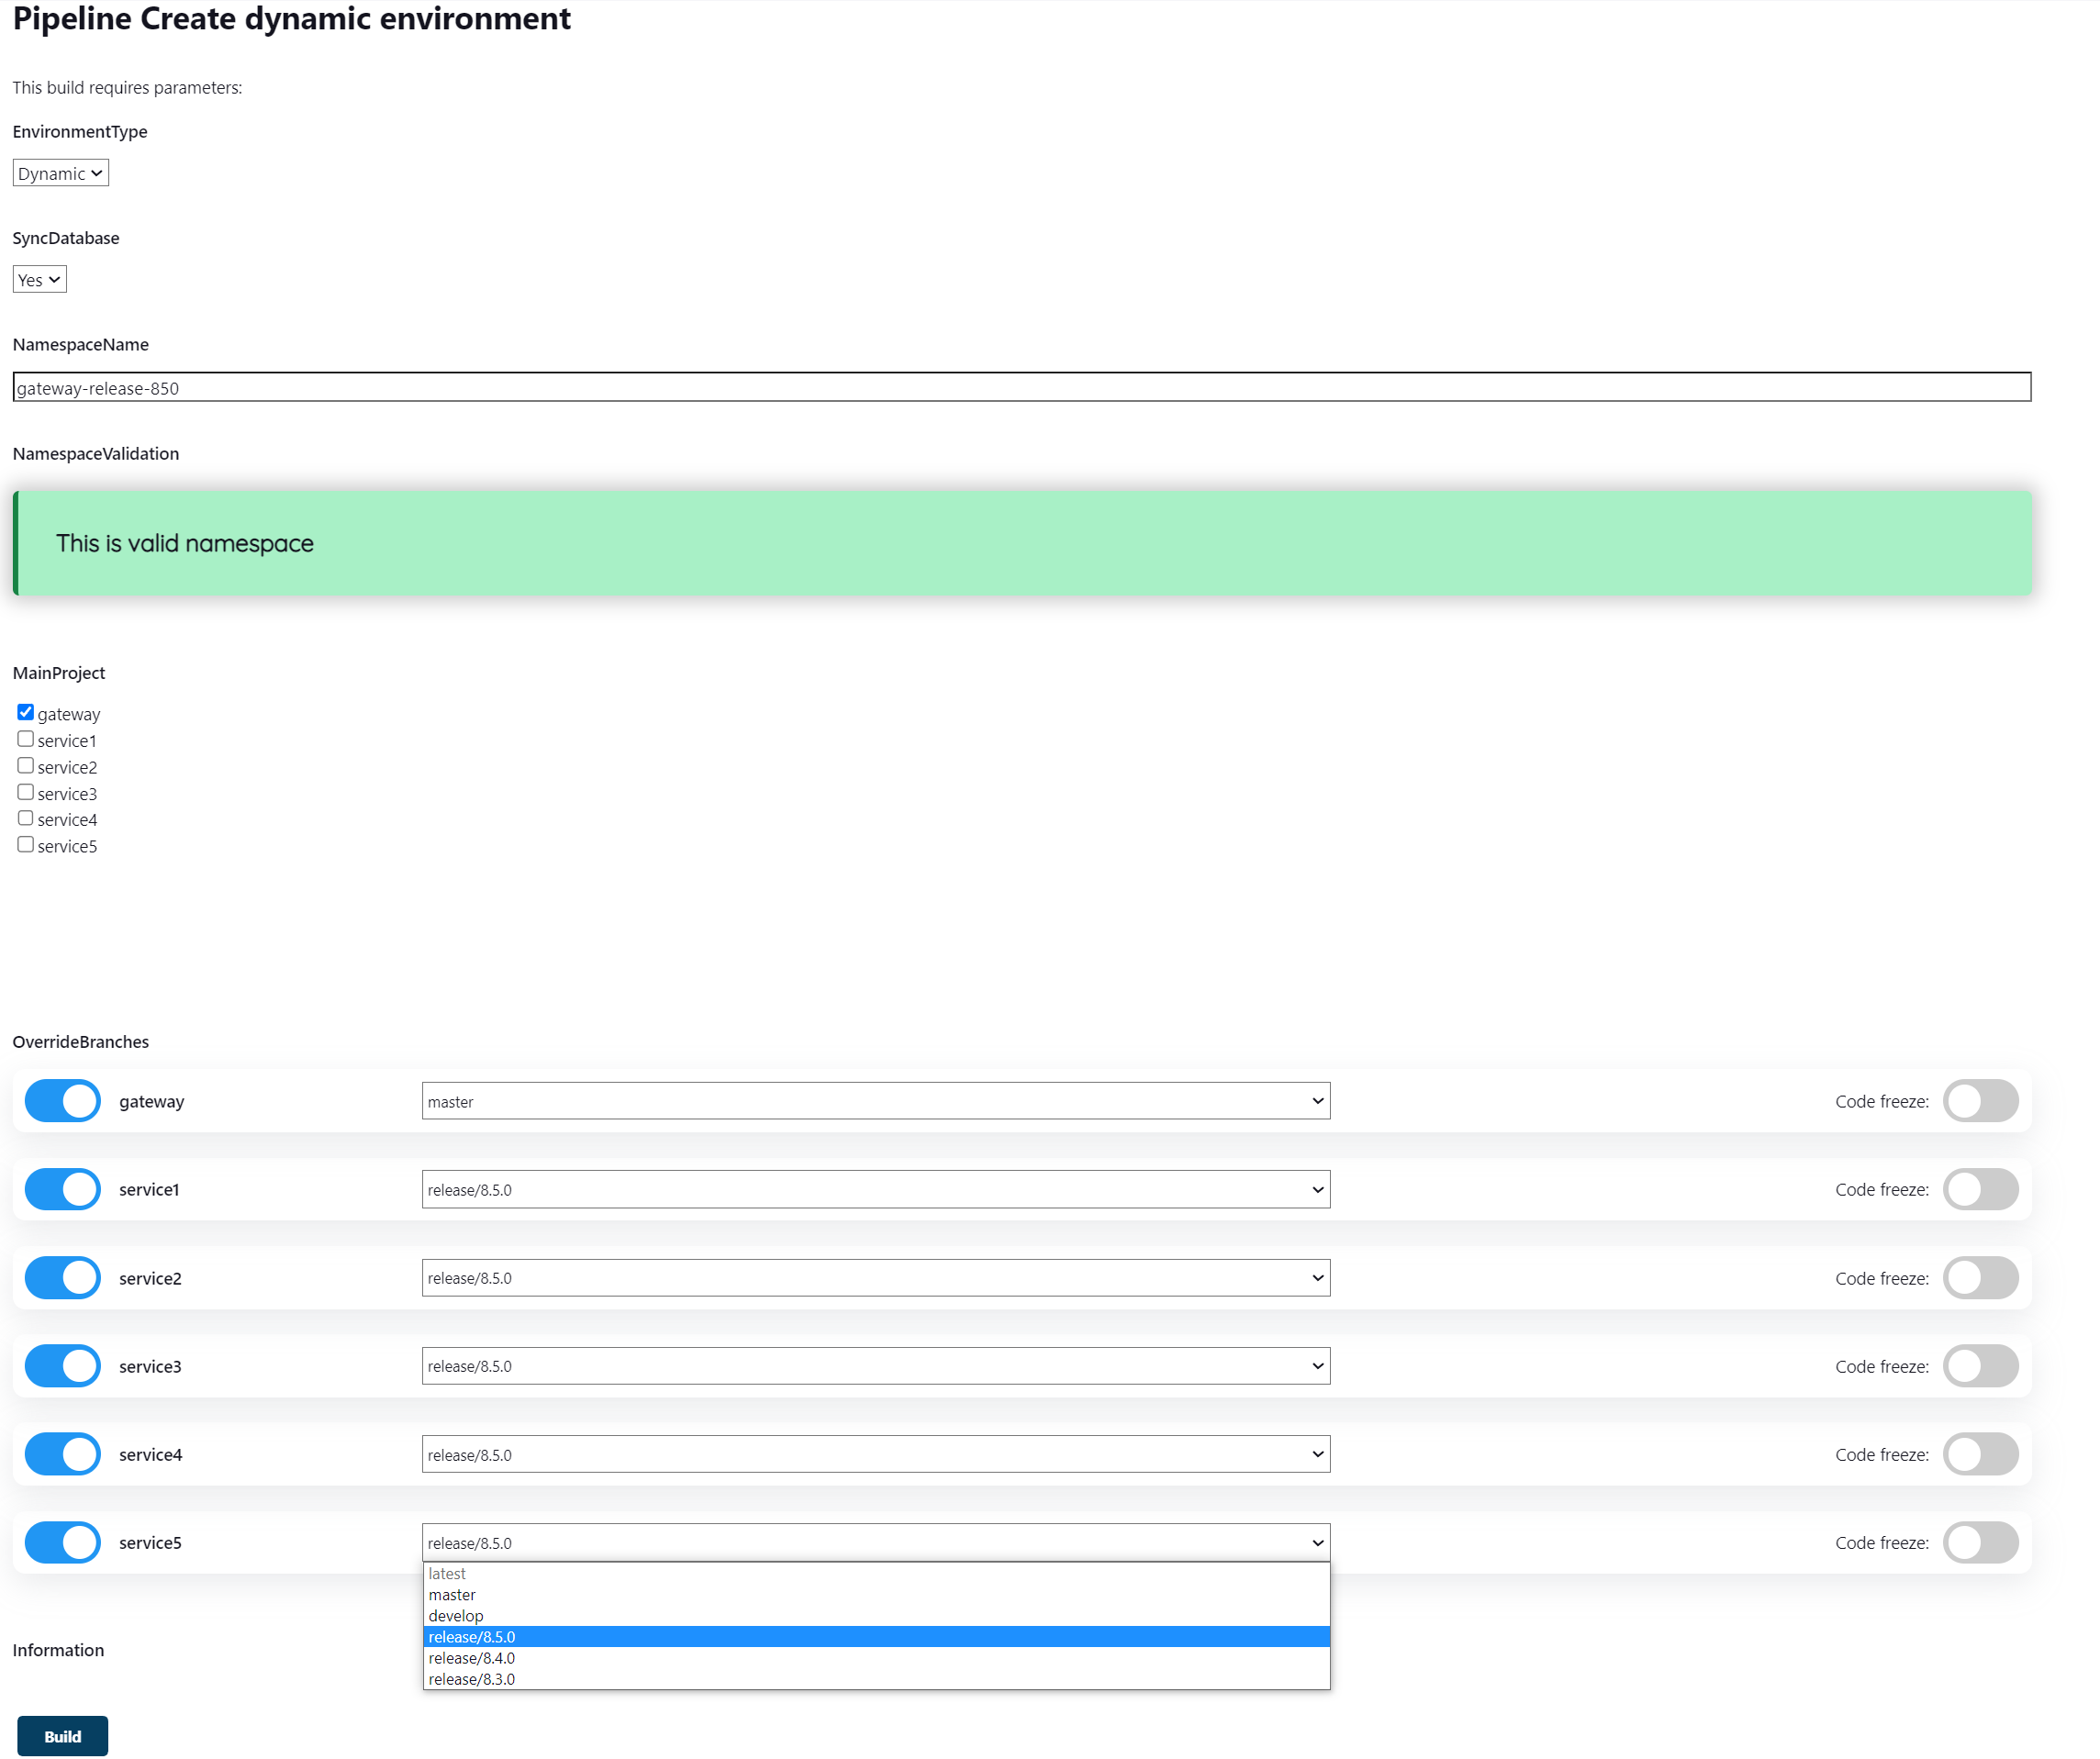 Using Jenkins Pipeline to create a dynamic environment
We launch a build and get a new dynamic environment. When the build is being launched, the process of collecting each microservice’s docker images from the Git branch selected by the user is initiated. The image collection process takes place in parallel, so it doesn’t take long. After all the required docker images are collected, the environment is deployed, with each microservice deployed from the relevant docker image.
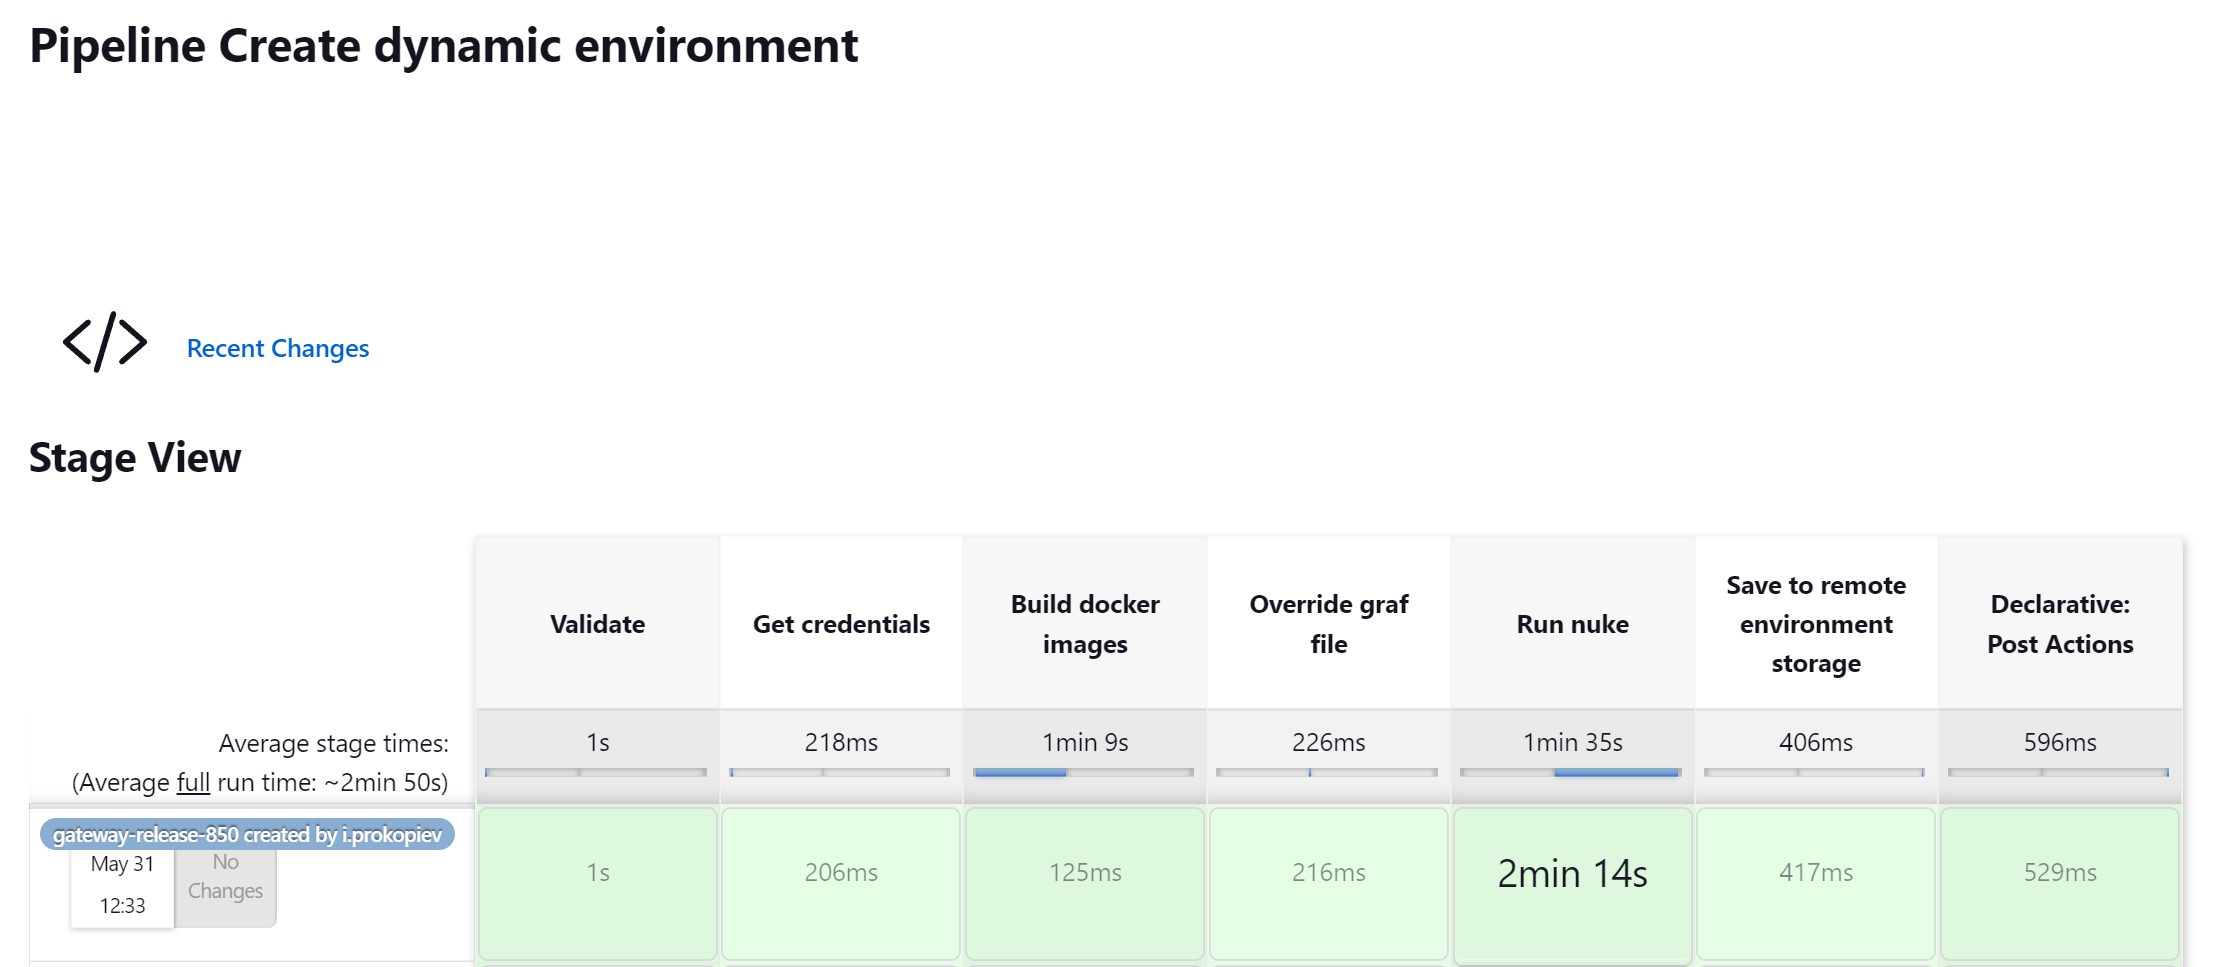 Jenkins Pipeline after creating a dynamic environment
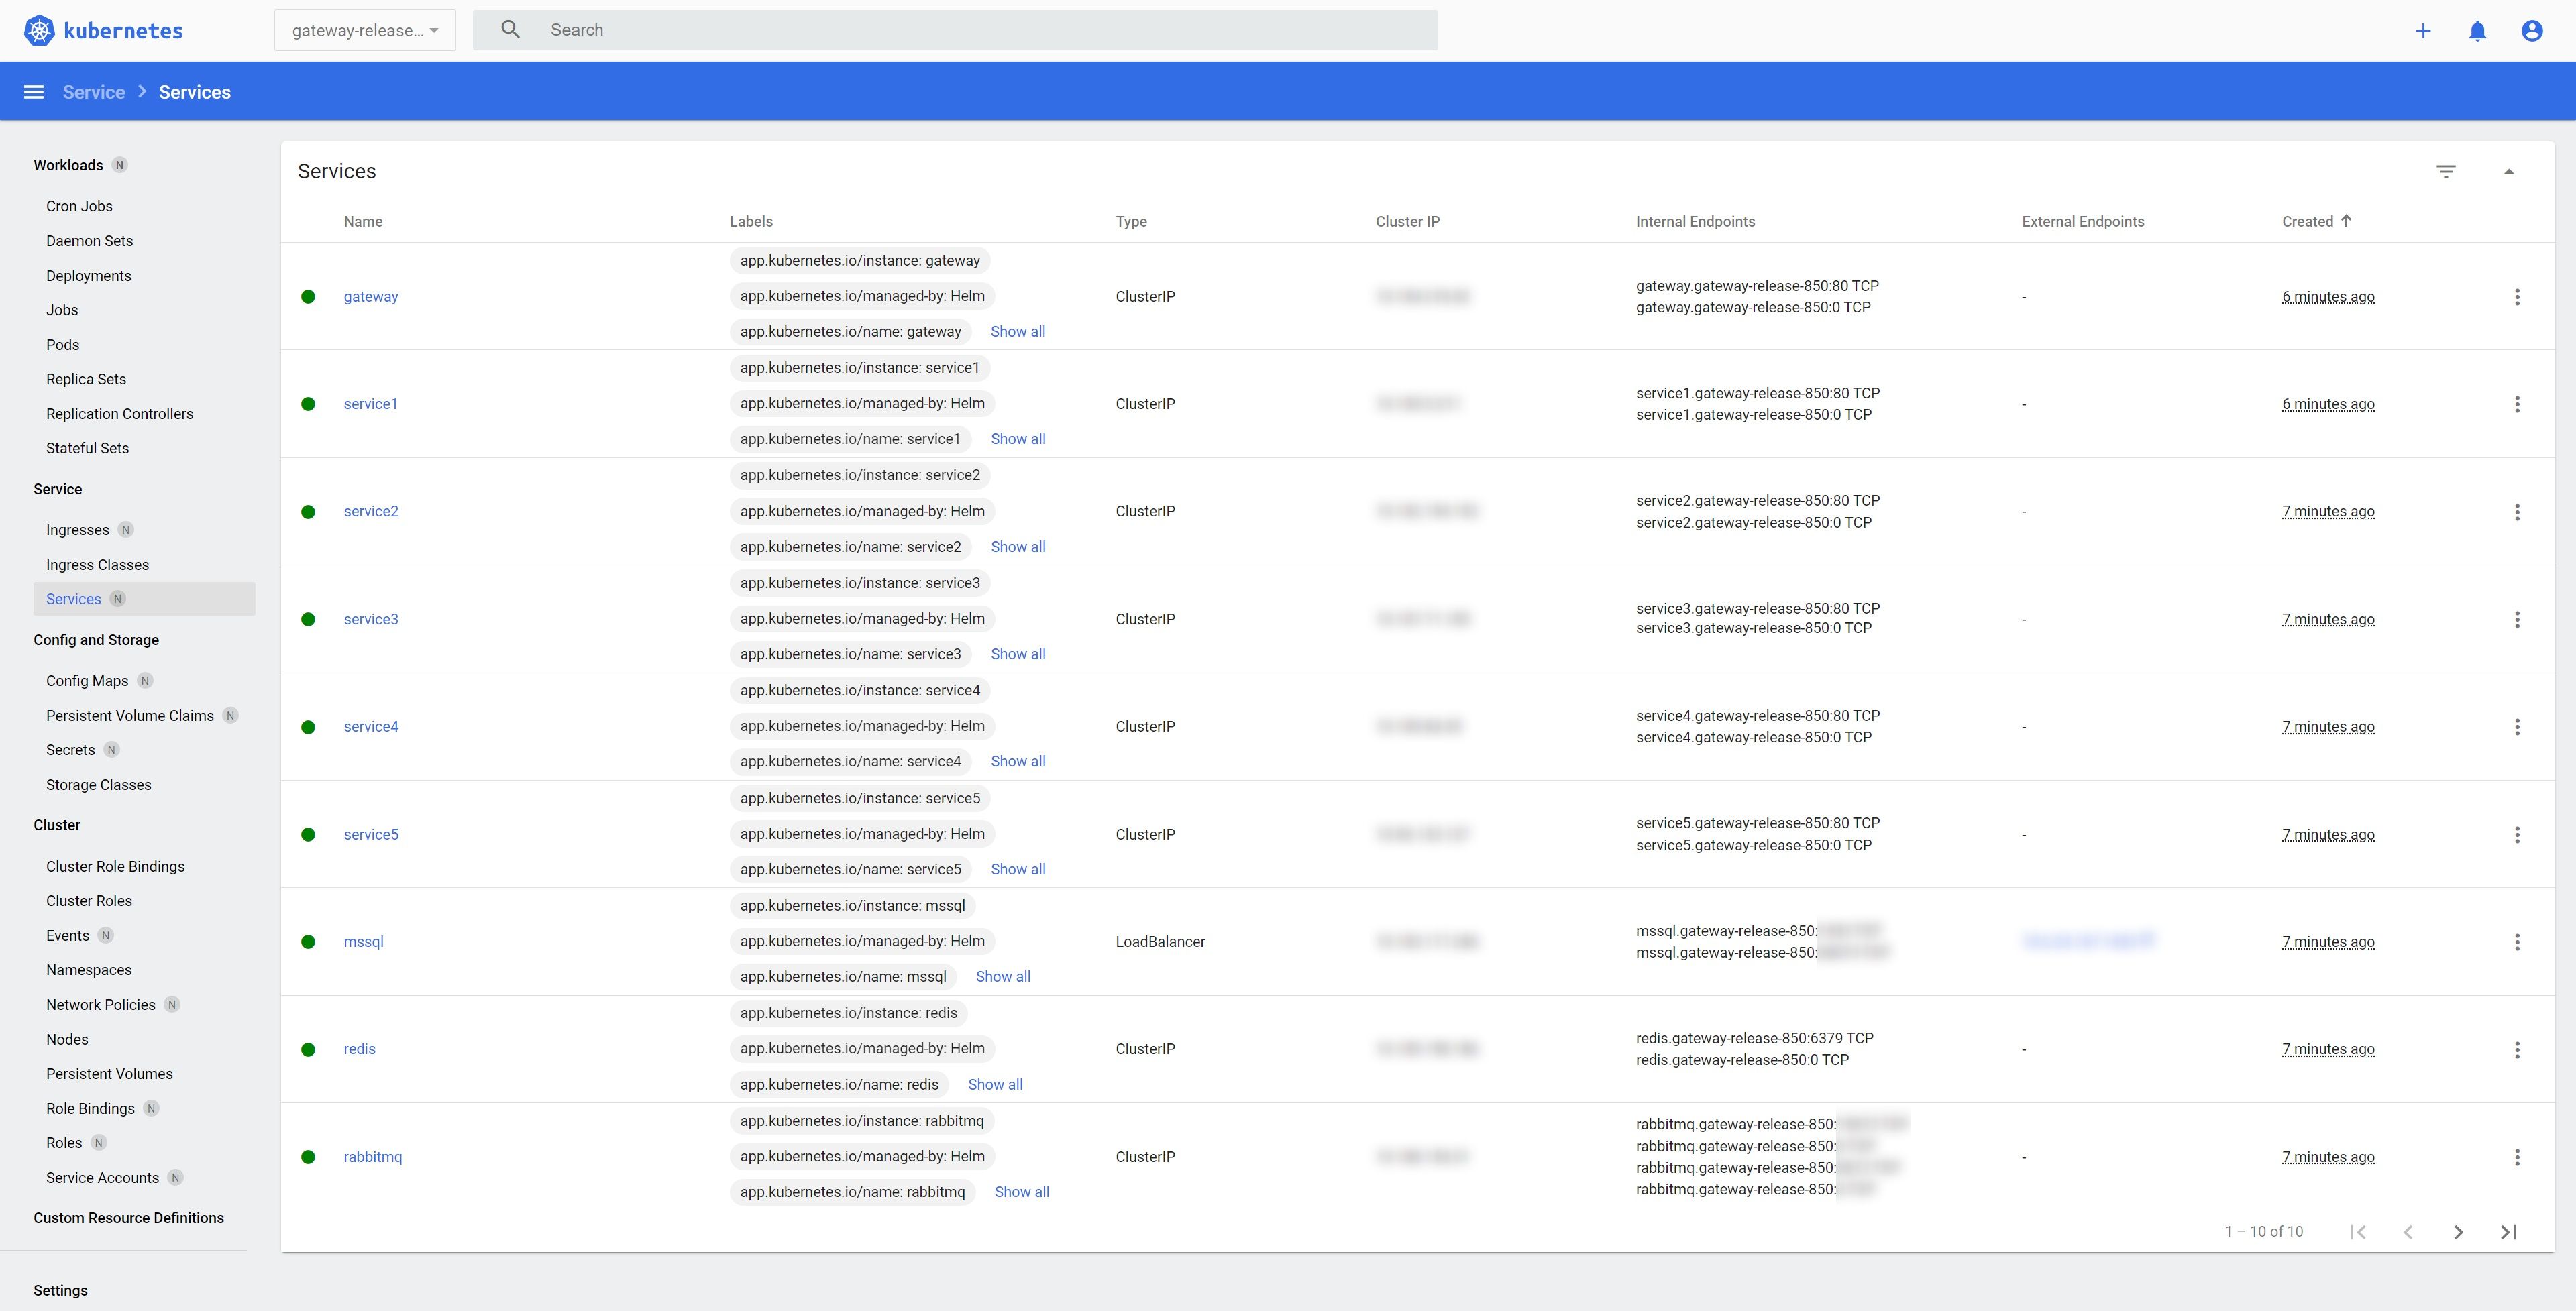 Kubernetes dashboard with a created dynamic environment
During the creation of the environment for the Gateway service, the necessary infrastructure was automatically deployed – MS SQL, Redis, and RabbitMQ as well as microservices.
Automatic migration of users to the created environment
Once created, the new dynamic environment for the Plarium Play project will not be empty: it will contain some content and test users to make testing easier for the QA specialists.
In a separate web application, the required user IDs are specified, which will be copied to the dynamic environment when it is created.
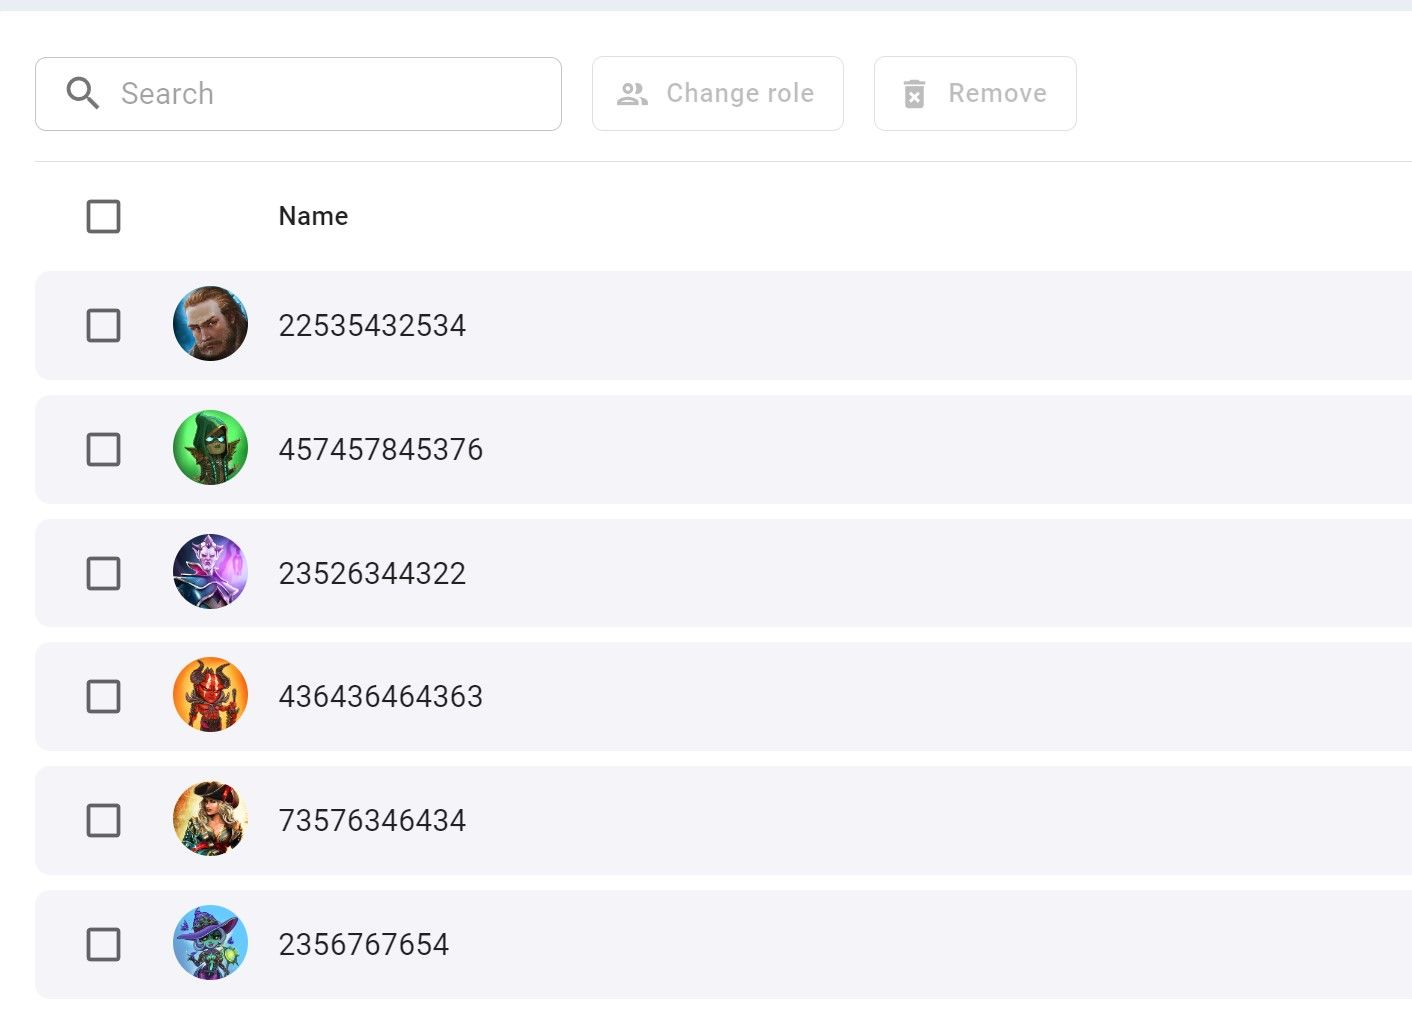 A web application with users that will be copied to a dynamic environment
For the migration, we’ve developed a launching mechanism using Nuke. Nuke is a .NET core library that can simplify the process of writing and running scripts that may be needed during a CI/CD setup. During the build of the microservice image, the inline database image is also built. The inline image contains a FluentMigrator project that consists of database schema migrations.
In the project’s Helm chart, the inline image of the microservice database is deployed using init containers before creating the environment.
    spec:
      initContainers:
      - name: database-migrationб
        image: "{{ .Values.image.repository }}-database:{{ .Values.image.tag | default .Chart.AppVersion }}"
Inside the inline container with the database migration, a Nuke process is launched that applies the required FluentMigrator migrations to the database, then migrates the users with the IDs specified in the web application.
Users will migrate from a reference-stable environment with a predefined name.
Dynamically changing Git branches in an independent environment and code freeze capabilities
Sometimes there is a need to change the branch after creating the environment. For example, I created an environment from a branch and then realized that I needed to modify it – but I didn't want to delete the environment because I already had test users and some user states created.
To do this, we made another Jenkins Pipeline which displayed the created dynamic environments and allowed you to select one of them and see which microservices it consisted of. It also showed which Git branch the microservices were deployed from, and allowed you to change Git branches and apply code freeze.
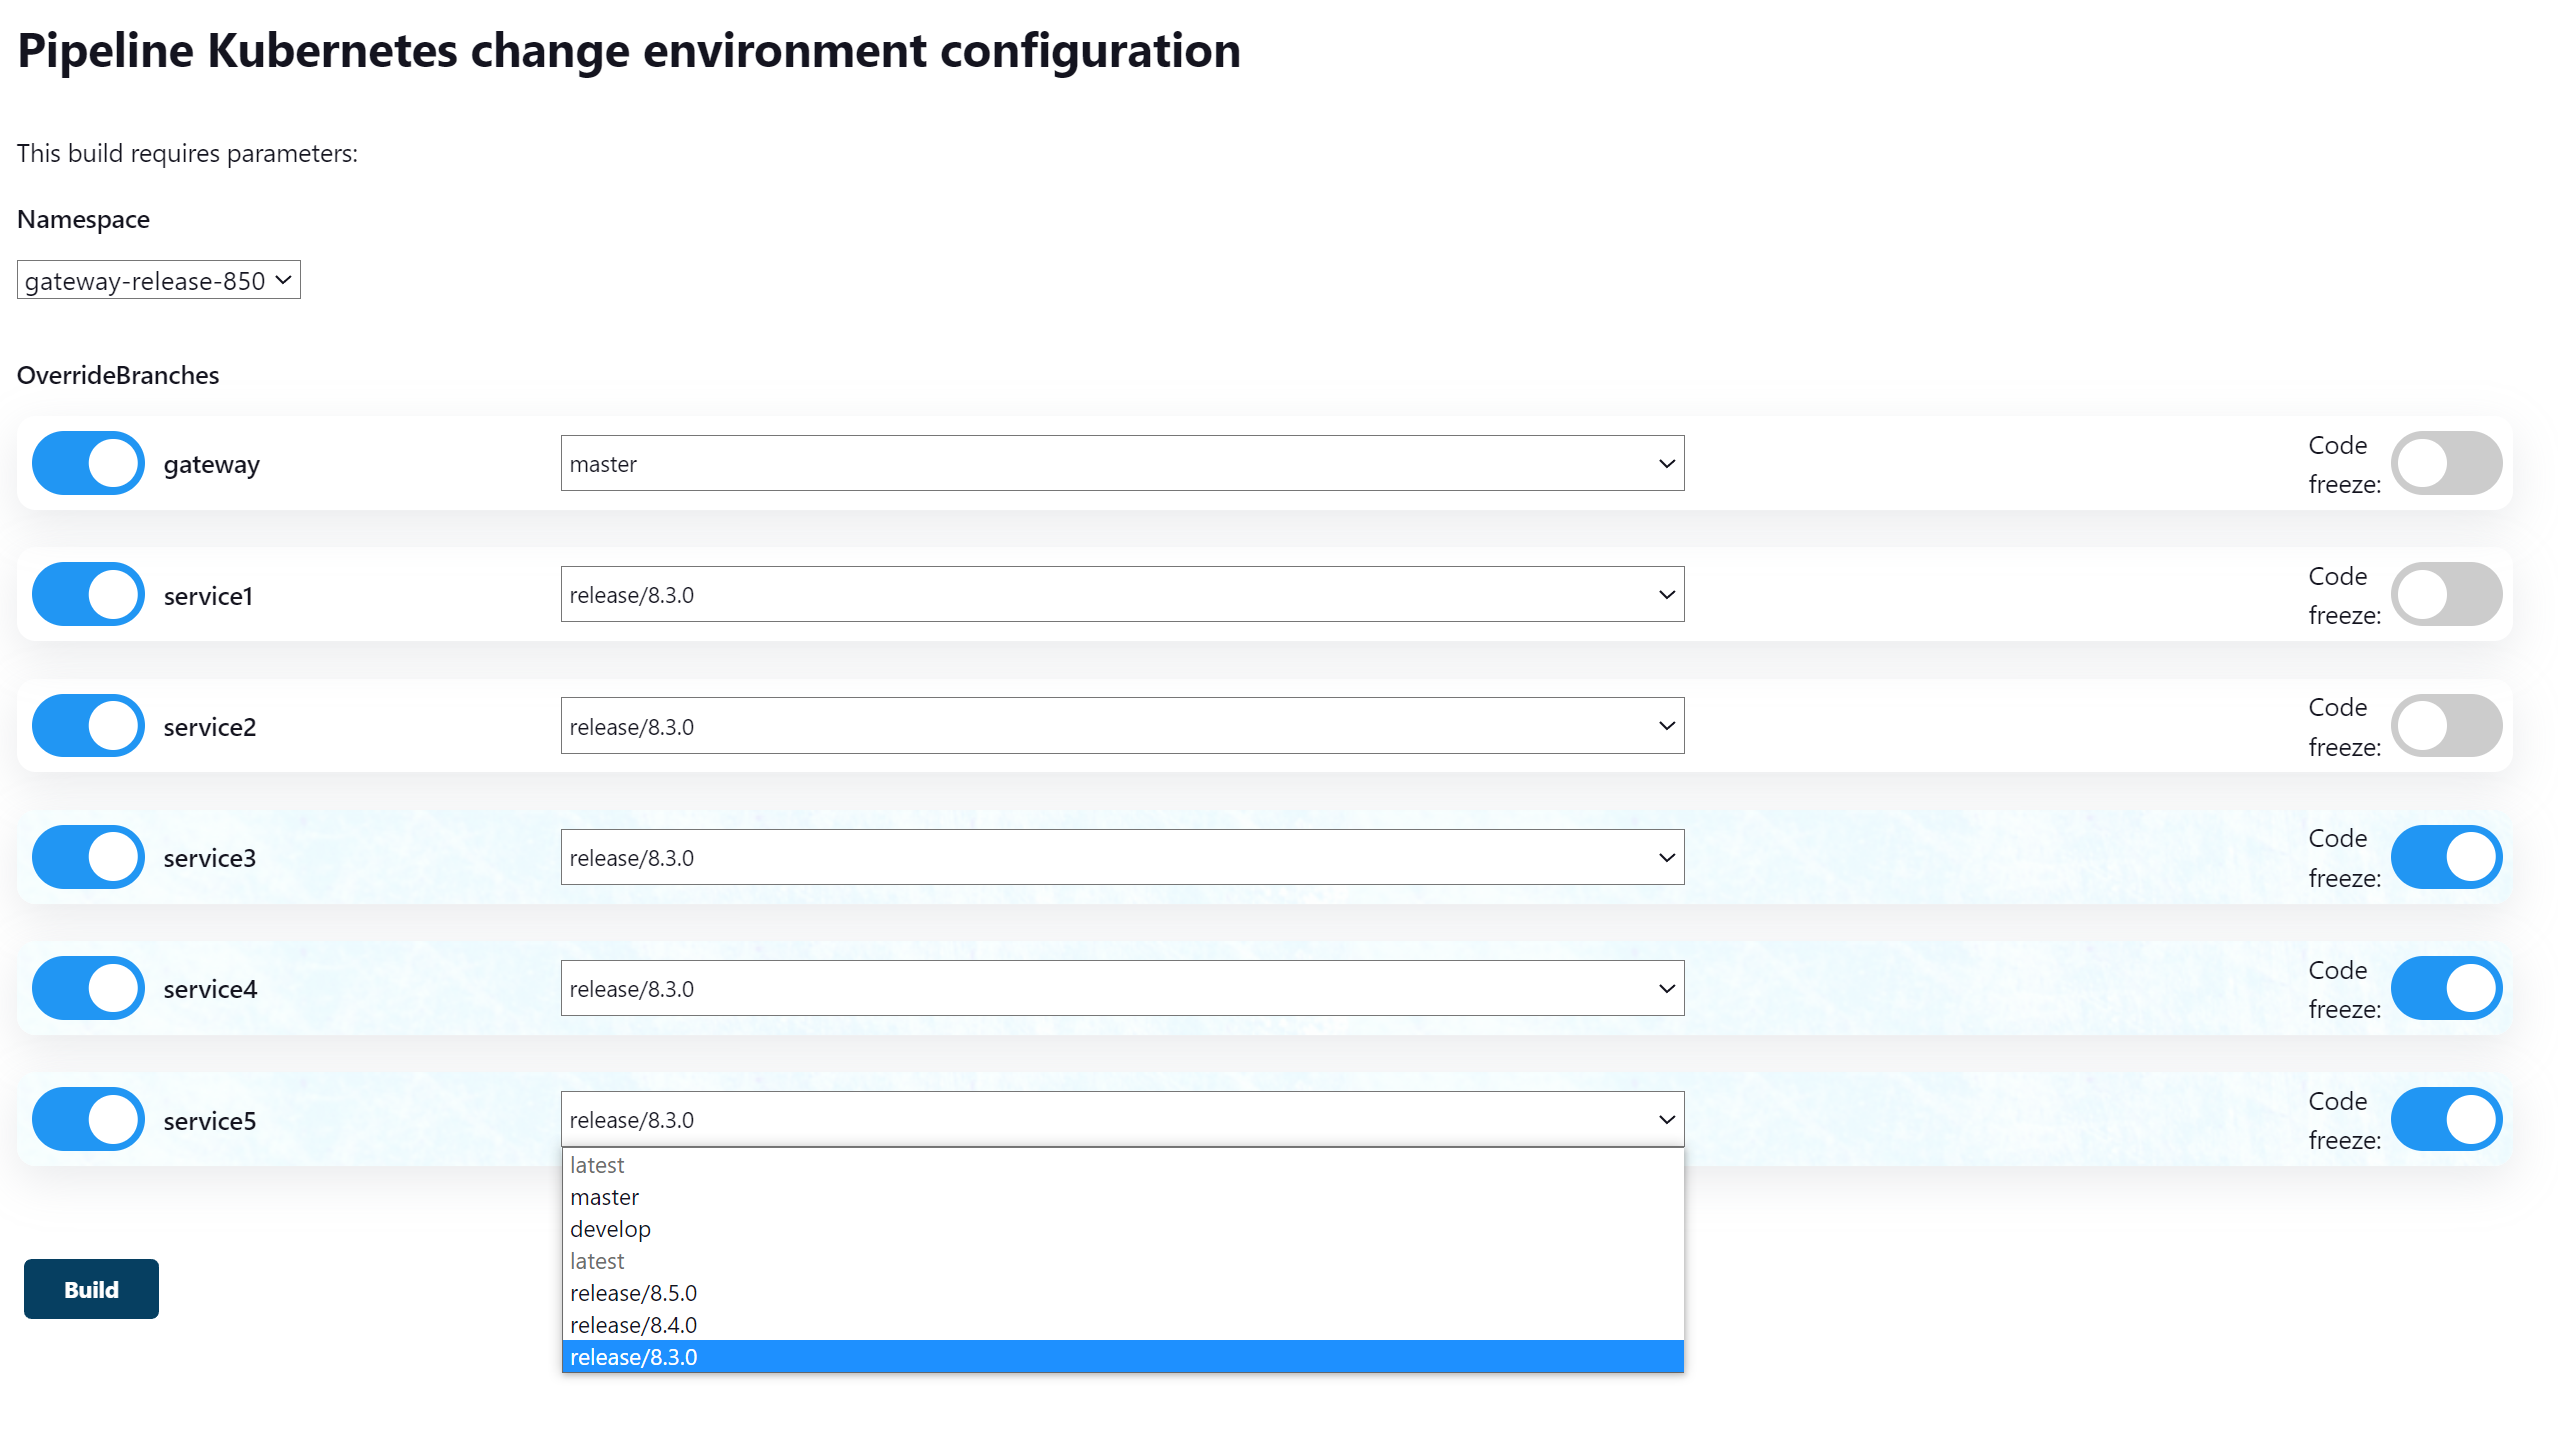 Jenkins Pipeline showing changes in the dynamic environment
This mechanism is very useful when preparing a release candidate. When the QA team starts testing, it is possible to freeze any changes to the environment and get a stable expected result during the release.
Working with a database in an independent environment
When creating an environment, it always needs its own database. To connect to the database, the LoadBalancer Kubernetes service type resource is used.
Our Kubernetes cluster is not located in the cloud but instead on dedicated servers, so we used the MetalLB plugin to connect to the database. It allows you to specify the range of IP addresses that the plugin will use for LoadBalancer resources.
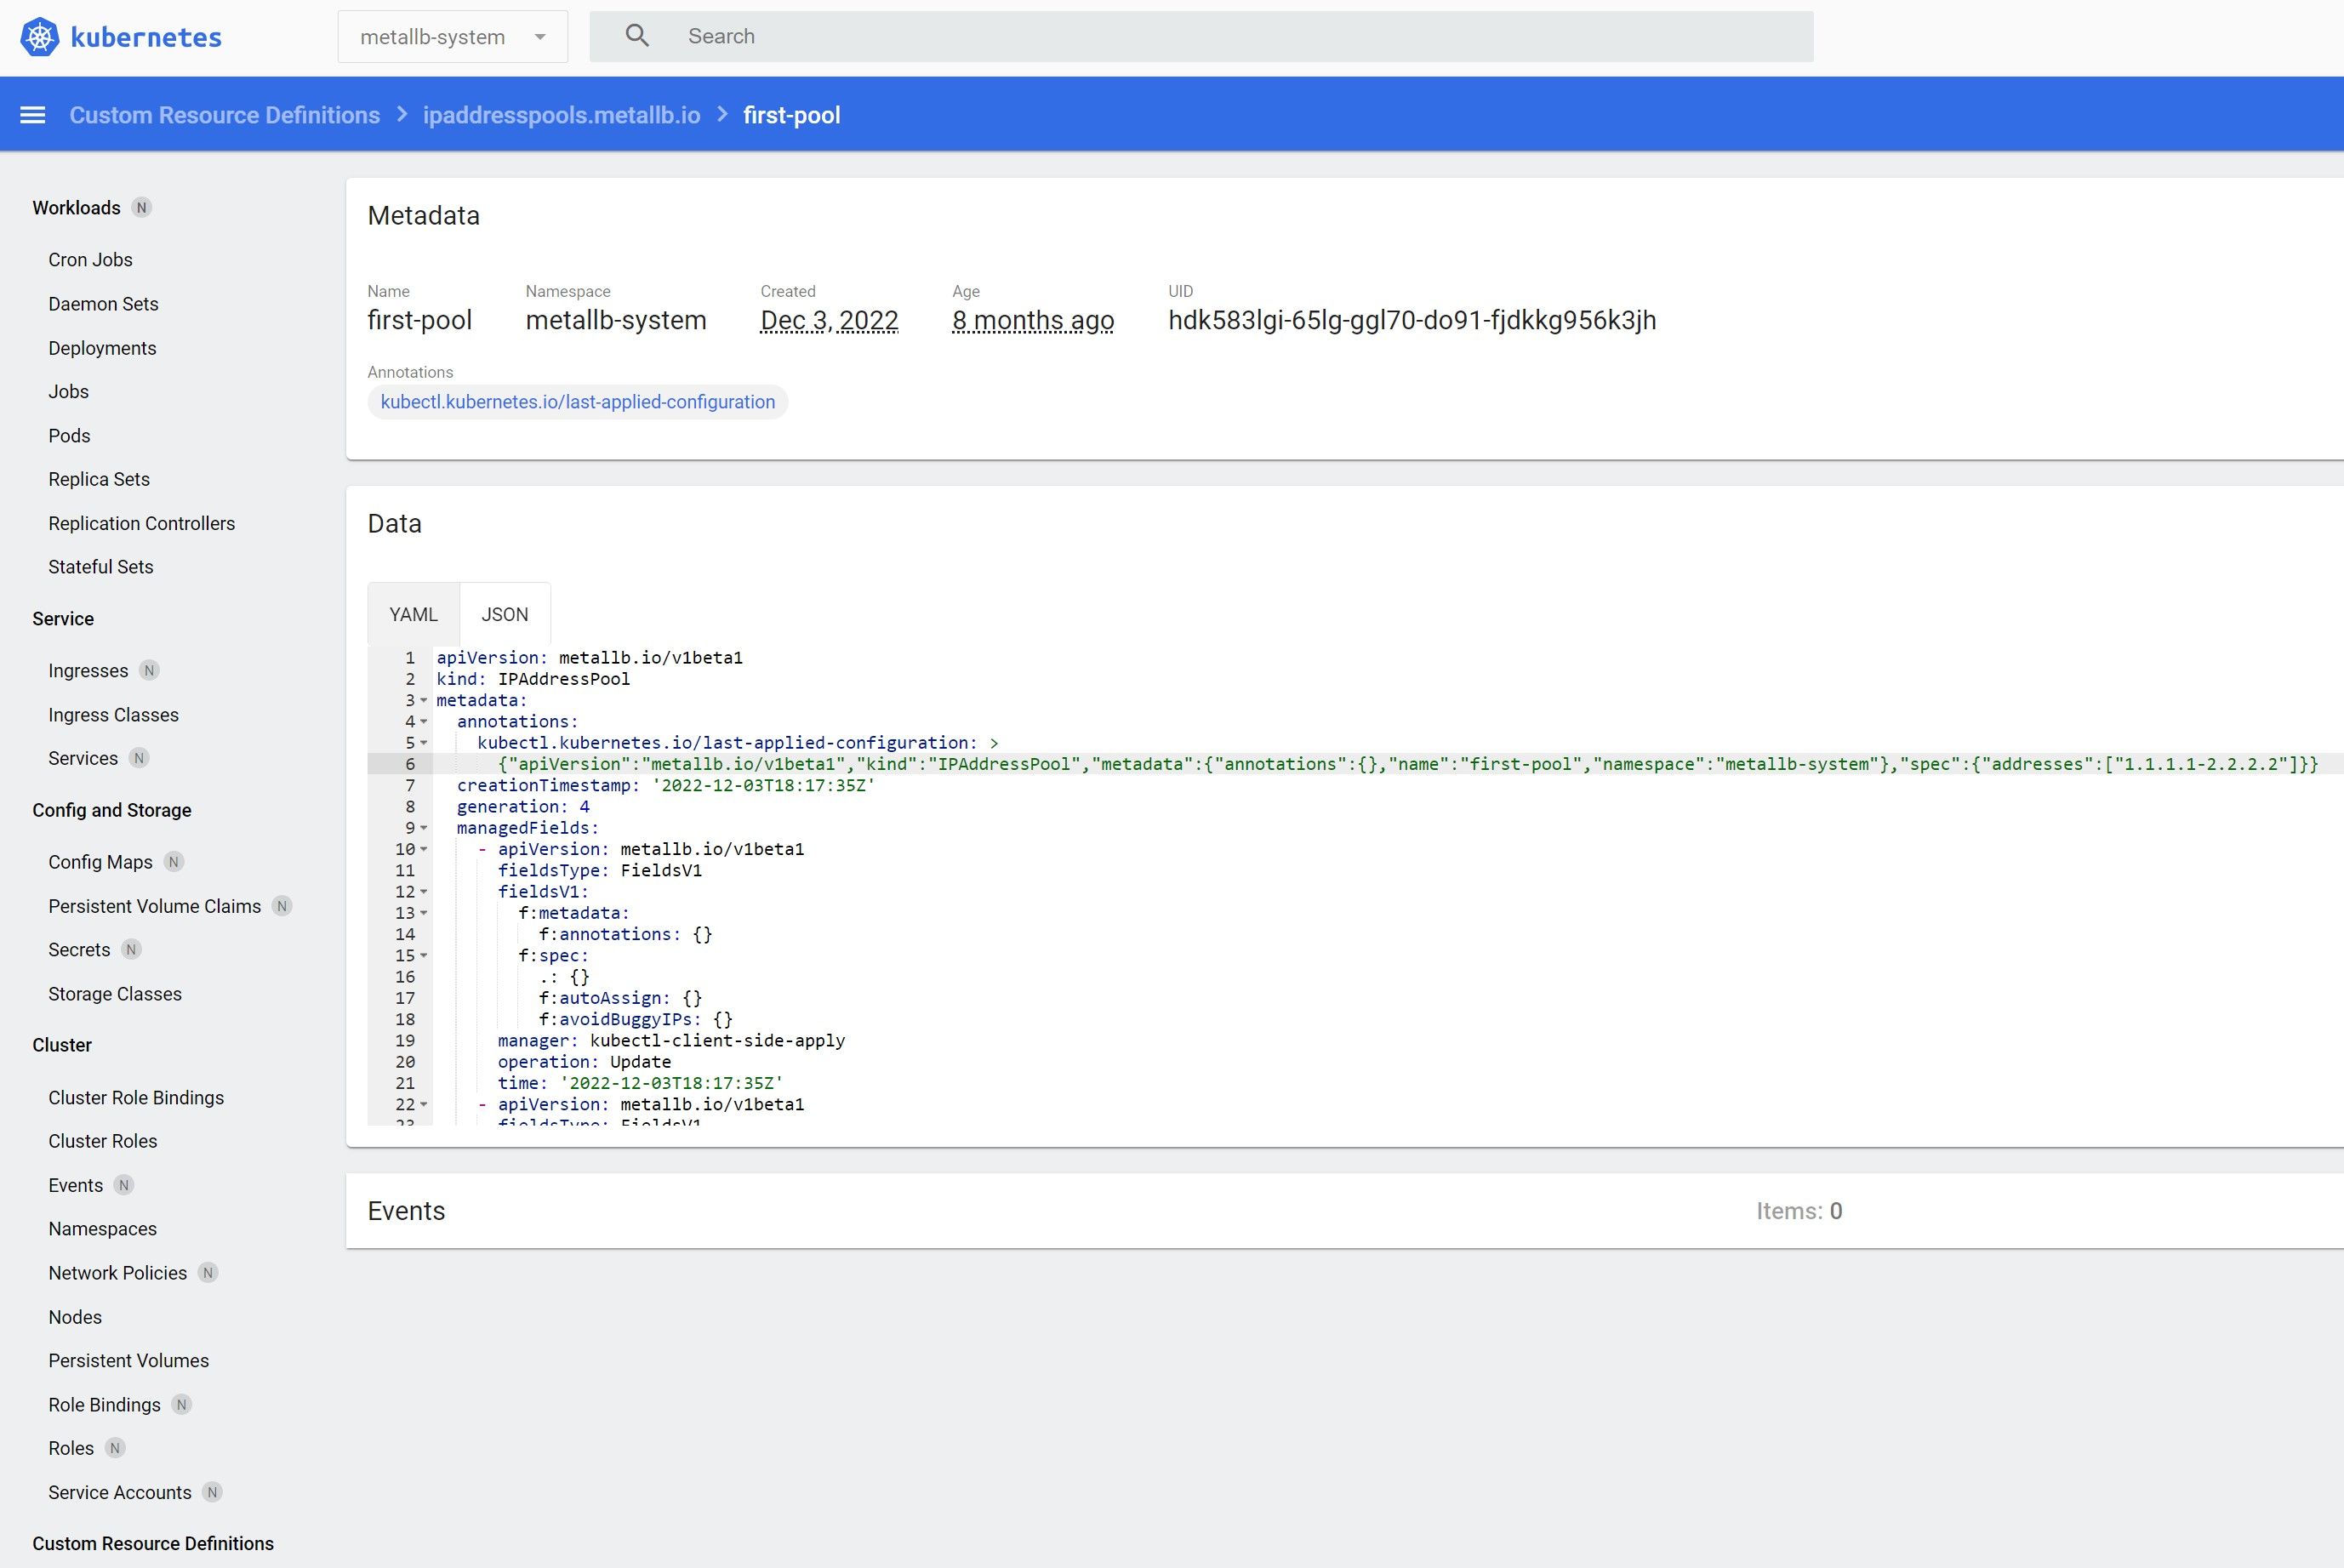 Kubernetes dashboard showing MetalLB resource
You can now select a LoadBalancer resource type for your database and get an IP address to connect to it.
 LoadBalancer resource with an IP address
Integration tests to ensure interaction between services
We needed to prevent a situation where a developer could break the integration with other services when changing functionality. Usually, unit tests are used to check integration between modules, but they’re run for one specific microservice and don’t check interaction with other services. Under such conditions, it’s possible that integration between services will be broken. These risks can be completely avoided thanks to integration tests at the pull request stage.
An automatic integration test project is placed in each project’s repository. The Automation QA team is responsible for writing these tests. All repositories have a "minimum one successful build" setting for pull requests.
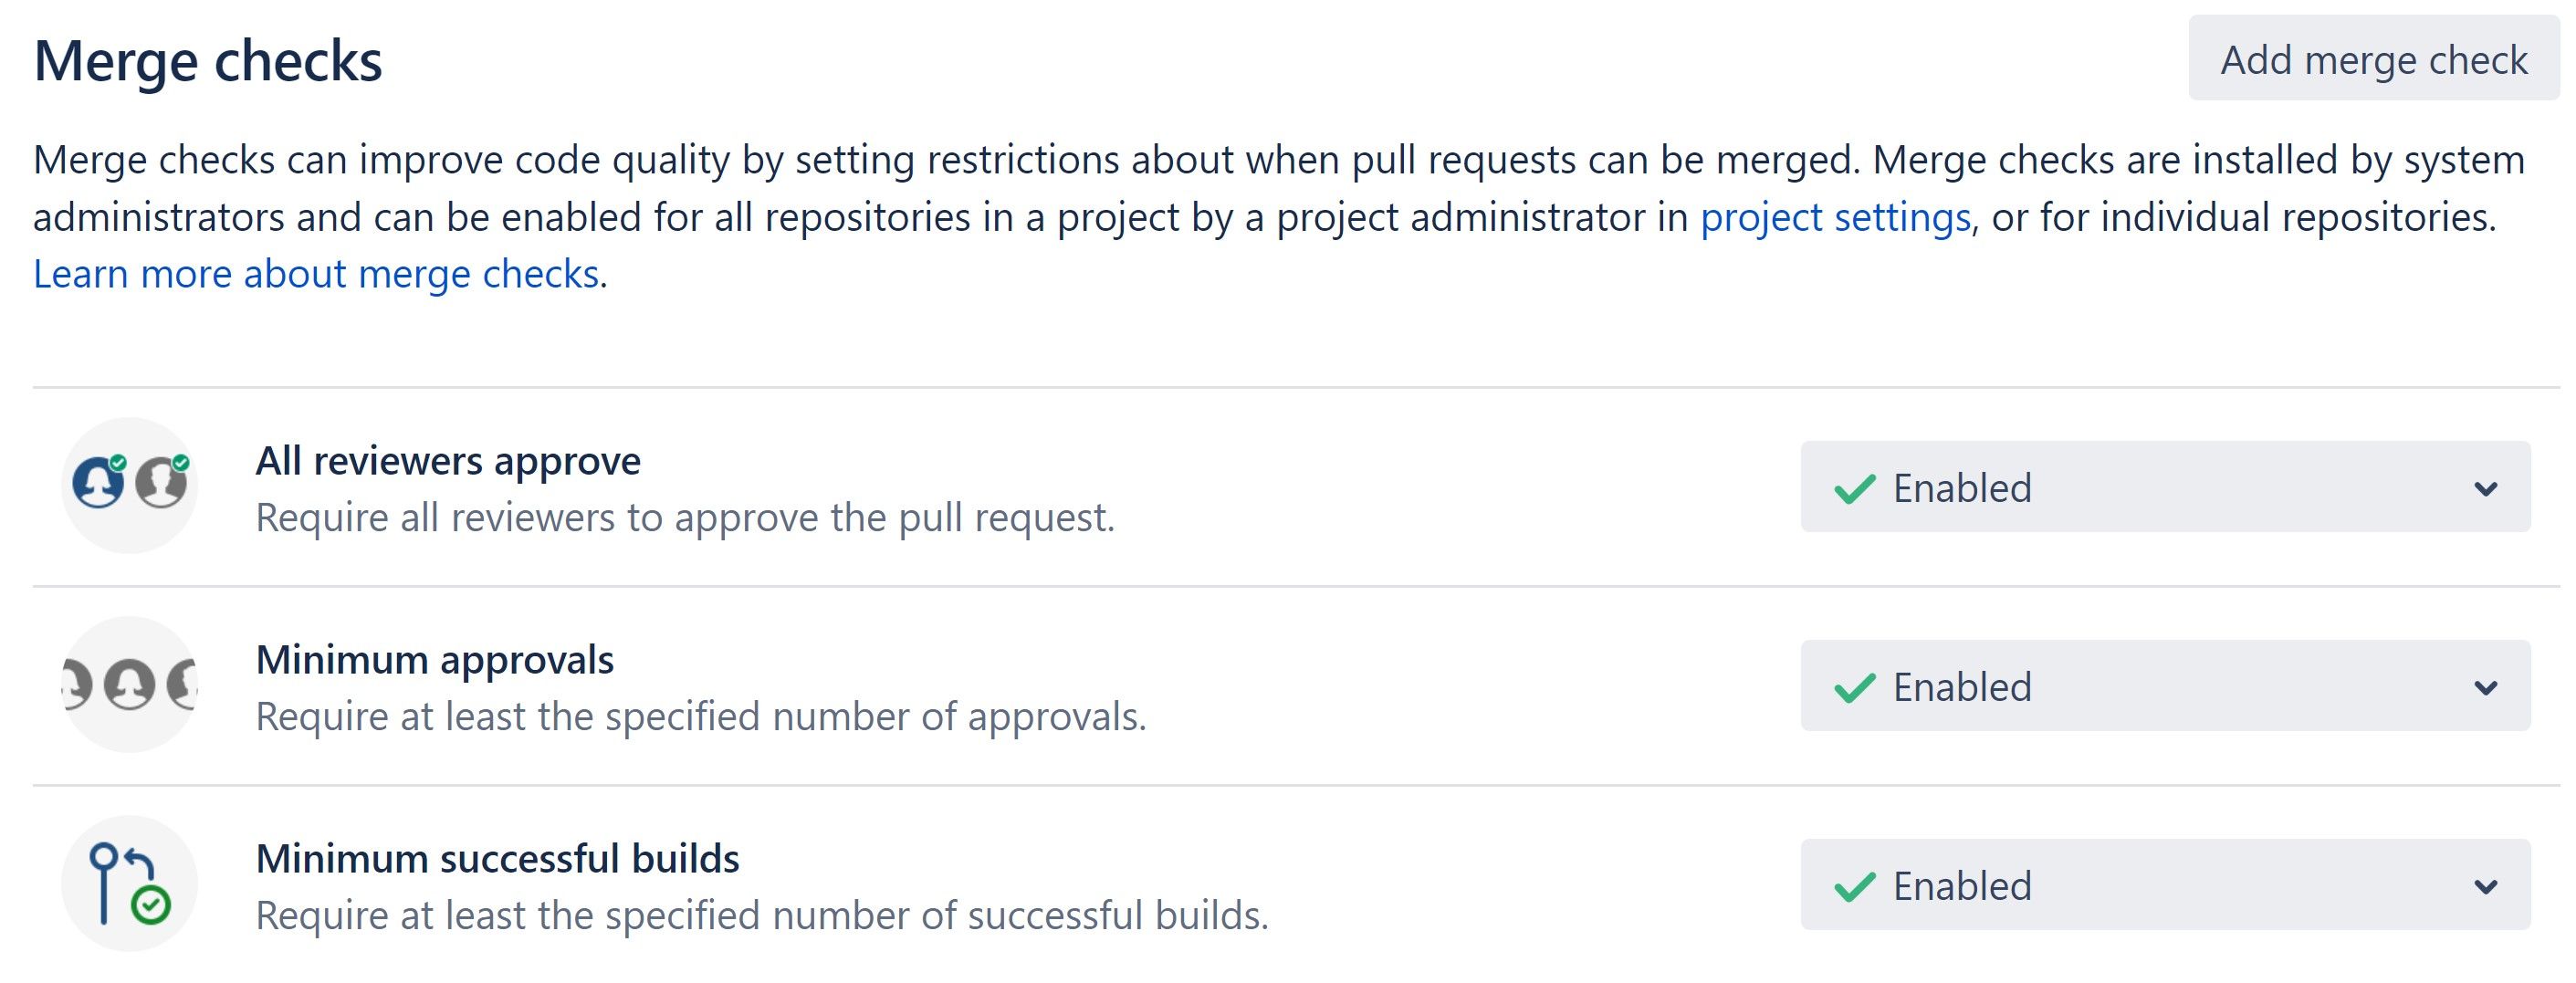 Repository settings
During a pull request, a dynamic environment is deployed to any branch. The microservice in which the pull request was created collects the docker image from the source branch and autotests for it, and all other services the microservice depends on are deployed with the tag “latest”. After that, it also checks for other microservices that have the current one among their dependencies.
Let's take an example using the Gateway service, which depends on the Service1 service. When we make a pull request to Service1, integration tests for Service1 and Gateway will run to ensure that changes in Service1 do not break functionality in Gateway. The result of each set of integration tests can be seen in the Jenkins Pipeline that runs when the pull request is created.
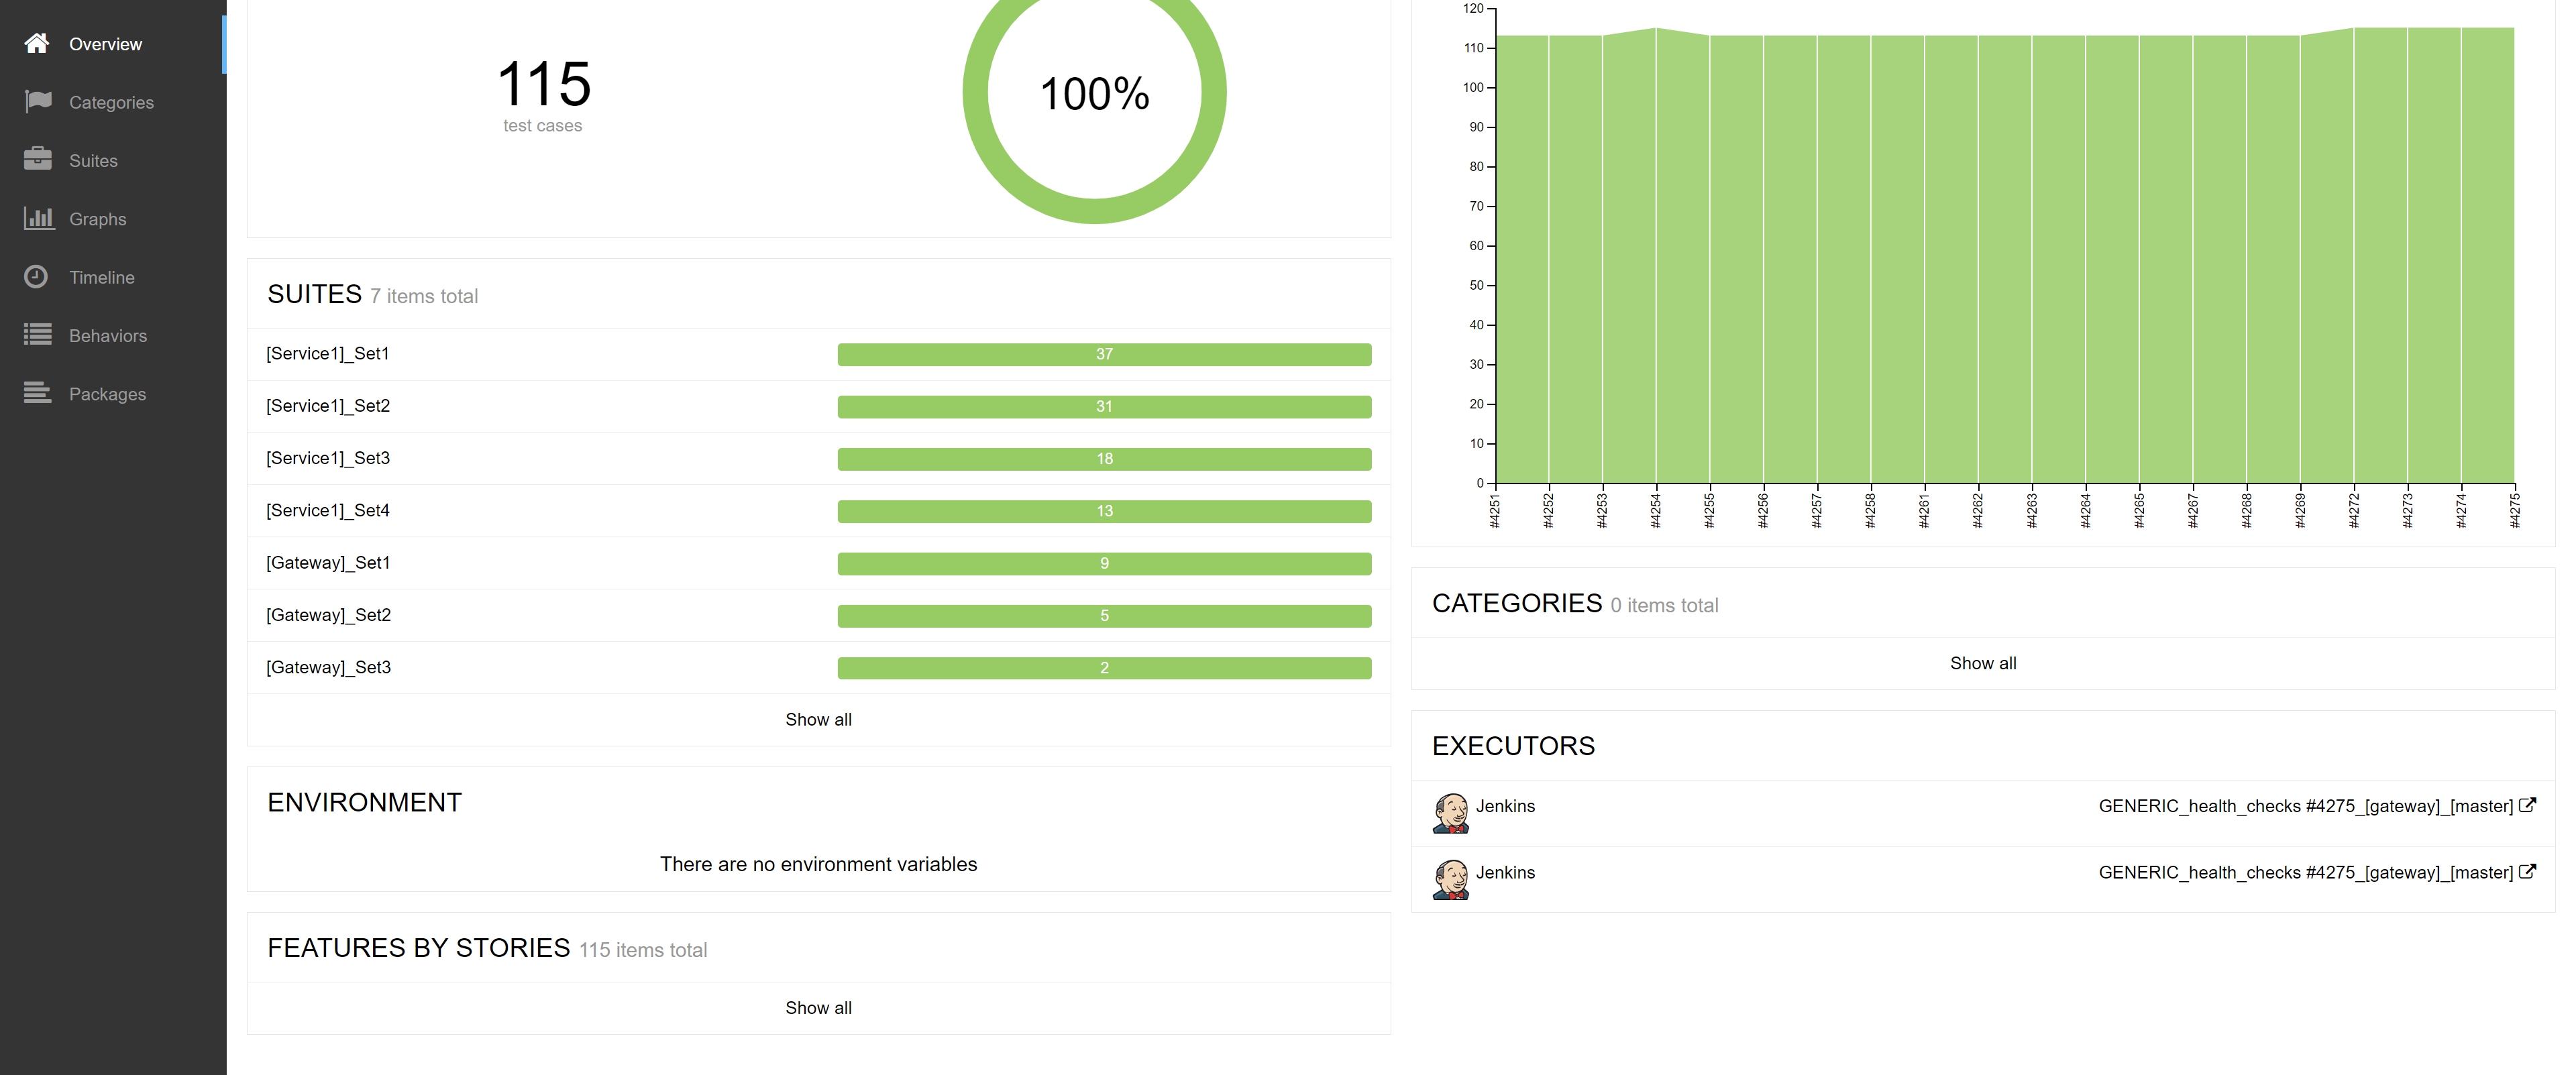 The result of the integration tests
If the autotests were not run, it would be impossible to merge pull requests.
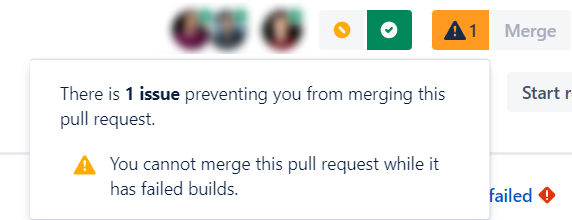 UI showing the inability to merge pull requests
If the integration tests fail, the developer can immediately see what exactly was broken. Each test case issues a trace ID.
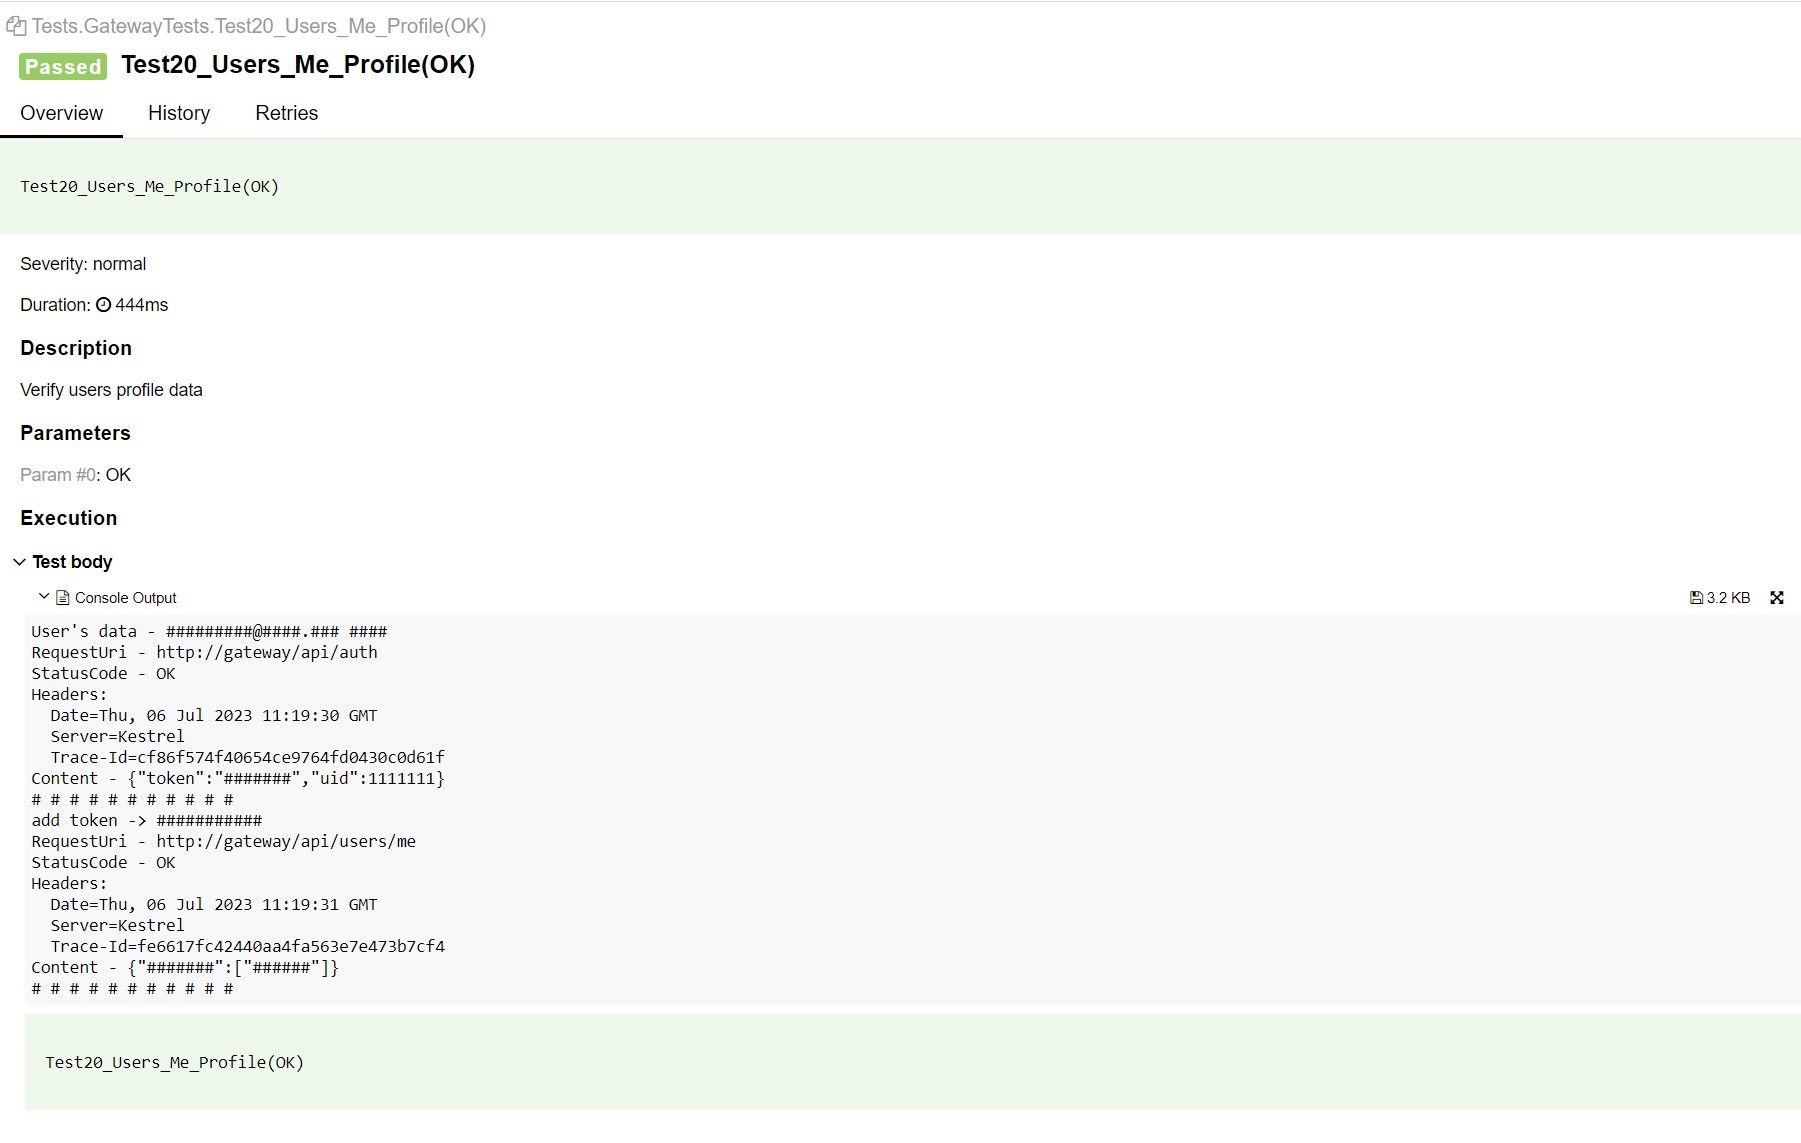 The result of integration testing with an example trace ID
We use Jaeger to trace requests. Each microservice writes a trace to Jaeger, after which trace ID can be used to trace the full request path from start to finish, including all parameters.
 Jaeger dashboard with tracing results
Results
Thanks to the transition to Kubernetes, we were able to flexibly develop and quickly deploy full-fledged dynamic environments.
Since then, the development of new versions of the Plarium Play launcher has sped up. In addition, we are now developing multiple versions at the same time.
Thanks to integration testing, the quality of functionality used in test environments has improved. This approach allows you to reduce the amount of regression testing, which saves time for the Manual QA team.
For bugs that are difficult to reproduce, developers can use dynamic environments and ask QA specialists to reproduce the bug on a specific environment, then look at the request tracing or even debug the code on a dynamic environment. One of the ways to use dynamic environments is several developers working simultaneously on the same task.
When creating this approach, I was primarily thinking about simplifying the work of the development and QA teams. After implementation, all teams commented on the simplicity, speed, and convenience of dynamic environments, as well as the advantages of the approach compared with the static environments we used before. The only drawback, in my opinion, is the complexity of implementation, but it justifies the obtained results.


