A Deep Dive into Level Design: Creating Interactive Moving Objects for Mech Arena Maps
This text is a translation of an article originally published on GameDev DOU.
My name is Daniil Honcharenko, I'm a Level Designer at Plarium. I work on Mech Arena - a dynamic PvP shooter focused on team interaction. It has dozens of Mechs and Weapons, different game modes and over 45 battle maps with unique gameplay on each.
We constantly strive to improve the gaming experience of users and to diversify it. Because of this, the idea arose to add interactive moving objects to some Mech Arena maps. This would make Battles more dynamic and provide players with a more exciting experience. In the article, I will tell and show you step by step how we put this idea into practice. I will share the challenges we faced and the solutions we chose.
How Level Design works in Mech Arena
What’s so difficult about creating a graybox version of a map? At first, it seems simple: just place the blocks in a 3D space and you're done. No need to bother with modeling, textures, skyboxes or sound. But it’s a little more complicated than that - and much more interesting. A level designer can be compared to an architect of a game world. It is through gray blocks and low-poly shapes that they work towards the final visual and gameplay result.
Map design should be "readable" for users. This is important because it helps players to identify safe and dangerous areas, discover additional paths, and find positions from which to defend and attack. And of course, the map should be well balanced. In Mech Arena, I consider many factors, including metrics, weapons, and game mechanics, specifically in the context of Arena Battles between real players.
Five stages that help me balance out the map and make it readable for the player
1. Determining the purpose of the map or what new gaming experience is worth creating for players. I plan the size of the map and the combat I want to see on it. Will it be a large, open map designed for Artillery and Guided Weapons, or a small close-range map that favors Close Quarters Weapons and dynamic action? Or something in between, such as a mid-range and vertical layout? Whatever approach I take, it doesn't mean I'll neglect any Mechs or Weapons. Everything should still work fine, but each map has its favorites. This is necessary so that players get a variety of experience from the battle and it is interesting for them to experiment with different Squad setups.
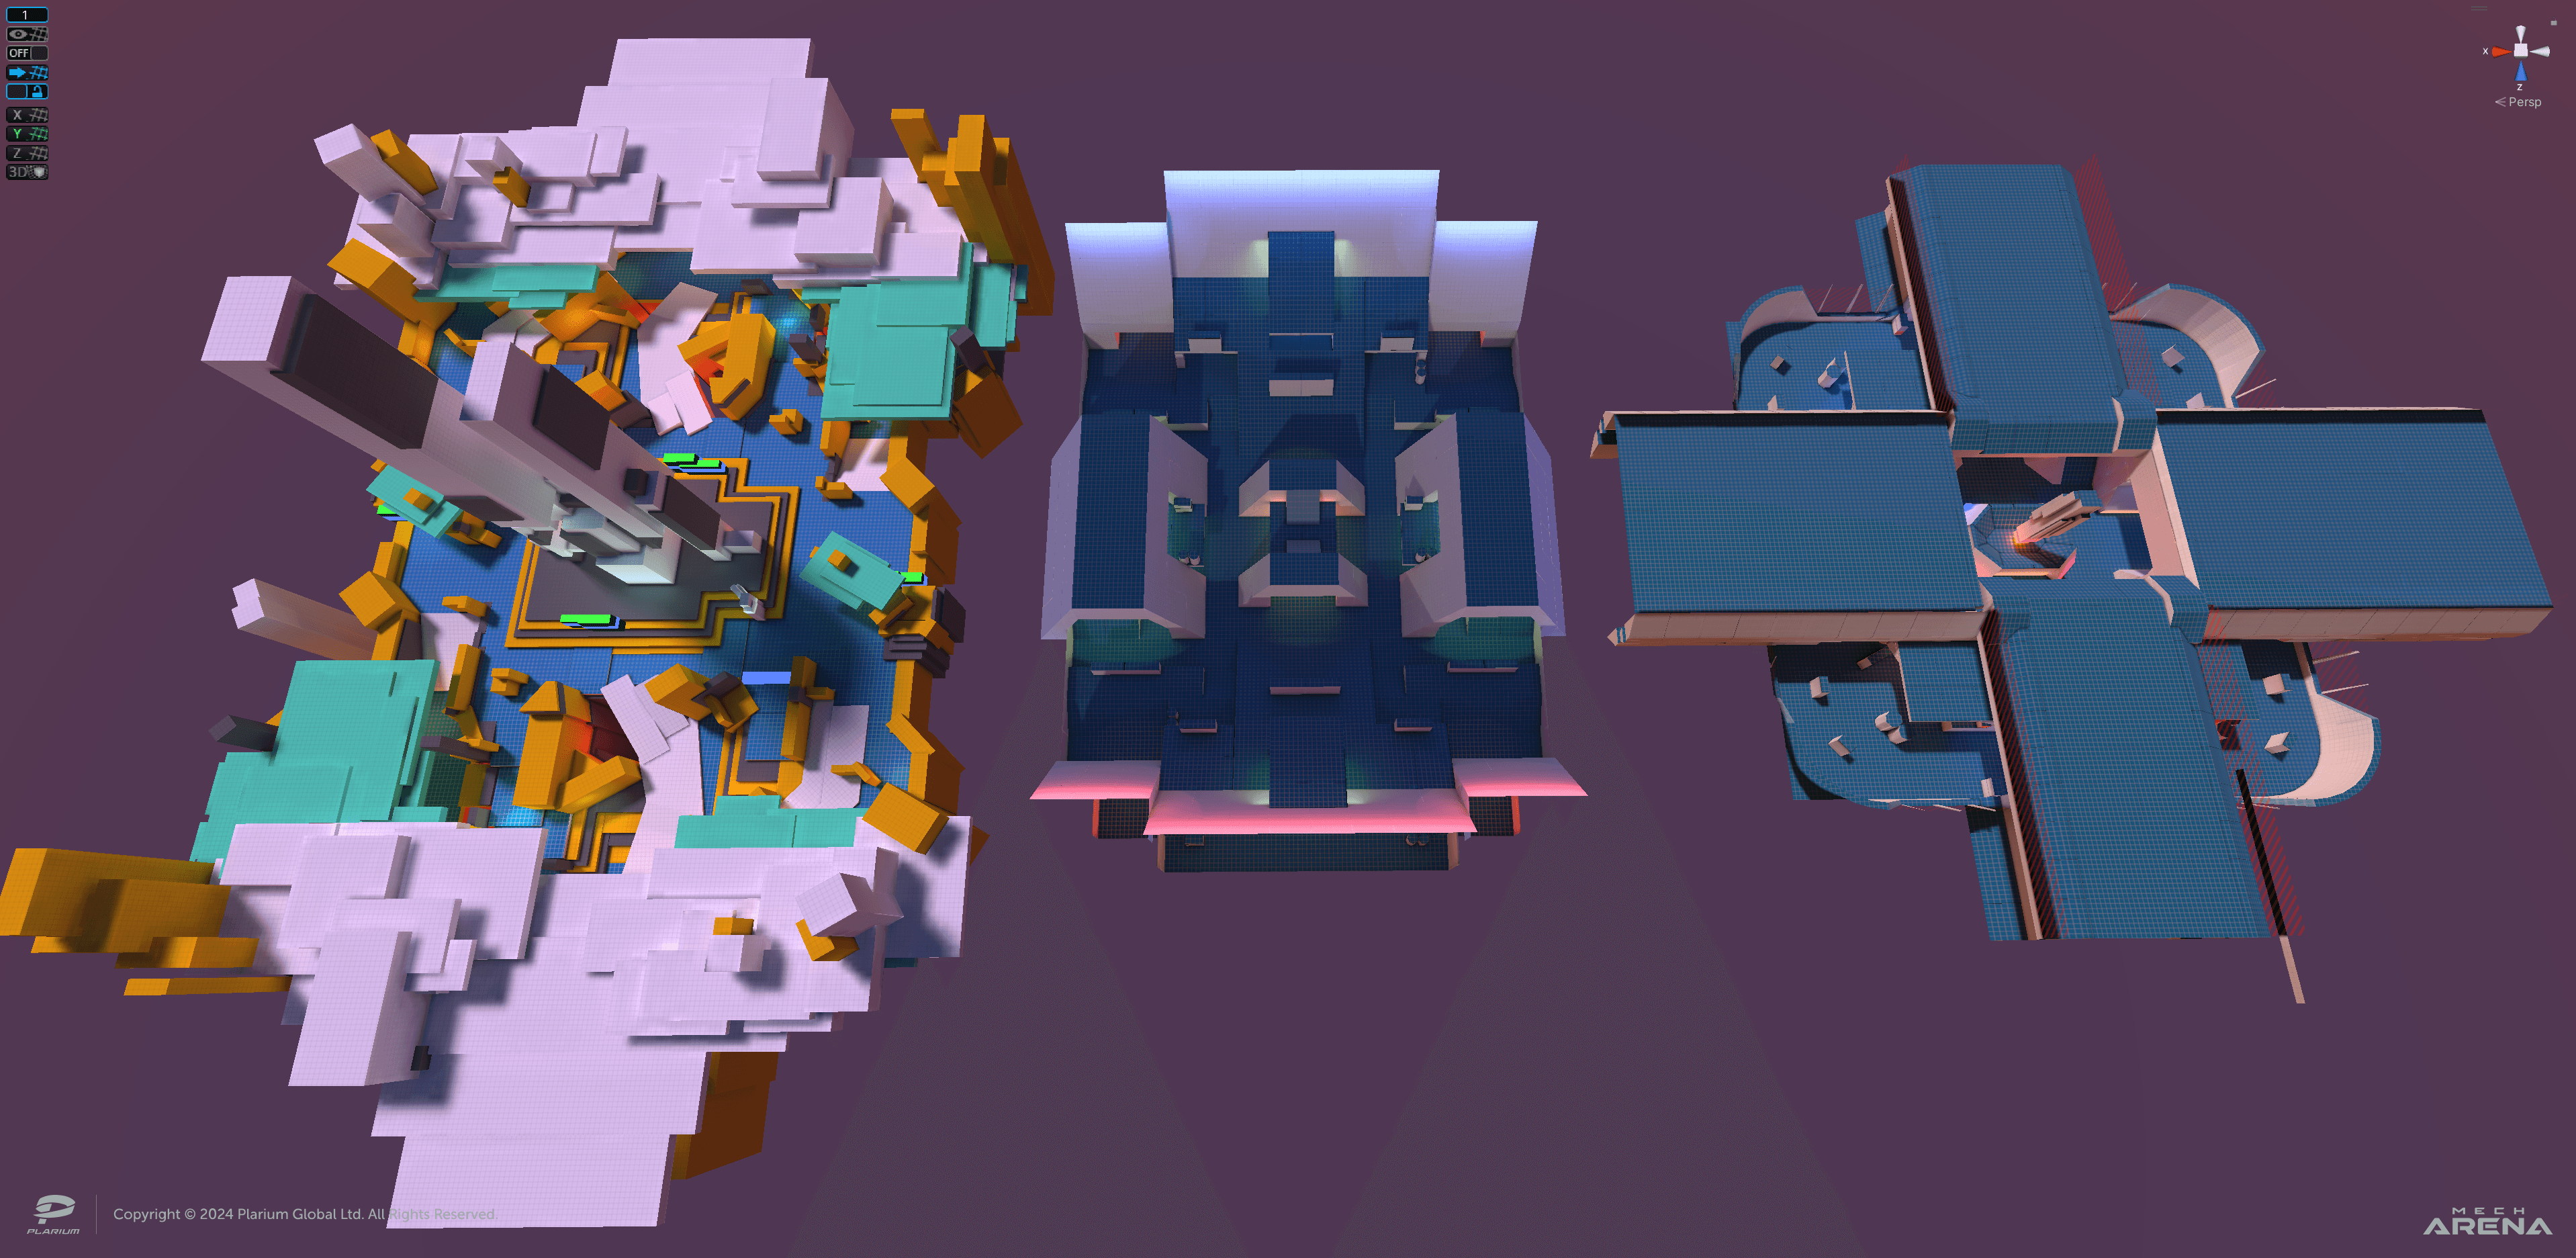 Sizes of Mech Arena map playboxes "Constant", "Z.C. Control" and "Artifact X"
2. Choosing a visual theme for a set of maps. There are usually three maps in one set in Mech Arena. With a Concept Artist, we generate ideas and assemble a reference board. Having several options, we approve one of them together with the Game Director and Art Director.
This stage helps us to understand what the map environments will look like. Maps are usually connected to Events. For example, if an Event is planned during the festive season, we will give the map a wintery holiday aesthetic. Also at this stage, I figure out how to best use the space, calculate where I will place landmarks and decide which components of the map I will use as cover, etc.
 Final version of maps from different sets: “Constant”, “Smokestacks” and “VMD Lab”
3. Blocking (graybox version of the map). This is the stage at which the creative process of implementing ideas begins: creating a map "from scratch", laying the foundation and trying to imagine the final graphics using only rectangular gray blocks. Some people start with a concept on paper and sketch a simple scheme of the location. I prefer to work immediately in 3D space with large shapes, laying down landmarks and points of interest (POI), before diving into the details. In my opinion, this is the most convenient approach, because it allows you to immediately test the map, run through it and get a feel for it.
 Final graybox version of the map “Singularity”
4. Balancing the map out. When creating maps in Mech Arena, I consider a variety of factors. There are more than 25 Mechs in the game, with a range of sizes, Speeds, Abilities, and HP. And there are over 100 Weapons with various Ranges, Perks and principles of operation (Radius Damage, Targeting Systems etc). Because of this, it’s important to think carefully about spawn points and different game situations in advance. You need to be attentive to metrics, divide the map into zones, guide the player with shape, color, light, landmarks, and points of interest (POI). As a rule, for all modes except Free-For-All (FFA), we create symmetrical maps. This helps to avoid balance problems and saves us time.
Final graybox version of the map “Smokestacks”
5. Testing the graybox version of the map. This is one of the most important parts. It is necessary to test and edit the map at this stage. This will save time compared to editing when the final graphics are in place. Usually, when creating a graybox, I test the space by running and jumping around the map to evaluate the performance of the landmarks and guidelines. I also bake NavMesh (navigation) and spawn bots in order to test the operation of zones, cover and distance shots.
When everything is to my liking, I assemble builds with the map and invite colleagues to join the testing. During playtests, we make screen recordings. These allow me to check the map’s performance and analyze different playstyles in depth. I also collect feedback from test participants to find out what they feel and think. I examine heatmaps to understand the analytics of Weapons, Mechs and their Abilities.
 Testing the graybox version of the map “Singularity”
In addition, I am involved in the management of level design and analytics. I provide support at all stages of the pipeline and am constantly looking to improve the players' gaming experience. One of these improvements is adding interactive moving objects to maps, which I will talk about later.
Designing moving objects for 5v5 Deathmatch maps
The idea of making objects players could interact with arose a long time ago. We even partially implemented it on the Smokestacks map. In the center, above the control point, we placed two circular pieces of cover that slowly rotate around the opening. Nothing complicated: it was created with a simple animation for a group of objects and using the NavMesh Obstacle component with Carve enabled (to dynamically change the NavMesh). There was no interactivity, but there was another consideration - the synchronization of these objects between players.
All map geometry is placed locally in the player's device. In order for the server to understand the position of moving objects at a specific moment, it must be notified. To do this, we created a Movable World Object View script. If it is added to the parameters of a moving object, the desynchronization of the movement of such an object between players disappears. At first glance, this seems awesome. You can make different types of moving cover, close and open passages and create traps. But while working on the Singularity, Equilibrium, and Constant maps, new challenges arose and things became even more interesting.
 Demonstration of the moving objects operation on the “Smokestacks” map
Working on Singularity, Equilibrium, and Constant maps
1. Level map design and main idea
In my opinion, the introduction of moving, interactive objects into a game should improve the dynamics of the battle and fill the gameplay with interesting situations, encouraging players to adapt and change tactics. We decided to create three maps for the 5v5 Deathmatch mode, which would have objects from two categories:
- Objects with vertical movement: These would destroy Mechs and any deployed abilities (e.g. Mines and Turrets).
- Objects with horizontal movement: These would not always damage Mechs, but would destroy any deployed abilities
The idea of vertical dangerous objects was also determined by technical factors. To implement a platform where a Mech could move up or down, we had to change the Character Controller and spend a lot of time testing the code - and time was short. For safe horizontal objects, I decided to only destroy the deployed abilities, so that there were no situations where a Mech’s turret or mine would hit the inside of a moving object or be suspended in the air when the object started to move. But sometimes I made objects with horizontal movement dangerous for Mechs as well, purely due to level design, not technical limitations.
 Demonstration of the technical problem of vertical and horizontal movement of objects
I decided to make two spacious maps and one more closed one. Each map has its own pace, dynamics, and favored weapon range, which I'll talk about later.
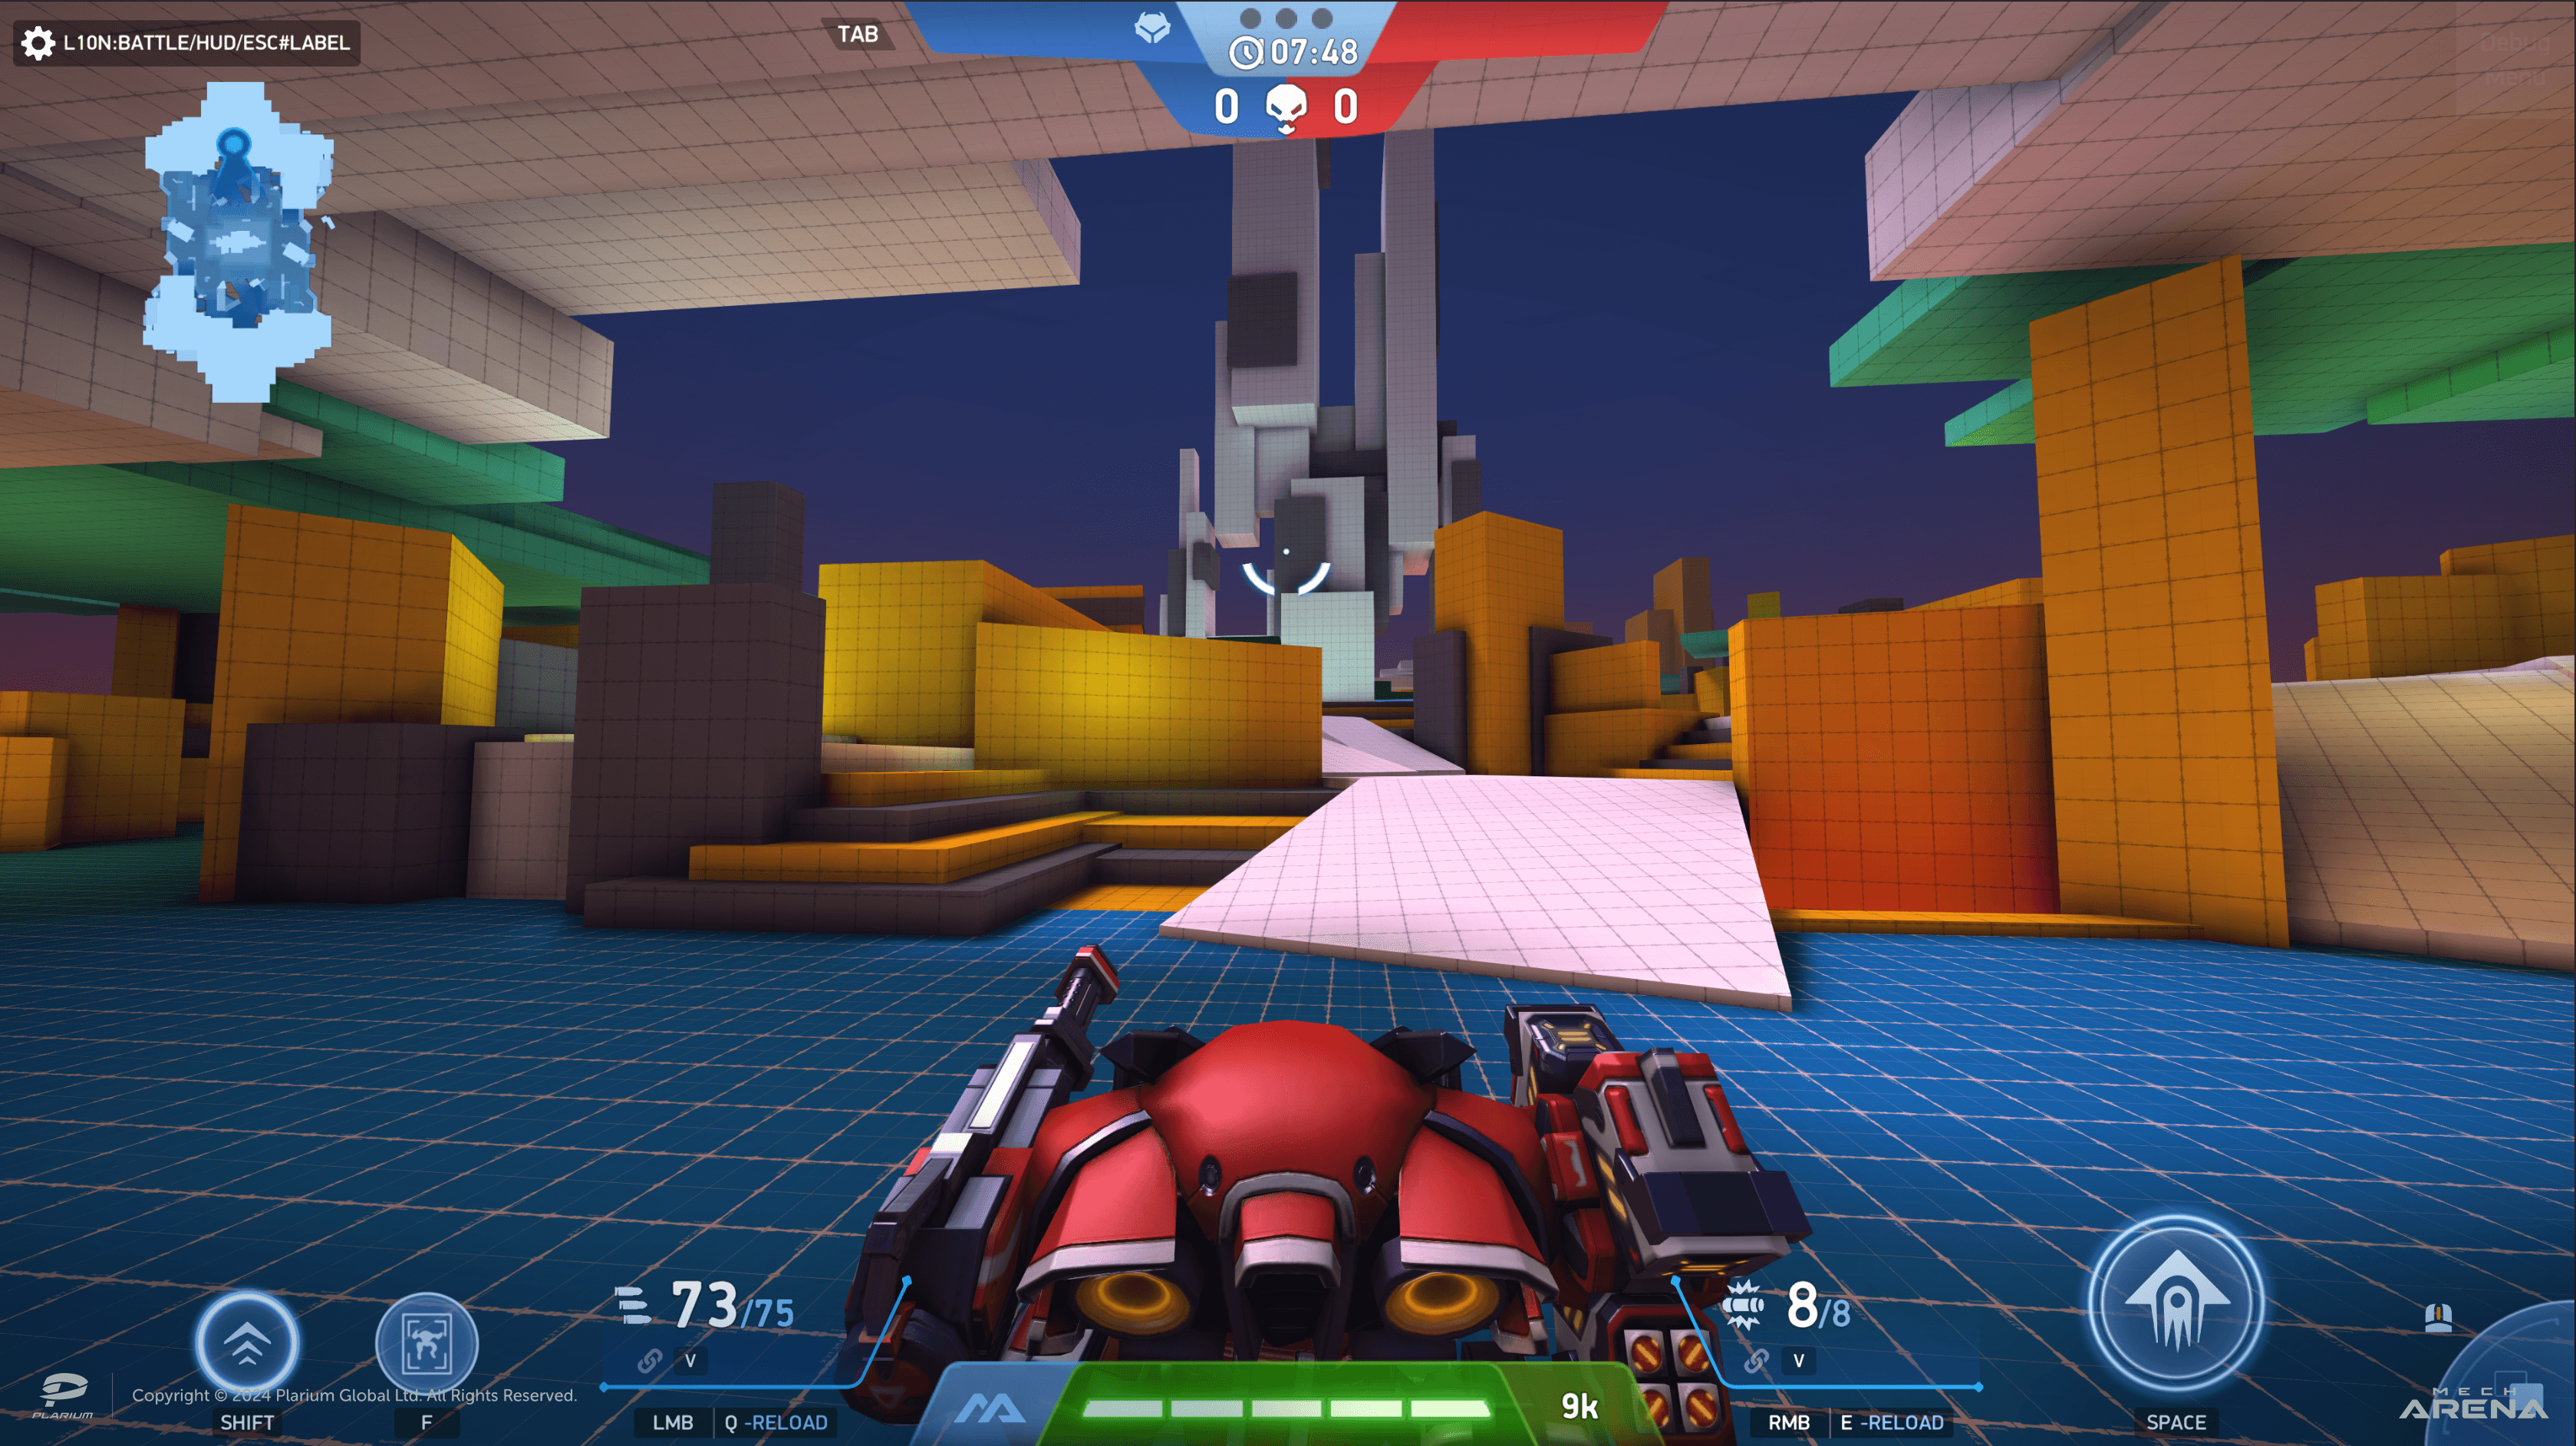
Singularity is an open and spacious map with verticality that allows some Mechs to jump into advantageous positions. An interesting and dangerous landmark is a pyramidal rock that stretches from a portal in the sky to an energy sphere hanging over the center of the map. The dominant Weapons here are Guided (Javelin Racks and Helix Racks): they shoot in a parabolic trajectory and the projectile chases the enemy, flying over some cover. Due to the zoning of the map and the possible routes and positions, other weapon types also work well.
Equilibrium is a map divided into two floors. The first is tight and dangerous, with moving traps. It’s more focused on close and medium combat ranges, so Guided Weapons do not work well here. The second floor is open, with limited cover, making Mechs vulnerable to Guided and Sniper Weapons. There are many opportunities to quickly jump from the second floor to the first to hide from the enemy and change position. You can also get to the second floor quite easily thanks to the many ramps around the map and nearby spawn points for each team. Another feature of the map is dangerous moving platforms.
Constant is a map that encourages the player to move towards the central landmark using different paths. These paths are periodically closed and opened by moving walls, some of which can destroy Mechs. This is a very dynamic map, suited to a wide variety of Weapons, but the best options would be Artillery and Guided Weapons. There are also chasms scattered across the map that players can fall through and lose their Mech, adding an extra element of danger.
2. Defining a visual theme
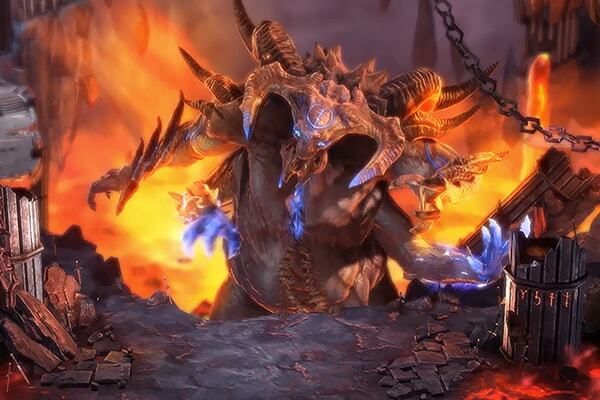
The Concept Artist and I brainstormed together and found some references. The intention arose to create a dangerous and mysterious parallel space that no one had explored. So we decided to develop the theme of the mysterious "Artifact X" from one of the previous maps and tell a story about where it came from and what dangers or benefits it could bring to the inhabitants of the Mech Arena universe.
Battles on the “Artifact X” map take place on a spaceship
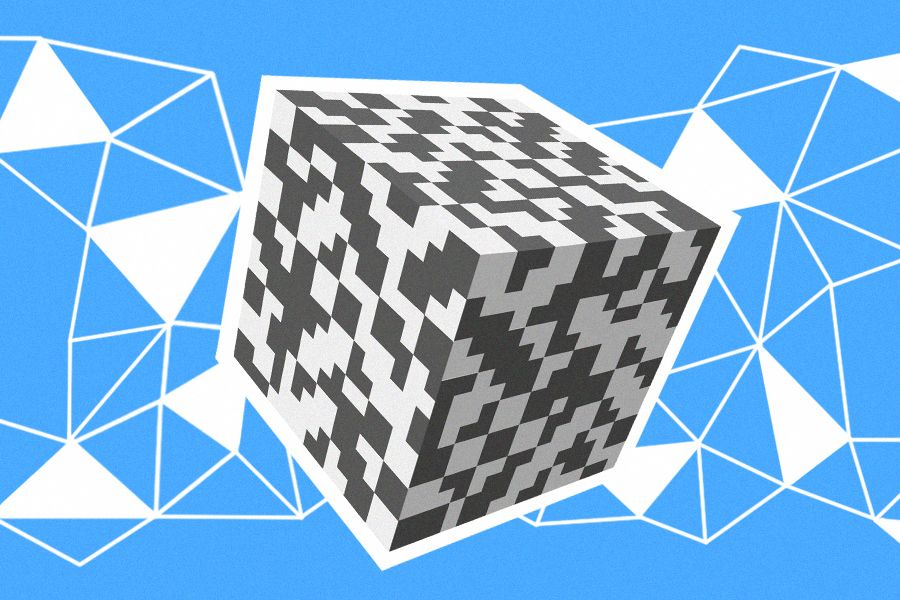
We were inspired by Control, Astral Chain and some elements of Death Stranding. Why these games? According to our concept, it was supposed to be a parallel universe where chaos reigned, but with its own order. It may sound a bit paradoxical, but it’s sci-fi. Human laws of physics are not inherent in this environment: there is no organic matter here, only cubic blocks of rock unknown to mankind, which are subject to powerful and dangerous energetic matter. The environmental design works with the layout and mechanics to create a tense atmosphere.
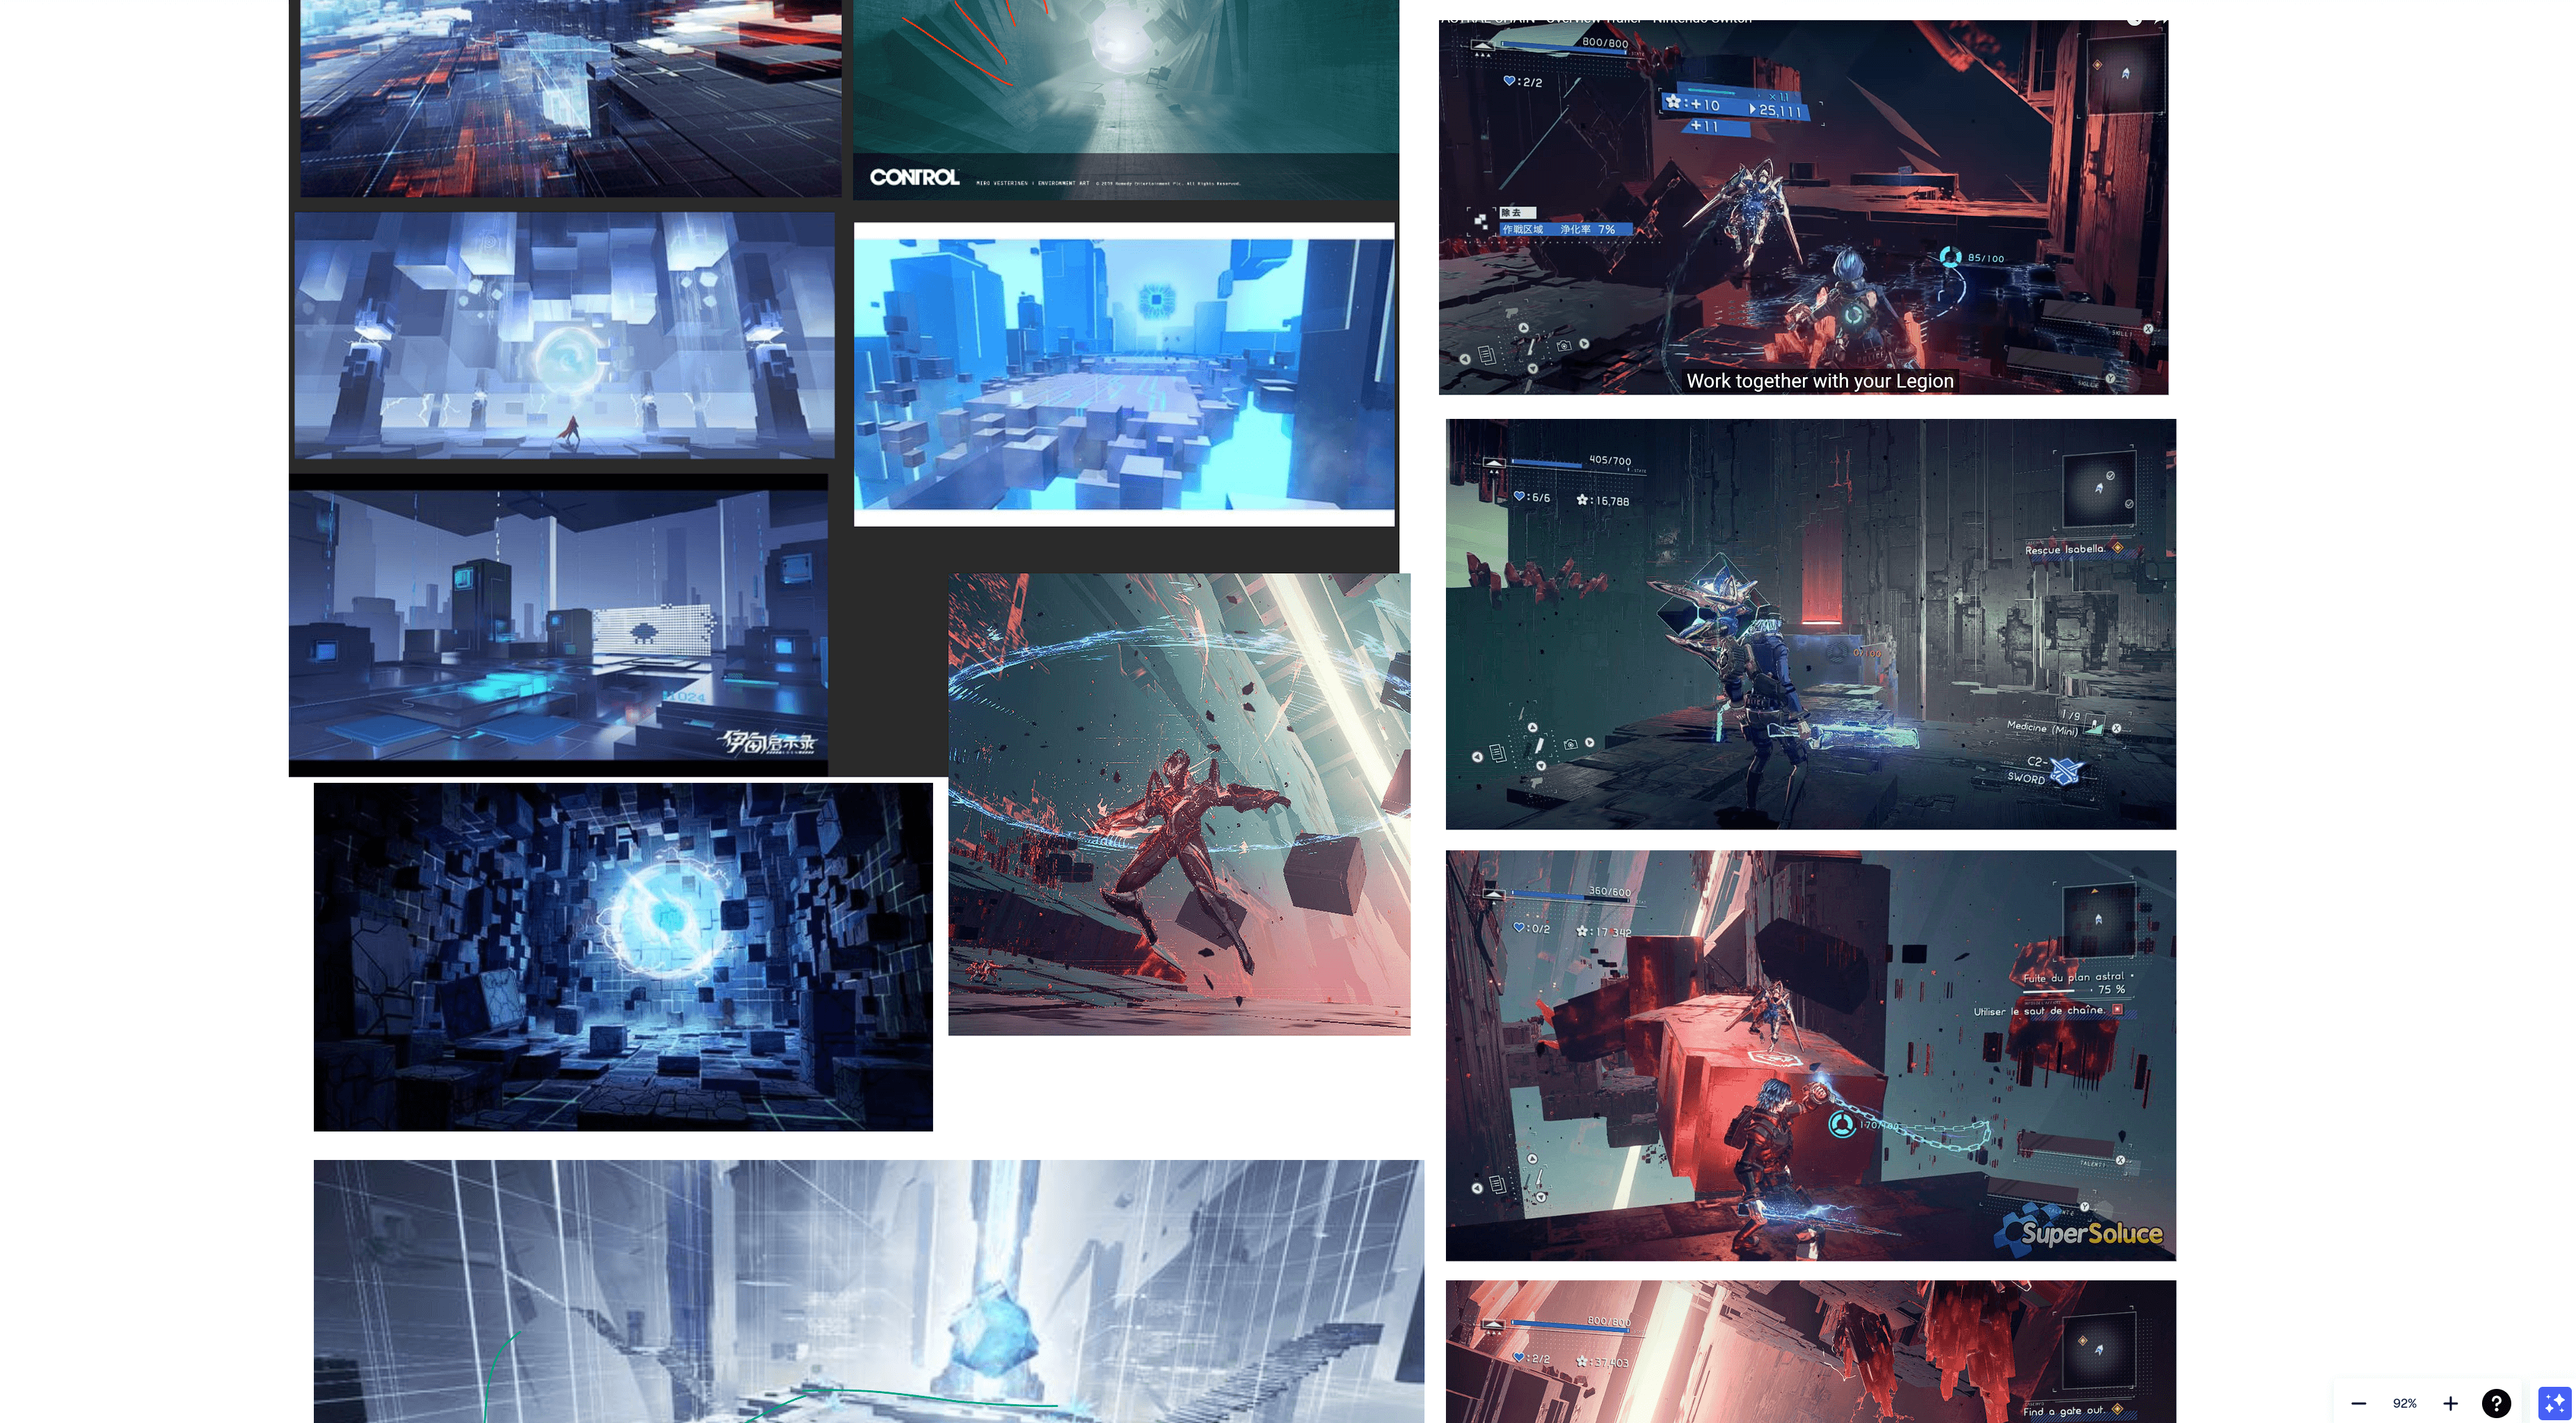 Some references
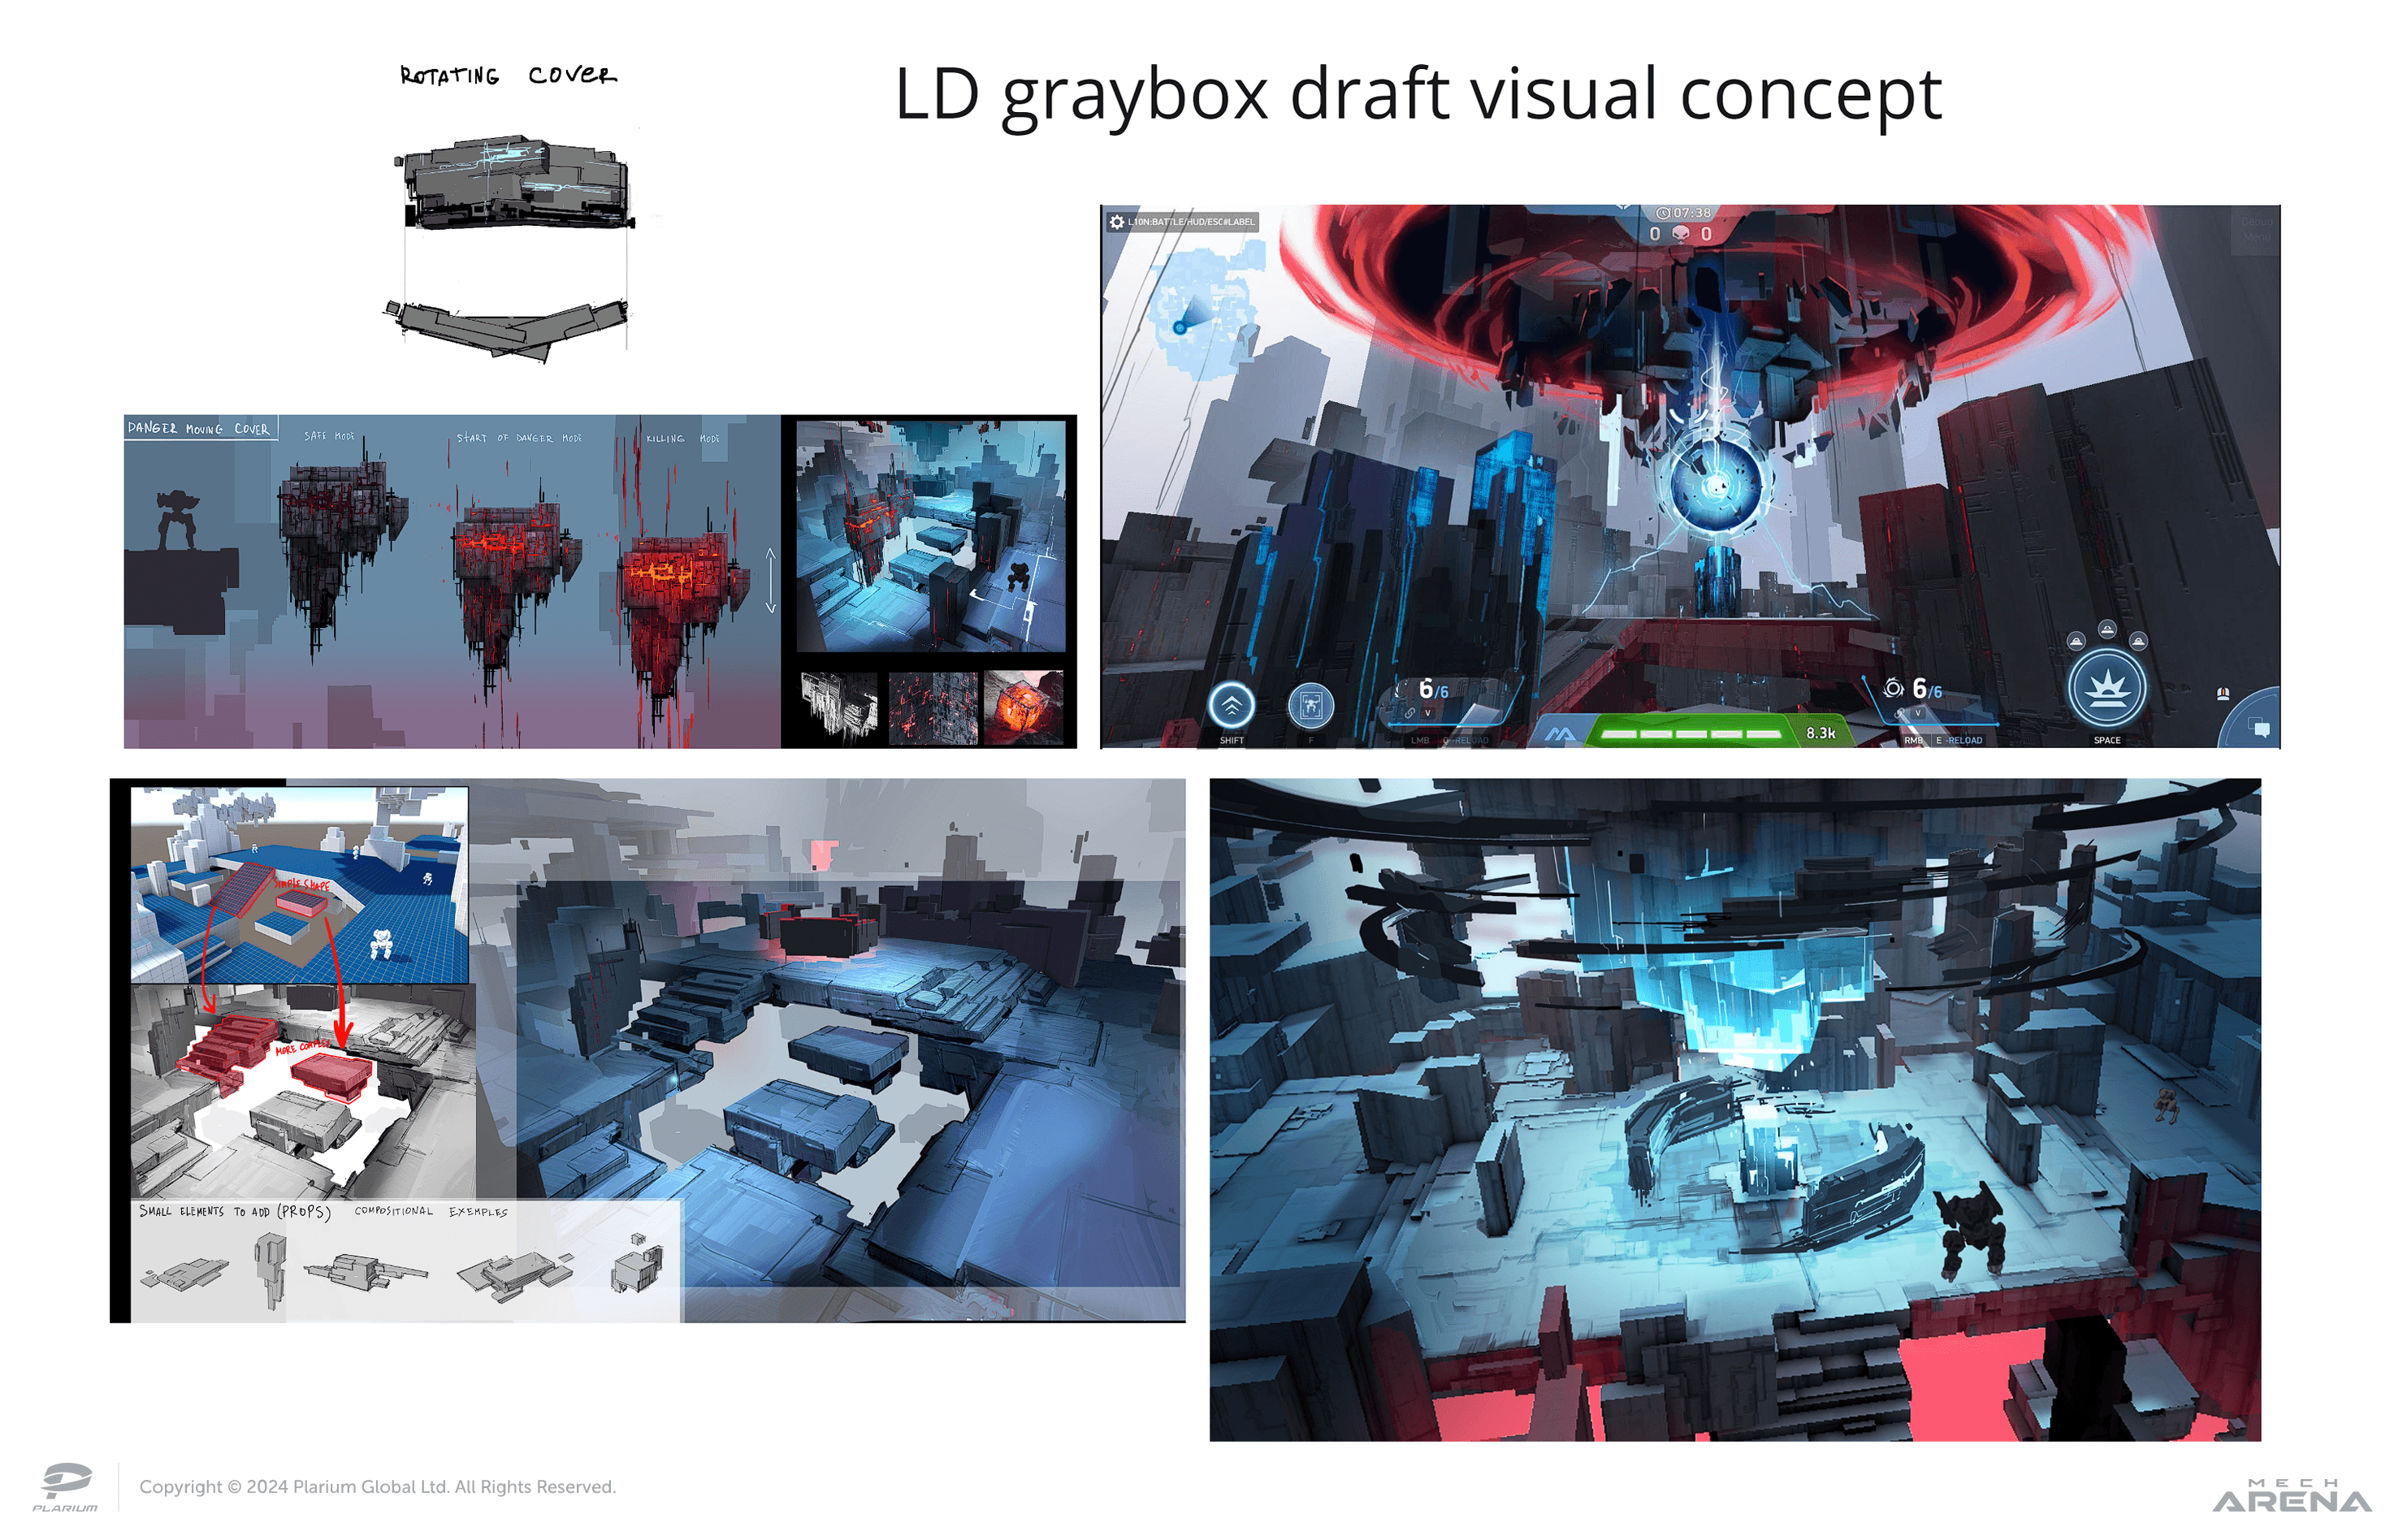
3. Development of the graybox version of the map
After approval with the Game and Art Directors, the Concept Artist and I sketched the initial concepts based on the main idea of the map and the reference board.
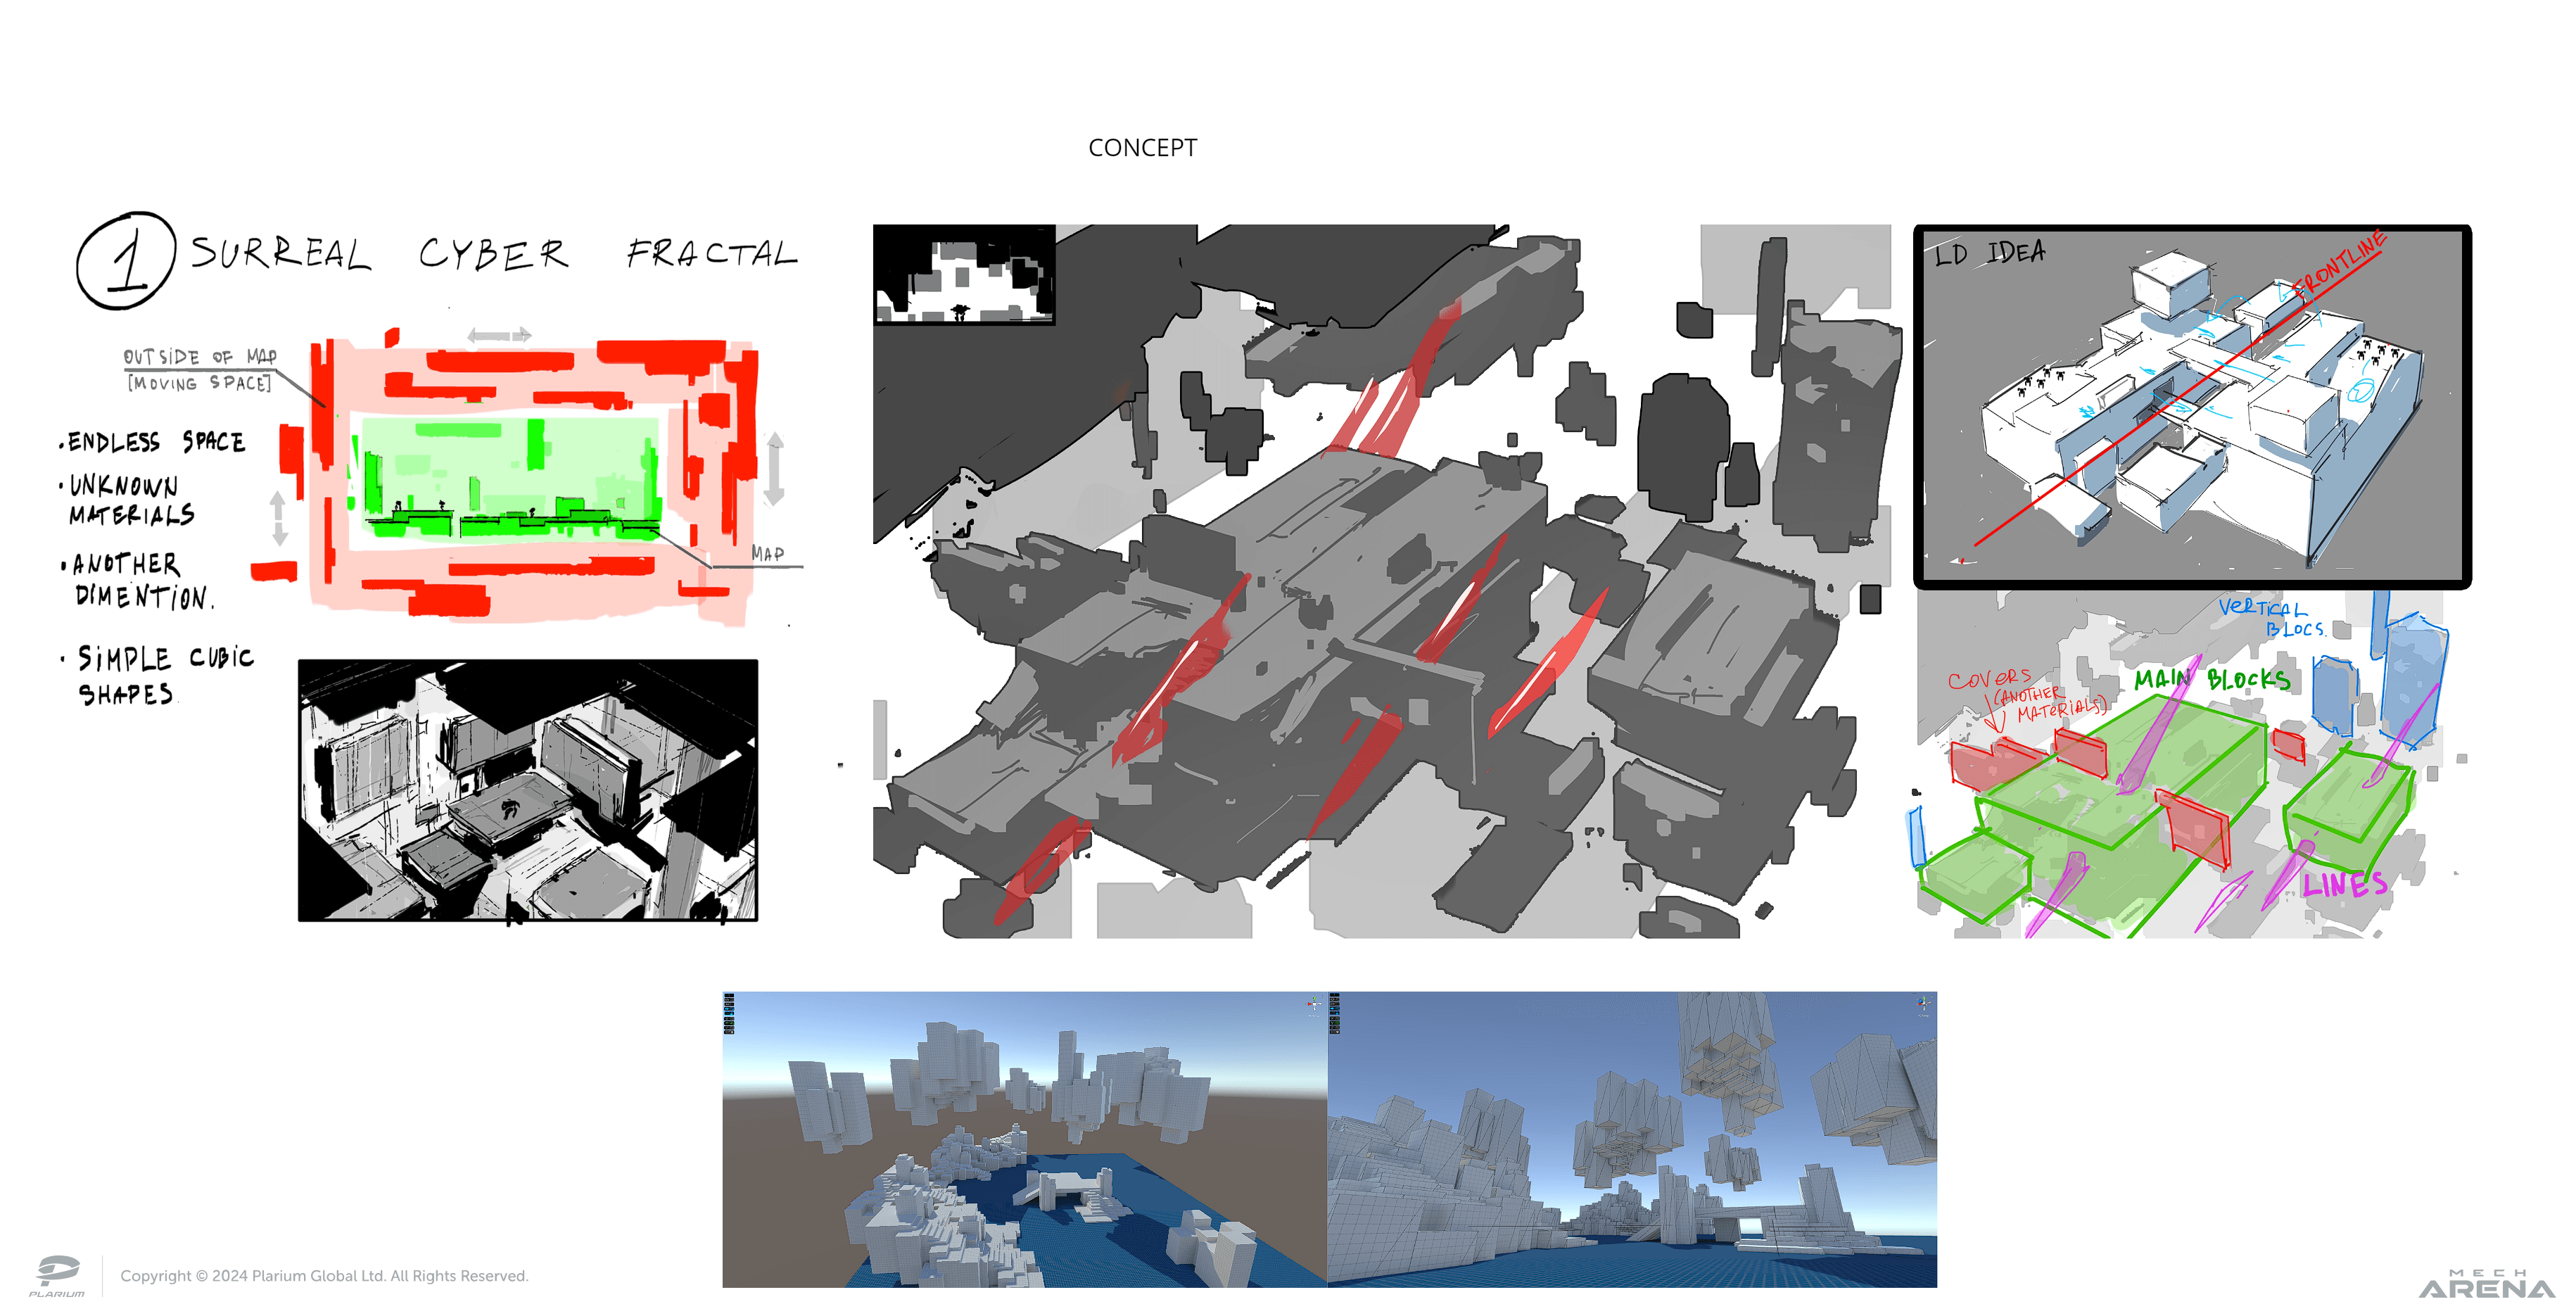 Initial concepts
My next step was to create the first layout. It was the Singularity map's graybox.
The Singularity Map
I started by creating large shapes to divide the location into zones, then moved to the finer details. The chosen visual theme of a parallel universe gave a lot of room for ideas. There are independent structures that can be combined, and platforms that hang in the air, and treacherous zones for players with endless pitfalls. I wanted players to notice the mystery and unnaturalness of the map during the first seconds after they spawn at the base point. That is why, during the countdown, users see a central landmark, which quickly disappears behind a moving wall of stone blocks. During development, we also decided to add a spherical energy anomaly to the center of this landmark. If the player jumps into it, it can destroy their Mech. This made it possible to highlight the central area of the map.
 Initial spawn (graybox)
 Initial spawn (final version)
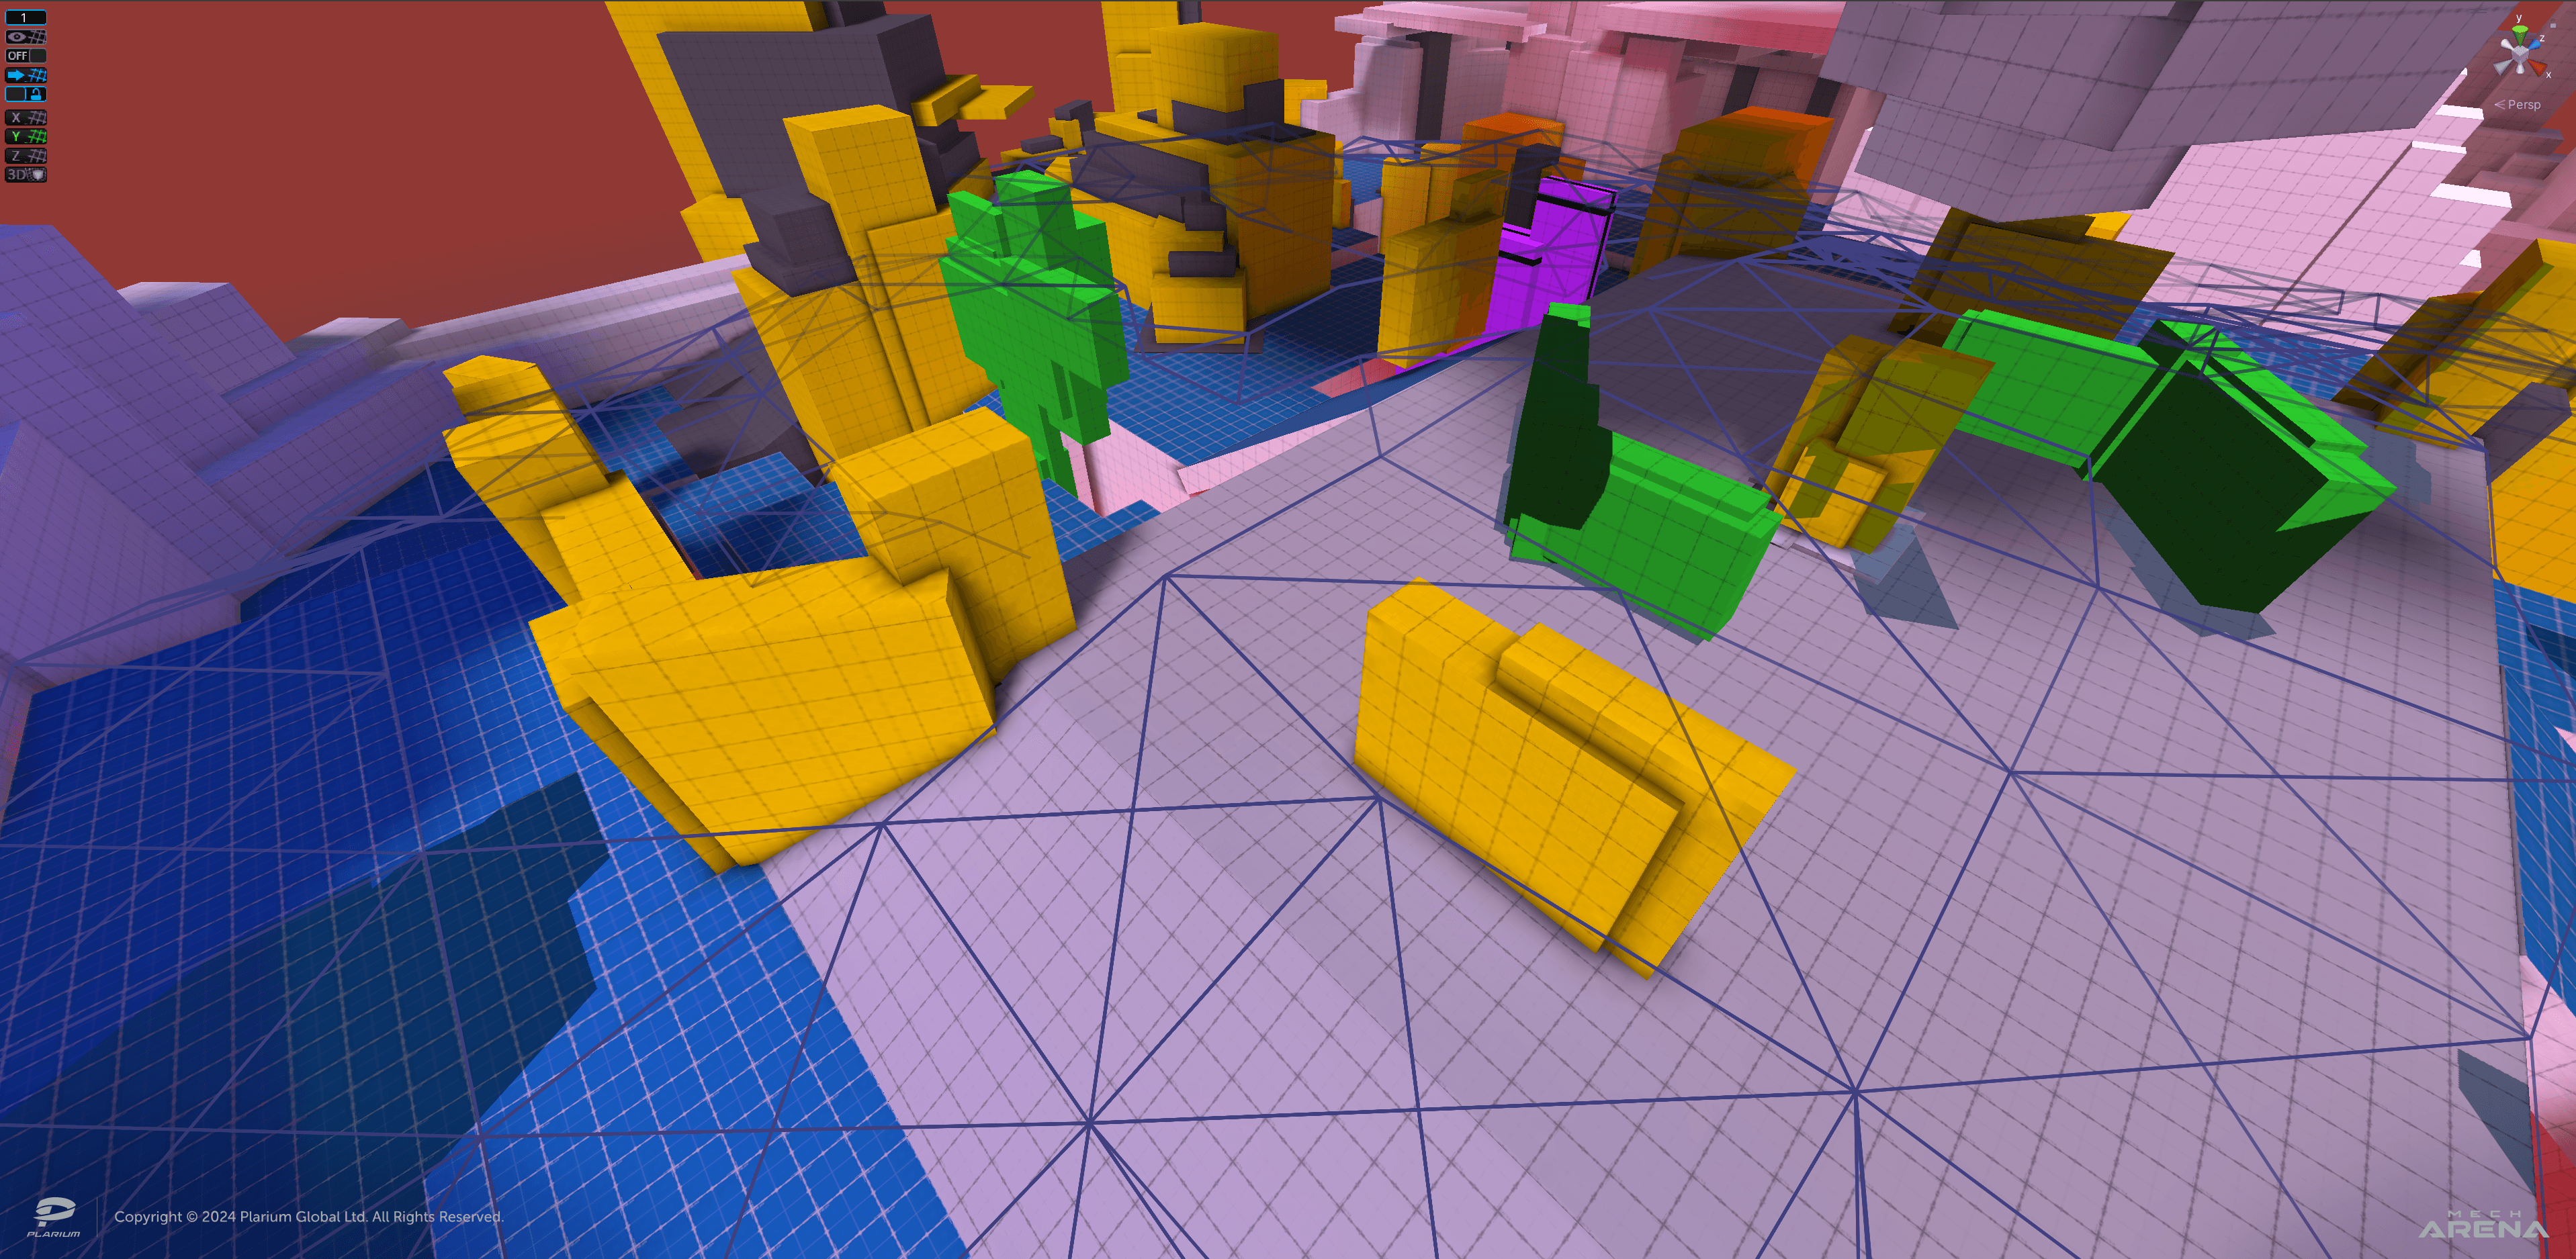
I broke down the moving objects by color so that it was easier for me and the participants of the playtest to understand them on the graybox version of the map:
- Objects with horizontal movement were green
- Objects with vertical movement were purple. They had inserts with an Emissive material that lit up red when an object became dangerous to the Mech and the player. On the next map in the set, I turned this indication into a more informative one.
The only exception is the wall, mentioned above, which moved out of the way during the spawning of players. This wall only moved once at the beginning of the battle and remained static until the end. Most objects move in their own separate space, except for the central covers, which rotate around their axis. Horizontal and vertical moving objects were placed over a chasm where the player cannot walk: falling through there would result in the Mech being immediately destroyed. This made the technical implementation a bit easier for me, namely dealing with navigation for bots in places like this.
 Danger indication of a moving object
To implement the movement, I created a separate Legacy animation for each object and used the first version of the Movable World Object View script so that during the playtest the movement of the objects was correctly synchronized between all players.
Movable objects of the map "Singularity"
a) Movable walls that emerge from below and form cover for the base spawn point for each team. Their main purpose is to show the player a location and then make the base spawn point safe.
 Movable walls at the teams’ base spawn points
b) Central movable cover that continuously rotates around its axis. Its role on the map is to create cover, expose long sightlines and open/close passes for both teams in the central part of the map, where the most direct path to the opponent's base lies. In addition to creating animations and a synchronization script, it is important to consider the interaction of bots with such objects.
 Central moving covers and work of NavMesh Obstacle
In the Mech Arena project, we use two types of navigation for AI:
- Standard navigation from Unity or NavMesh
- An internally developed wayfinding algorithm for bots created by our team - Astar navigation, that directly affects the pattern of their behavior during combat.
At the time of creating the graybox, I worked only with NavMesh as certain tests had to be conducted for Astar navigation. To dynamically break the navigation in places where the object would move at a certain moment, I used the NavMesh Obstacle component with Curve enabled. That meant that navigation would break correctly in movement areas, and bots would take this into account.
c) Vertical moving covers that can destroy the mech when the red indicator is triggered. As I wrote earlier, the danger of these objects is due to technical factors. As a result, such objects become dangerous when they start moving down and remain dangerous until they return to their original position at the top. While the object is hovering under the map, it is still dangerous.
 Vertical dangerous moving objects
To train the object to destroy mechs and their deployed abilities, I used Box Colliders very closely scaled to the size of the objects themselves, and added our internal Kill Zone View script to them with the Everything parameter. You can see how these colliders (KillBox) work in the gif above: they turn red when they become dangerous. I added the KillBox group on and off directly to the motion animation.
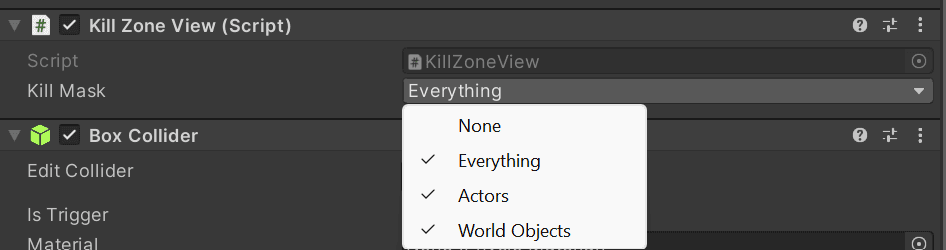 Kill Zone View script
I will tell you a little about the operation of the Kill Zone View script. In its original state, the script made the collider dangerous only for Mechs. I used it to create danger zones on the map. But during testing, there was a need to modify the script, so now we can choose which type of objects should be destroyed:
- None – No impact on the collider
- Everything - Makes the collider dangerous for Mechs and deployed abilities
- Actors – Makes the collider dangerous only for Mechs
- World Objects - Makes the collider dangerous only for deployed abilities
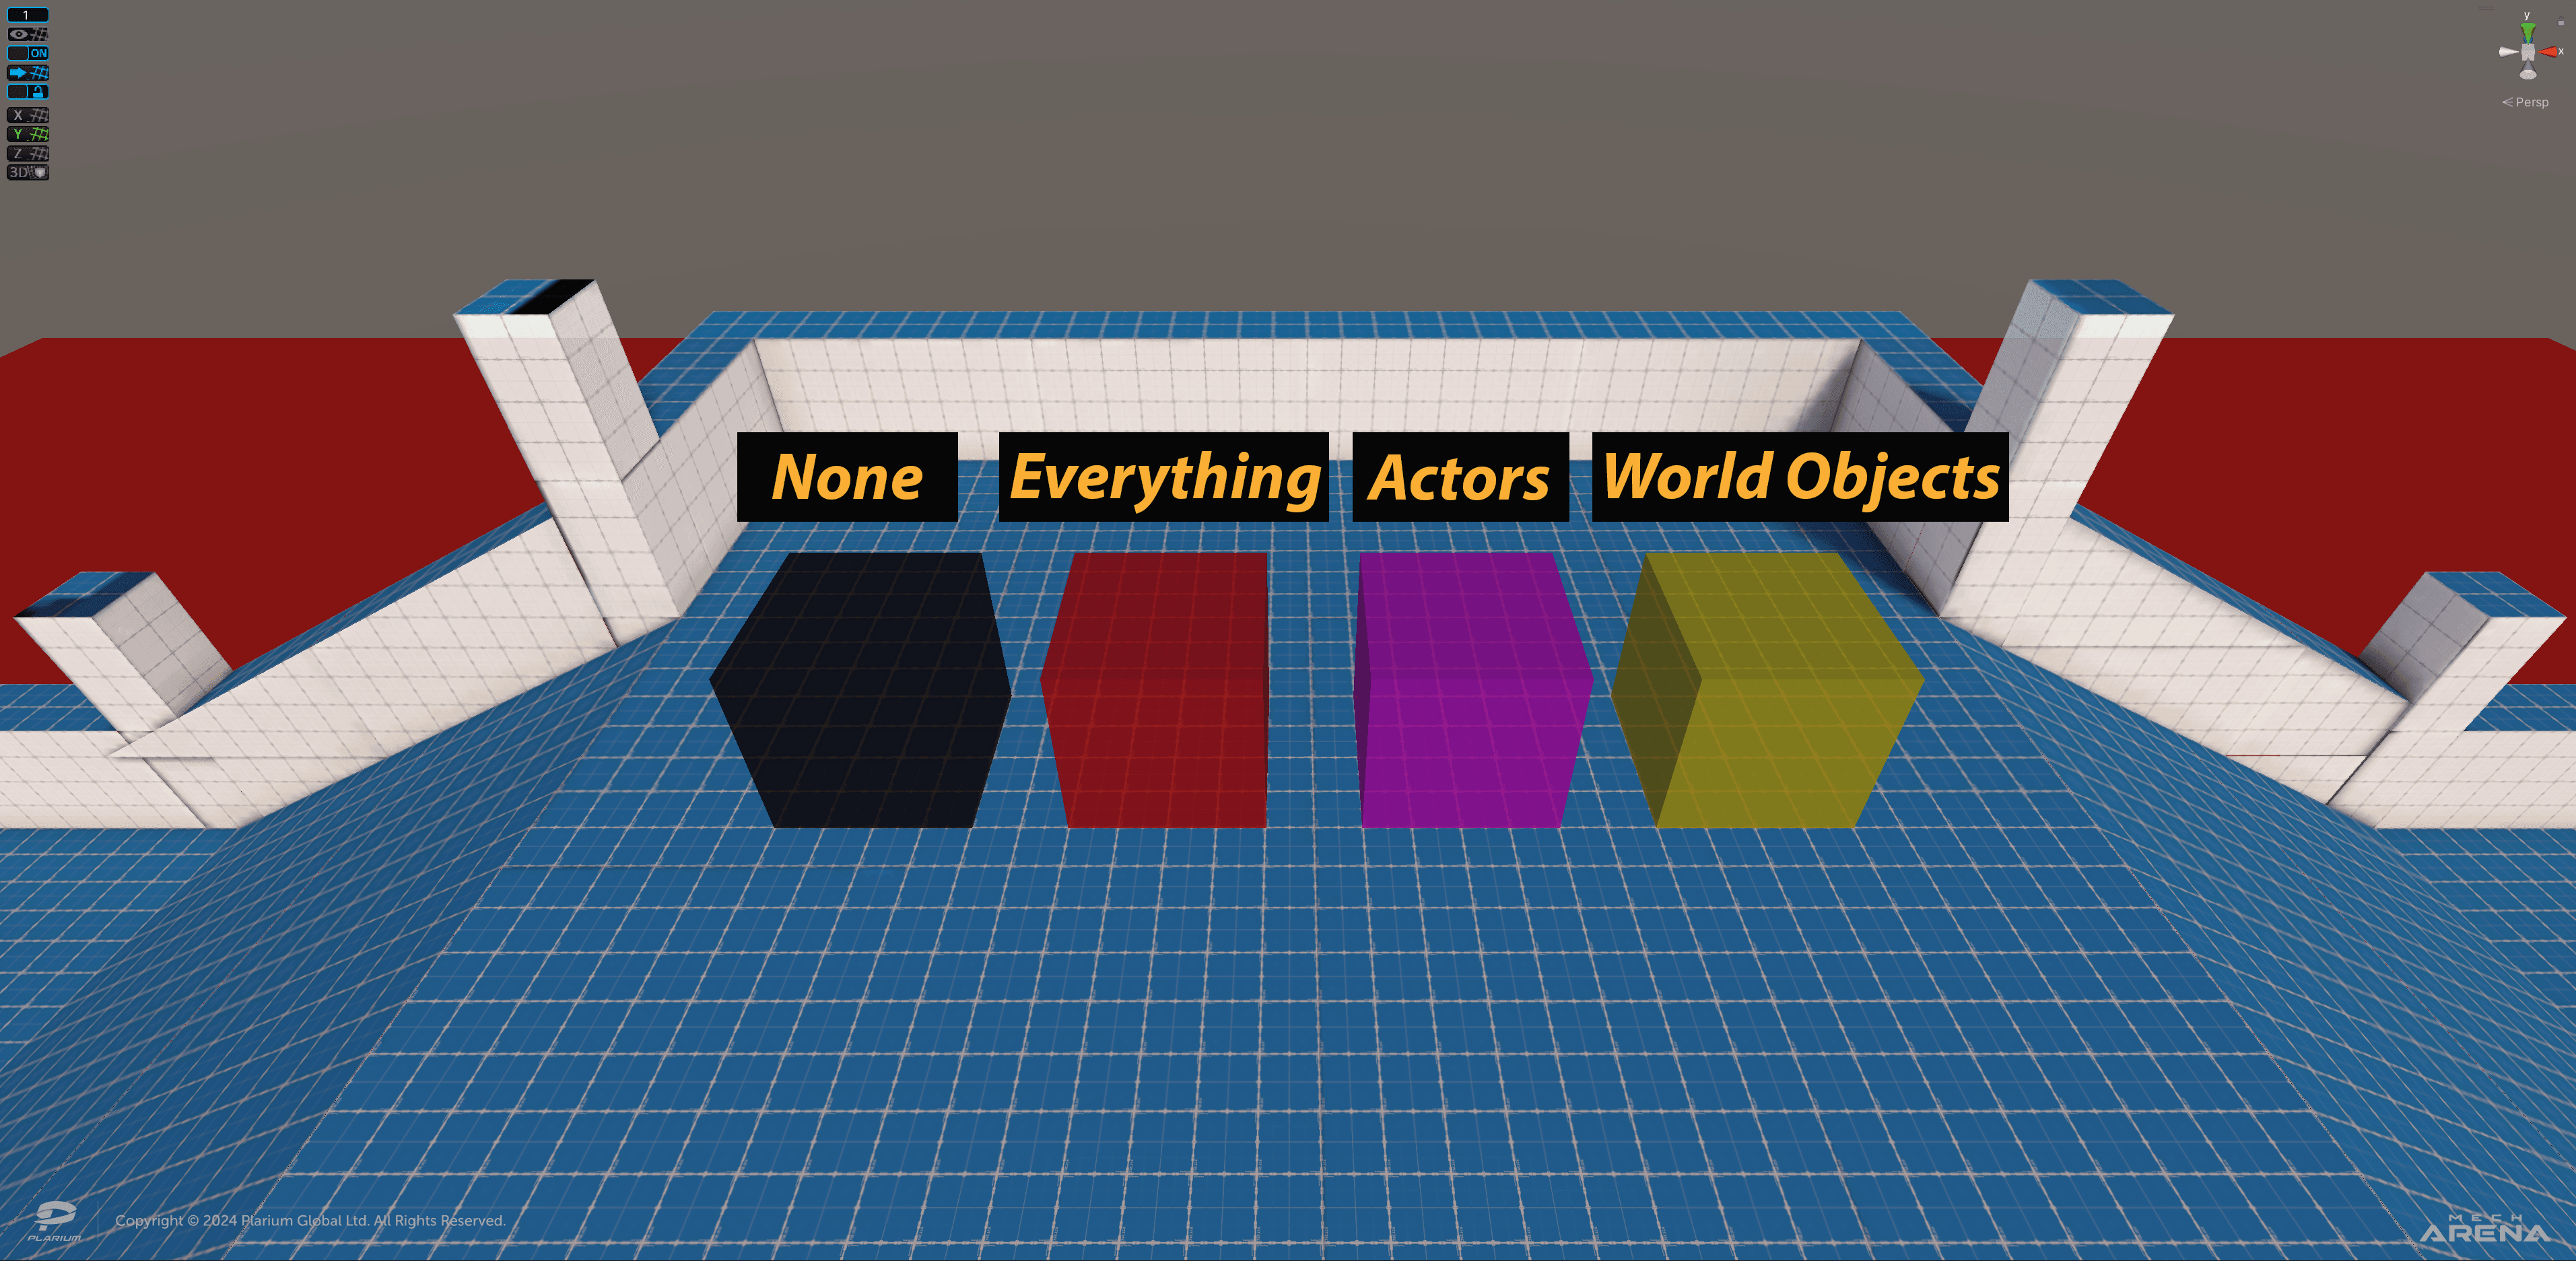 Color scheme of Kill Zone View script parameters
 Operation of the collider with the parameter Everything
 Operation of the collider with the parameter Actors
 Operation of the collider with the parameter World Objects
d) Horizontal moving objects destroy deployed abilities, but do not affect Mechs in any way, except that they can push the player a little while moving. We used the Kill Zone View script here with the World Objects option. The main task of these objects is the function of dynamic cover, which the player can temporarily hide behind, and the creation/removal of firing positions for both teams. Since these covers are central in the line of fire, just as discussed in point “b”, you need to use the NavMesh Obstacle component with Curve enabled to dynamically change the NavMesh.
 Horizontal moving object
The Singularity map has central symmetry. The moving objects in points "c" and "d" are also symmetrically arranged. So, by placing the objects and setting their timings, I ended up with a single system of moving objects for this map that worked as a coherent mechanism. This is exactly what I wanted.
When I had the first iteration of the map ready, I handed it over to our Concept Artist and they did paintovers. During the development of the first map, I constantly communicated with the Concept Artist and exchanged ideas so that we did not deviate from the main visual idea.
 The first visual concepts of the Singularity map
Moving objects of the Equilibrium map
On the Equilibrium map, I used axial symmetry, so the moving objects were mirrored for each team. I used the principles already laid out in the previous map, but there is one interesting area that took more time to balance out and polish. Read more about it in point "d".
а) A horizontal moving object that destroys Mechs and deployed abilities while moving its faces along the X axis (Everything parameter). Since it is in the playfield, a NavMesh Obstacle is used to dynamically change the NavMesh.
 Horizontal moving object, parameter Everything
b) Horizontally moving objects that destroy only deployed abilities have the World Objects parameter. The NavMesh Obstacle component is also used here.
 Horizontal moving objects, parameter World Object
c) Vertical moving columns with the Everything parameter. On the graybox, they were dangerous only when moving up, but after the playtest I decided to make their movement down dangerous as well.
 Vertical moving objects, parameter Everything
d) Vertical moving platforms that have Everything parameter on when moving. When they stop, they form passages over a chasm for both the first and second tiers of the map. This was the most difficult and complex of the moving elements to implement, because it was necessary to carefully balance the timings and adjust the navigation for the bots. To make the navigation for the first and second tiers where the platforms will move, I created a temporary geometry group and set our internal Tag “NavMeshHelper”. After the addition of this Tag, this geometry group was able to turn itself on and off when baking the navigation, so I didn’t have to do it manually.
 Temporary geometry group for baking NavMesh and Astar
Now I had navigation in the places where the platforms would stop, so the bots could easily walk on them. But I needed the bots to know at what point the platforms form this passage, and for the platforms to actually be physically walkable. After all, there was now navigation on the first and second tier, regardless of whether there were moving platforms.
I created separate additional objects with the NavMesh Obstacle component, as I have done before. But earlier this component was directly part of the moving geometry. This time, the lower and upper invisible cubes were attached to each platform separately. Mesh Renderer and Collider were disabled for them, as NavMesh Obstacle only works with Curve enabled. So when the platform moved from top to bottom and vice versa, these invisible cubes would dynamically enable and disable navigation for the first or second tier respectively. The main thing was to correctly balance the size of each of them, so that everything was correct and on time. This would help to achieve the highest possible accuracy for alerting the bot about changes in navigation.
 Operation of "invisible cubes" with navigation while moving
As already mentioned, on this map I decided to finalize the system of indicating the movement of objects. At this point I was using three colors:
- Blue - Safe
- Yellow - Get ready
- Red - Danger
This color marking can be seen in the gif above. This meant it would be clear to colleagues in the internal playtest when to prepare and leave the platform before it destroys their Mechs.
After working on the Equilibrium map, it became clear that it would be too risky with the project deadline to create another complex set of moving objects as the platforms from point "d" again. Therefore, when working on the last map in this set, I focused on moving objects that were easier to implement.
Moving objects of the Constant map
On the Constant map, I worked with less risky types of moving objects. However, this ultimately became my favorite map in the set. Here’s what it contained:
а) A moving vertical object that is dangerous (parameter Everything) while moving. It opens and closes a position/passage near the center of the map at certain intervals.
 Vertical moving object (Everything parameter)
b) Moving horizontal objects that have the World Objects parameter, i.e. destroy only the deployed Mech abilities. The central object acts as a moving cover that you can play and move with. A side object opens and closes a passage at certain intervals.
 Horizontal moving objects (World Object parameter)
The map is 180° symmetrical about the center, so the moving objects are located in the same place for each team.
4. Internal testing of grayboxes and handover to the Environment Team
This is my favorite stage, because now you can relax a little, sit comfortably and adjust the map before the playtest. I usually start by checking the location of the spawn points in the zones I laid out and their parameters. The spawn point has three main parameters:
- Team - Belonging to team A or B. Or it is a universal point for the Free For All mode.
- Type – Base (the main spawn used at the start of a round), Base Additive (one of the two additional spawns that, along with Base, are available to respawn a player after they die in the game) or MVP Point (used on the MVP screen after the game ends).
- Spawnpoint ID – an identifier assigned to a group or a single spawn point (in the case of FFA).
 Example of spawn points for team B, map "Constant”
In general, all the things I need are in two internal tools of our development team. These are Level Editor and Level Design Tool. With them, I can create spawn points, an MVP point, and a Weapon Ruler that helps map the ranges and trajectories of any Weapon in the game. I can also create a minimap, bake NavMesh and Astar navigations, set the map game mode, etc.
Having placed the spawn points and set the map mode (in our case it is 5v5 Deathmatch), I bake the navigation for bots and correct the places where it should not be or where it was baked incorrectly. When done, I save the data to the Level Preset. This is a .json file that contains all the information about the map: scene name, mode, spawn points, postprocess effects, an additional scene background bundle (we use the bundle system) and many other important points. I upload the finished Level Preset to the test server directly from the Level Editor menu, which is very convenient.
Another important step is setting the light on the map. Light is a powerful tool for directing the player's attention and enhancing the desired accents. For the graybox, as a rule, I adjust the light so that the map is easy to read, and illuminate the combat positions and passages. And in general, I make the blocking look nice, because we still have to play on it. I sometimes add a bit of Fog to the baked light, especially if I place some distant Far elements outside the map. Sometimes I configure the Skybox to make the map more atmospheric.
Although this is the graybox version of the map, I'm also following the optimization to get all my "mess" running on the playtest. So I additionally bake Occlusion culling. And with the help of the Physics Debug tool, I check whether an extra invisible collider is not lost somewhere in the middle of an open area and whether everything is normal with other colliders on the map.
 Operation of the Physics Debug tool
Once I'm done with setup and testing, I upload the data to my branch (using Sourcetree) from which I'll then collect test builds. We use the automated Jenkins system for assembly, it allows you to conveniently and quickly assemble test builds and update server data.
Now all that’s left is to inform colleagues about the playtest and conduct it. I always do graybox testing when I finish working on one map, rather than waiting until all three maps from the set are ready. This means I can immediately make changes to the layout and pass it on to the Environment Team. For balance and "polishing", two or three playtests per map are enough for me. In order to recreate the conditions that will be on the map in-game after release, we get Hangars with different types of Mechs and Weapons, which often have additional restrictions on the amount of certain content, and we also change up the Ranks of items to simulate different stages of player progression.
Usually, after transferring the map to the Environment Team for the final graphics, I no longer participate in the development. I only support level design questions. If something needs to be enlarged, reduced or moved, I do a final review of the map and check if everything corresponds to my blocking. I also conduct the final playtest. But with these maps, I took on the responsibility of customizing the animations and effects for the moving objects, as well as baking and customizing the navigation.
5. Refinement of the mechanics of moving objects and Astar navigation
After passing the layouts to the Environment Team, I moved onto solving the problems with moving objects that I discovered after the playtests.
a) The server does not understand what a collider with a Kill Zone View script is. This means that when the player leaves the battle and their Mech interacts with a dangerous object, nothing will happen, the Mech will not be destroyed.
 Misunderstanding of the dangerous collider by the server, the map "Equilibrium"
b) Making it possible to choose the type of collider for the Kill Zone View script (None, Everything, Actors, World Objects). As I wrote above, this is necessary so that the collider can separately affect different types of objects. Also, the script did not react to the deployed abilities. Instead of destroying the Mine, the dangerous object moved on, and the Mine was in place or even left hanging in the air.
 Kill Zone View script does not respond to outliers, map "Equilibrium"
c) Breaking Astar navigation when an object starts moving. As I mentioned, this type of navigation is our internal design, which takes the form of a grid frame that covers the floor. It is Astar navigation that affects the behavior of bots. That's why we had to create a tool that allows you to dynamically change the nodes of this navigation.
 Astar navigation, map "Singularity"
d) Changing the principles of operation of the Redeemer Mech Ability. This Mech is fast, and its Ability allows it to travel through time in order to return to its position 10 seconds back. If there were moving objects nearby, the Mech could return to the place where such an object is located and get stuck in it. Because of this, there was a need to teach it to self-destruct.
 The interaction between a moving object and the Redeemer Mech Ability, map "Equilibrium"
Even before working on the maps, I discussed all my ideas with the Unity Developers, so we were ready to fix the problems from this list. For the convenience of the developers and the QA Team, I created a layout with all types of moving objects used on the maps. This meant we didn't have to switch between different scenes and could do everything safely in one place, without the risk of breaking something.
 Layout for testing moving objects
I've already talked about how we've improved the way the Kill Zone View script works. We've also taught the server to understand when this collider script affects a Mech or a deployed ability, so I'll focus on other solutions. In order to solve a and b issues - flying objects in the air and Mechs not responding to the dangerous collider (for players who have left the battle) - a lot of changes were made to the Movable World Object View script. It is responsible for the synchronization of all moving objects on the map. I will not dwell on this point, because the explanation would be long enough to write another article. The same can be said about the Redeemer Mech Ability. In short, the mechanics of going back in time have been refined and now the Mech, after being trapped inside any object, self-destructs.
But I will tell you in more detail about the solution to almost the most difficult issue, namely about working with Astar navigation, and how we implemented a dynamic influence on it. Astar navigation resembles a triangulated 3D Mesh and has its own Vertex (nodes) where the edges of this mesh connect. To disconnect the desired sectors of the grid, one must “learn” to turn nodes on and off at certain intervals. For this, a conditional cube is created in the scene. It should be positioned so that it covers all the nodes in the area where the navigation needs to be changed. Next, the MeshRenderer component should be disabled and the BoxCollider removed, as it should be an invisible object that does not affect the player. Then our internal GraphUpdateScene script can be added, solving the task of switching the Astar navigation nodes on and off. By itself, such an object does nothing. For it to work, it needs to be made part of a moving object. That involves giving it an understandable name (for example, AstarGraphUpdater), adding it to the static subgroup of the parent group of the movable object, and adding it to the Element field (Graph Updaters item) in the Movable World Object View script placed on the parent group of the movable object. It looks like this:
 Effect of Graph Update object on Astar navigation nodes during wall movement
Red nodes and a grid around them mean that this zone is disabled. Bots will treat it as closed until the grid turns blue again.
There can be several such objects for one moving object. In the Movable World Object View script, cubes can be added and assigned a personal number to the Element field.
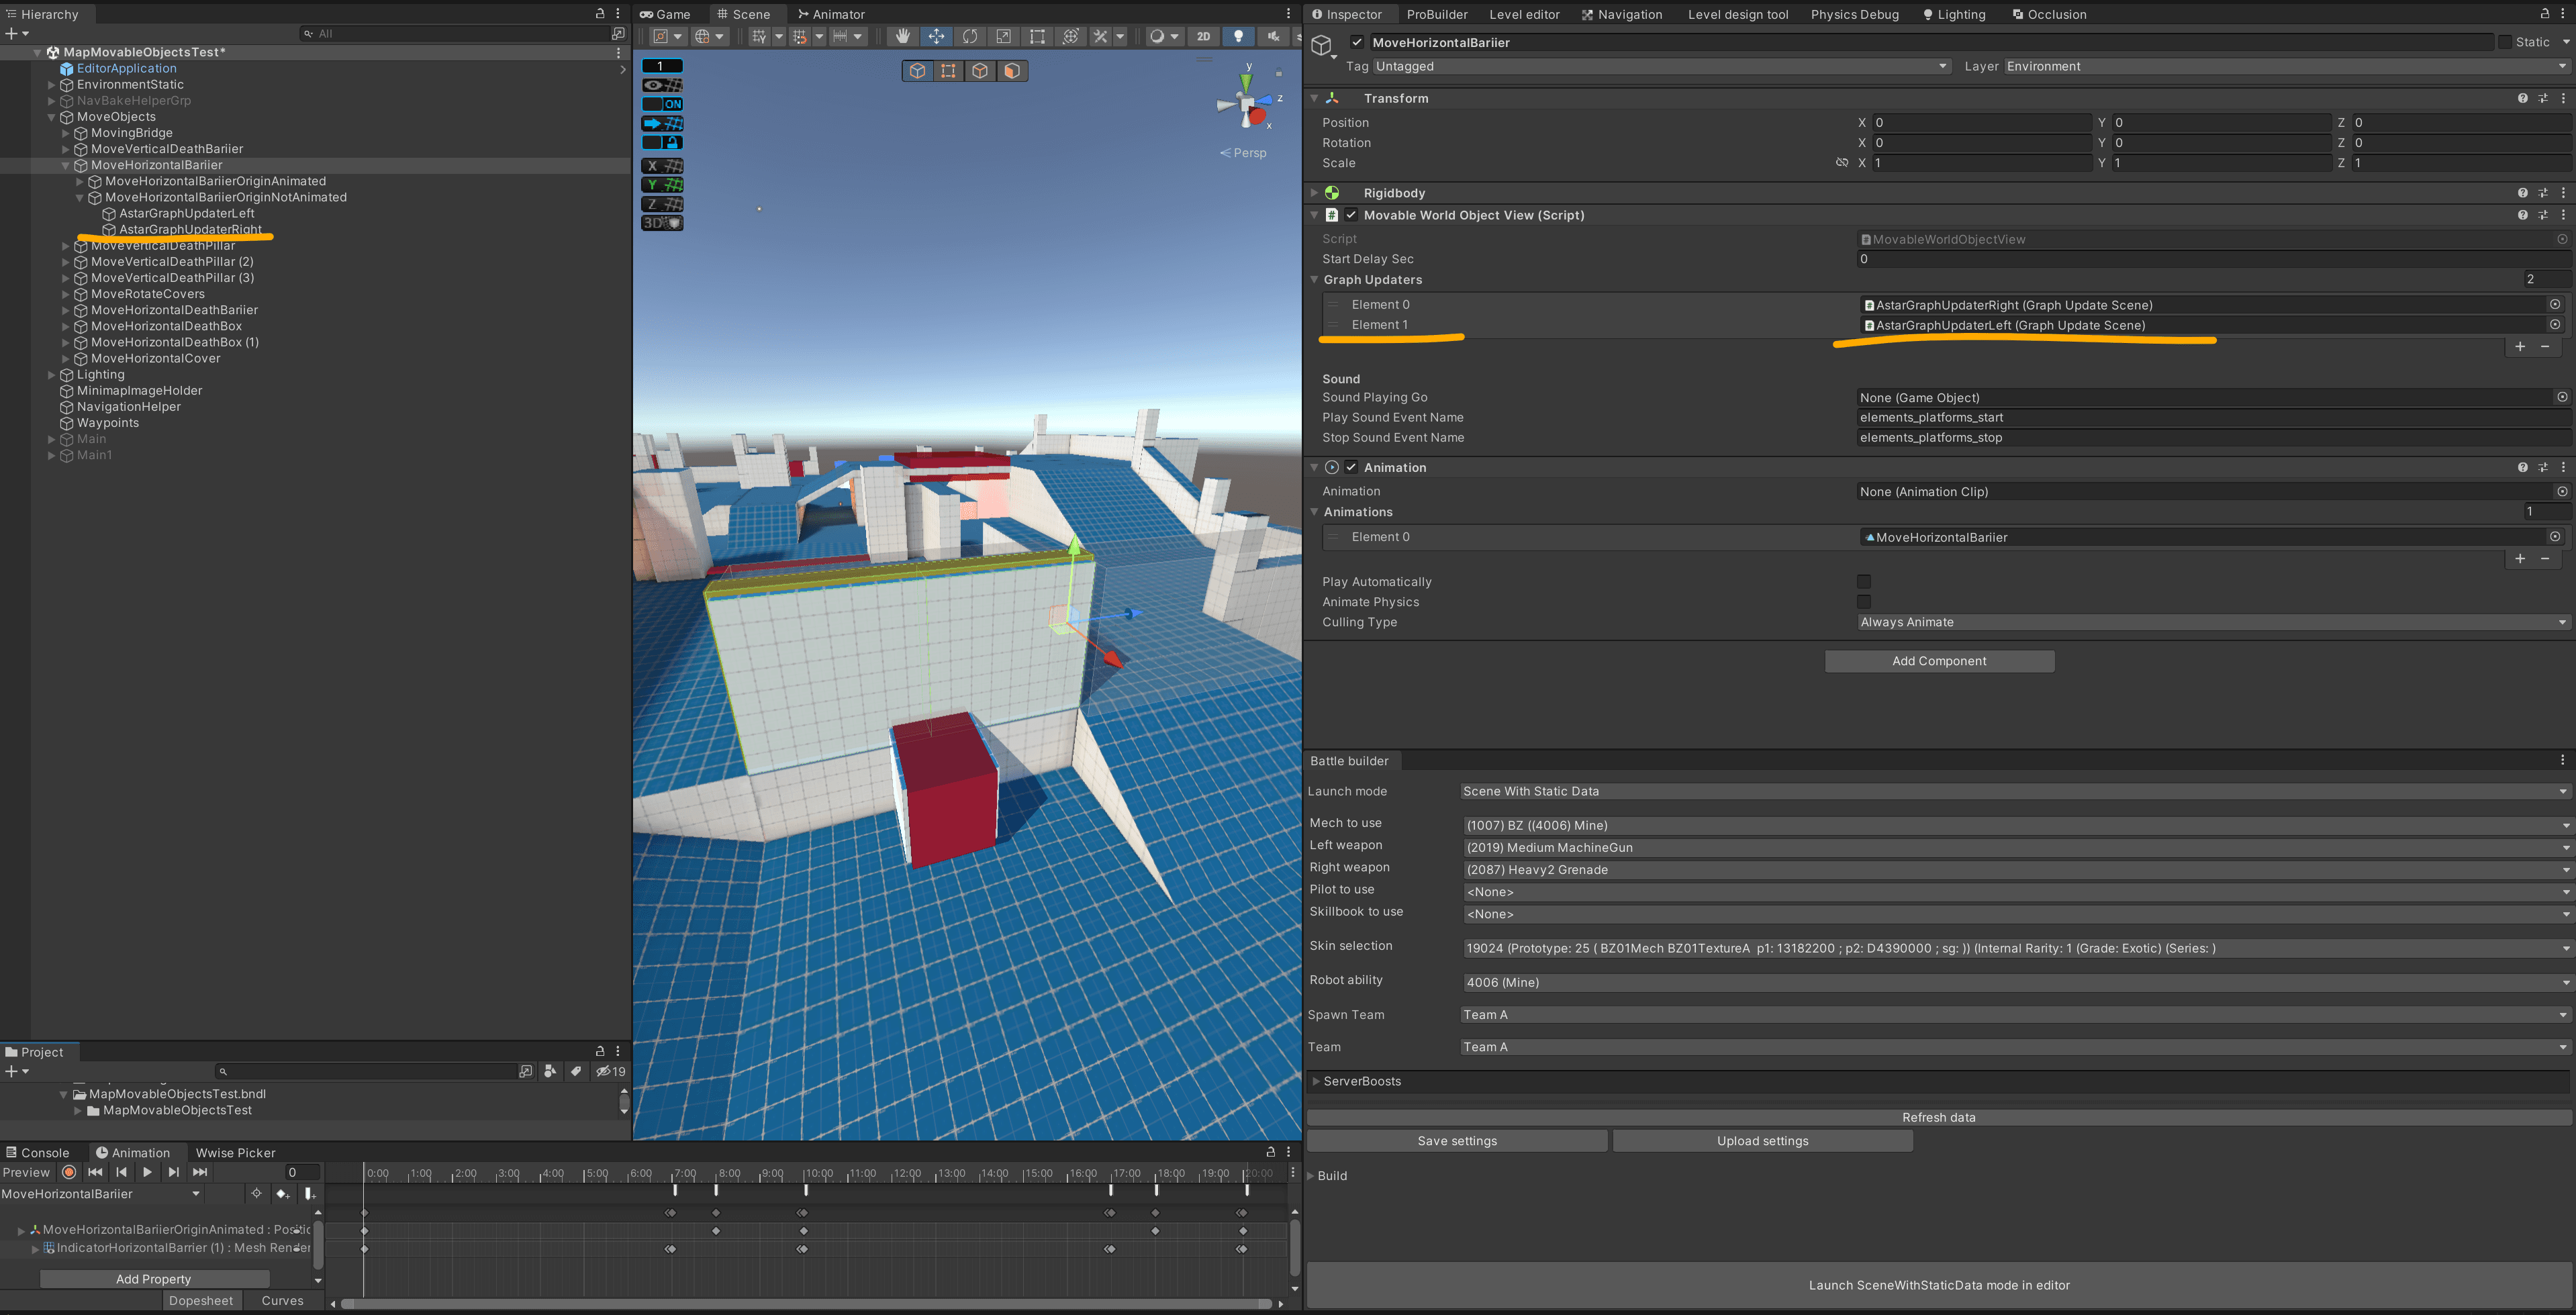 Assigning numbers to the Graph Update elements in the Element0 and Element1 fields, respectively
The example shows that the AstarGraphUpdaterRight element is placed in the Element0 field, and the AstarGraphUpdaterLeft element is in the Element1 field. These are numbers 0 and 1, respectively. While the items are configured, we now need to make them work synchronously with the movement of the object. For this, we use the event system for animation.
There are three types of interrelated events that must be placed sequentially:
- AnimEventOnPrepare: Warns the static GraphUpdate object that the animated object will move (according to numbering). Specifying the number of the object to be activated.
- AnimEventOnMove: Signals that an animated object has started moving. Both the current (in AnimEventOnPrepare) and the next static (in AnimEventOnStop) GraphUpdate object are activated, according to the numbering. Specifying the number of the object to be activated.
- AnimEventOnStop: Stops the animated moving object, deactivating the previous static GraphUpdate object. The next object that became current, according to the numbering, remains activated. Specifying the number of the object to be deactivated.
When the static GraphUpdate object is activated, it disables the Astar navigation nodes (makes the zone unwalkable for bots). And when deactivated, it turns on again. Then the zone becomes walkable.
So that the GraphUpdate object knows when and in what order it should turn the navigation nodes on and off, we need to correctly specify our events in the animation and assign them numbers according to which Element fields I put the GraphUpdate objects in. In our case it is AstarGraphUpdaterRight = Element0 with number 0 and AstarGraphUpdaterLeft = Element1 with number 1.
The moving wall from the previous screenshot has several different static positions when the movement ends. That is, we have two corridors: A and B. The moving wall closes corridor A for a certain time, then moves and, after stopping, closes corridor B. Simultaneously, it opens corridor A and vice versa. So, in the spot where the wall is located, the Astar navigation nodes are turned off and the events look like this: AnimEvent data-removed=0 >>> AnimEvent data-removed=0 >>> AnimEvent data-removed=1.
At this point, the wall has finished moving and has changed its position, closing the right corridor and opening the left one. In other words, AnimEventOnPrepare tells you that the wall will soon start moving to position 0 (AstarGraphUpdaterRight). Then the motion starts and AnimEventOnMove activates position 0 (while position 1 will still be active). Astar navigation nodes are now disabled in locations with static AstarGraphUpdaterRight (0) and AstarGraphUpdaterLeft (1) objects. After all, we remember that activated AstarGraphUpdater = disabled Astar navigation nodes.
Then the wall stops and executes AnimEventOnStop, which deactivates position 1 (AstarGraphUpdaterLeft, the zone becomes walkable) and leaves active position 0 (AstarGraphUpdaterRight, the zone becomes unwalkable). Now the wall must return to its original position, so we need to number the events according to the movement, inverting them: AnimEvent data-removed=1 >>> AnimEvent data-removed=1 >>> AnimEvent data-removed=0. This will be the end and the beginning of the looped animation. I get it, it looks confusing. I hope the gifs below will help figure it out.
Visualization of AnimEvent and GraphUpdater
The numbers 1 and 0 show the numbers of the corresponding GraphUpdater objects:
- Red: Navigation nodes are disabled, the object is activated
- Blue: Navigation nodes are enabled, the object is deactivated
- Yellow: Prepare to activate the object
How does this process directly affect Astar navigation? In the gif, you can see how the nodes and the grid around them turn on and off. Blue nodes and grid means navigation is on, red is off.
 Visualization of AnimEvent and GraphUpdater operation and impact on Astar navigation
If I want to make a vertical platform that, unlike a horizontal wall, forms a passage and does not cover it, I need to be careful and correctly place the GraphUpdater objects in the Element fields. Or change the numbering of animation events. I think it is more convenient to place the objects in the Element field inversely because of the example with the wall. The main thing is to remember that now our platform (presumably the wall) deactivates the GraphUpdater object when the movement ends and turns on the Astar navigation nodes. So, with the same numbering of events (AnimEvent data-removed=0 >>> AnimEvent data-removed=0 >>> AnimEvent data-removed=1 >>> AnimEvent data-removed=1 >>> AnimEvent data-removed=1 >>> AnimEvent data-removed=0)
I will put GraphUpdater objects accordingly: AstarGraphUpdaterTop=Element0 and AstarGraphUpdaterBottom=Element1.
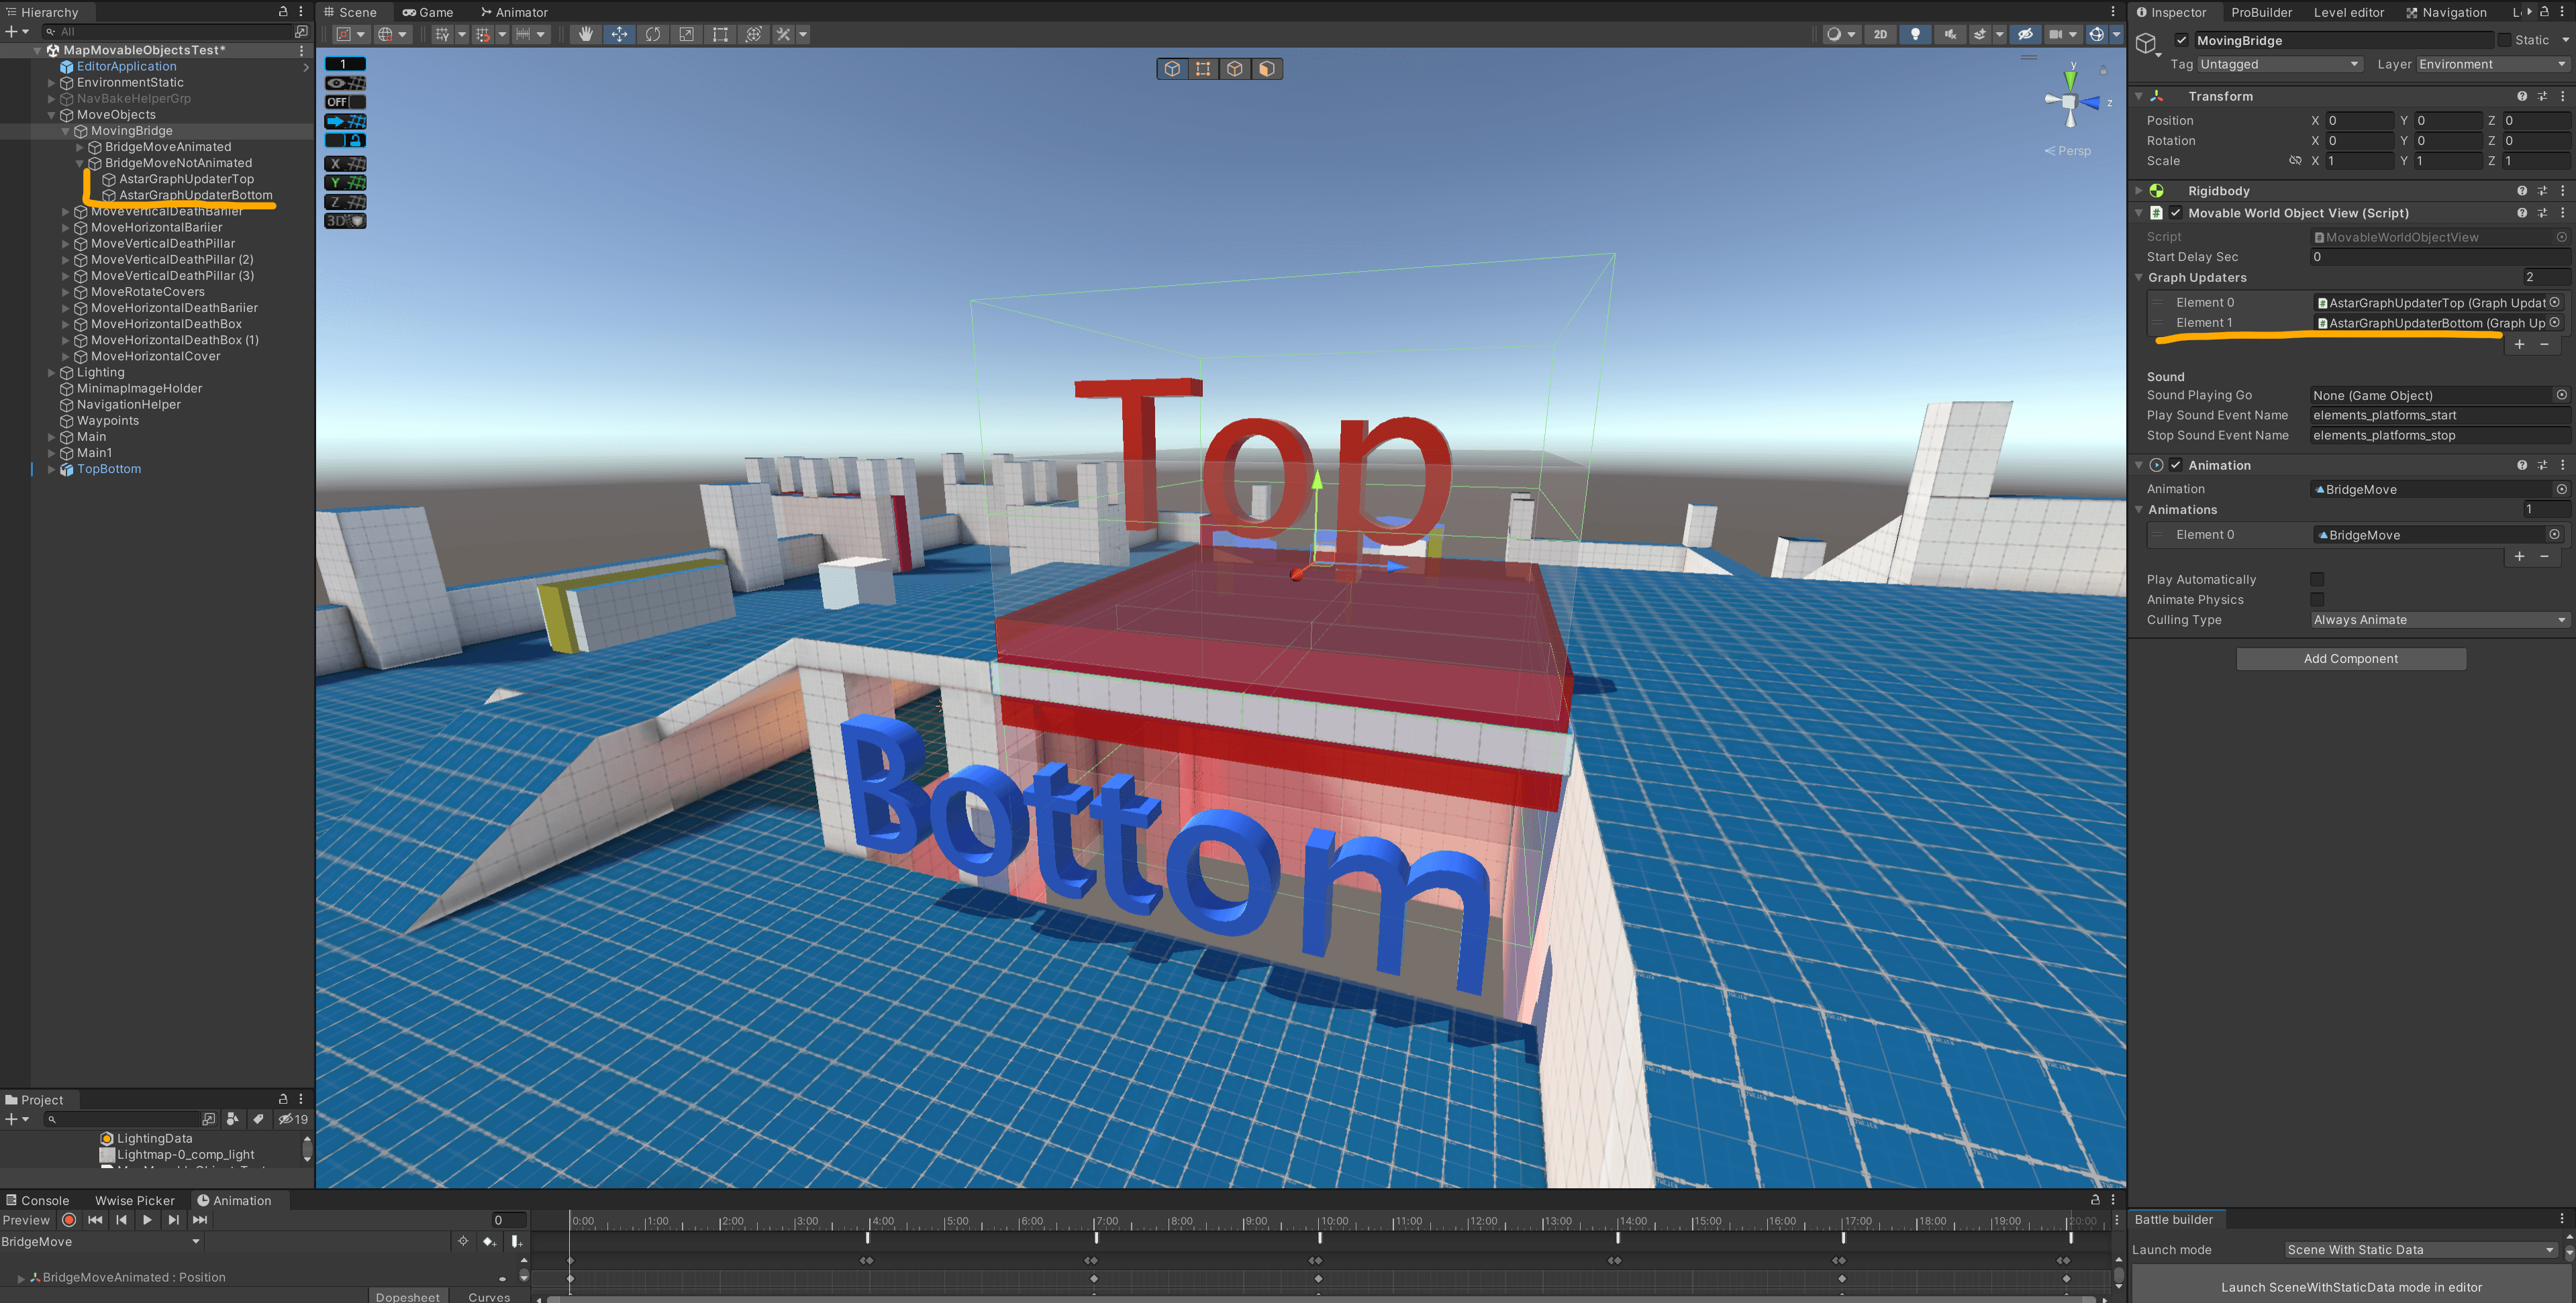 Location of GraphUpdater objects for a vertical platform
Top deactivated – navigation nodes are enabled
Bottom activated – navigation nodes are disabled
Location of GraphUpdater objects for a vertical platform
Top deactivated – navigation nodes are enabled
Bottom activated – navigation nodes are disabled
 Visualization of AnimEvent and GraphUpdater operation and impact on Astar navigation for a vertical platform
In the future, we plan to improve this system and make it more convenient.
6. Adjustment of moving objects on final versions of maps
As mentioned above, the final graphics are handled by the Environment Team. I worked on the mechanics of the moving objects and was on hand to support when the team had questions about the level design of the maps. The Environment and Tech Art Teams prepared the effects and textures for the moving objects, which we pre-approved so that I could customize the visuals. After receiving the first finished Singularity map from the artists, I started setting up object movement animations and visual effects.
Visual effects should perform the role of indication, warn the player about movement and danger. On the Singularity map, all moving objects that are dangerous have "veins" in the stone texture. These veins turn from a dark color to a bright red and thus signal the future movement of the object. An electric current effect is also added - an unknown red energy pulse that covers the object only during movement. This allowed us to illustrate that the object is not moving independently, but due to the influence of a destructive power, which has a threatening appearance and is associated with red-hot coals.
 Indication of a dangerous moving object on the Singularity map
To show a safe moving object, we used blue veins and added blue crystals to the structure of the object. They also change their brightness depending on the state of the moving object and do not cover it with an energy flow effect. According to our logic, these objects are set in motion by the blue crystals, a kind of battery that already contains a charge of other safe energy that does not extend beyond the crystals and does not affect Mechs.
 Indication of a safe moving object, Singularity map - Final
This is how I set up the other two maps: Equilibrium and Constant. Thanks to the preparation of mechanics and their testing, while the final graphics of the maps were being made, further work on setting up animations, effects, work with scripts and navigation passed without any issues. Therefore, in order not to repeat the process of setting up navigation and dangerous colliders again, I will show the operation of some moving objects on the final versions of the maps.
 Operation of vertical platforms with Astar navigation and activation of dangerous colliders on the map “Equilibrium"
 The operation of vertical platforms from the player's camera on the map "Equilibrium"
 The operation of other moving objects from the player's camera on the map "Equilibrium"
 The operation of moving objects in the scene on the map "Constant"
 The operation of moving objects from the player's camera on the map "Constant"
We wanted to warn the player about the danger not only visually but also with sound, so I also worked with the Audio Producer. The idea was that at the moment when a dangerous moving object is covered with energy, players would hear it crackling. This resulted in the Movable World Object View script overflowing with new possibilities and fields for adding sound effects.
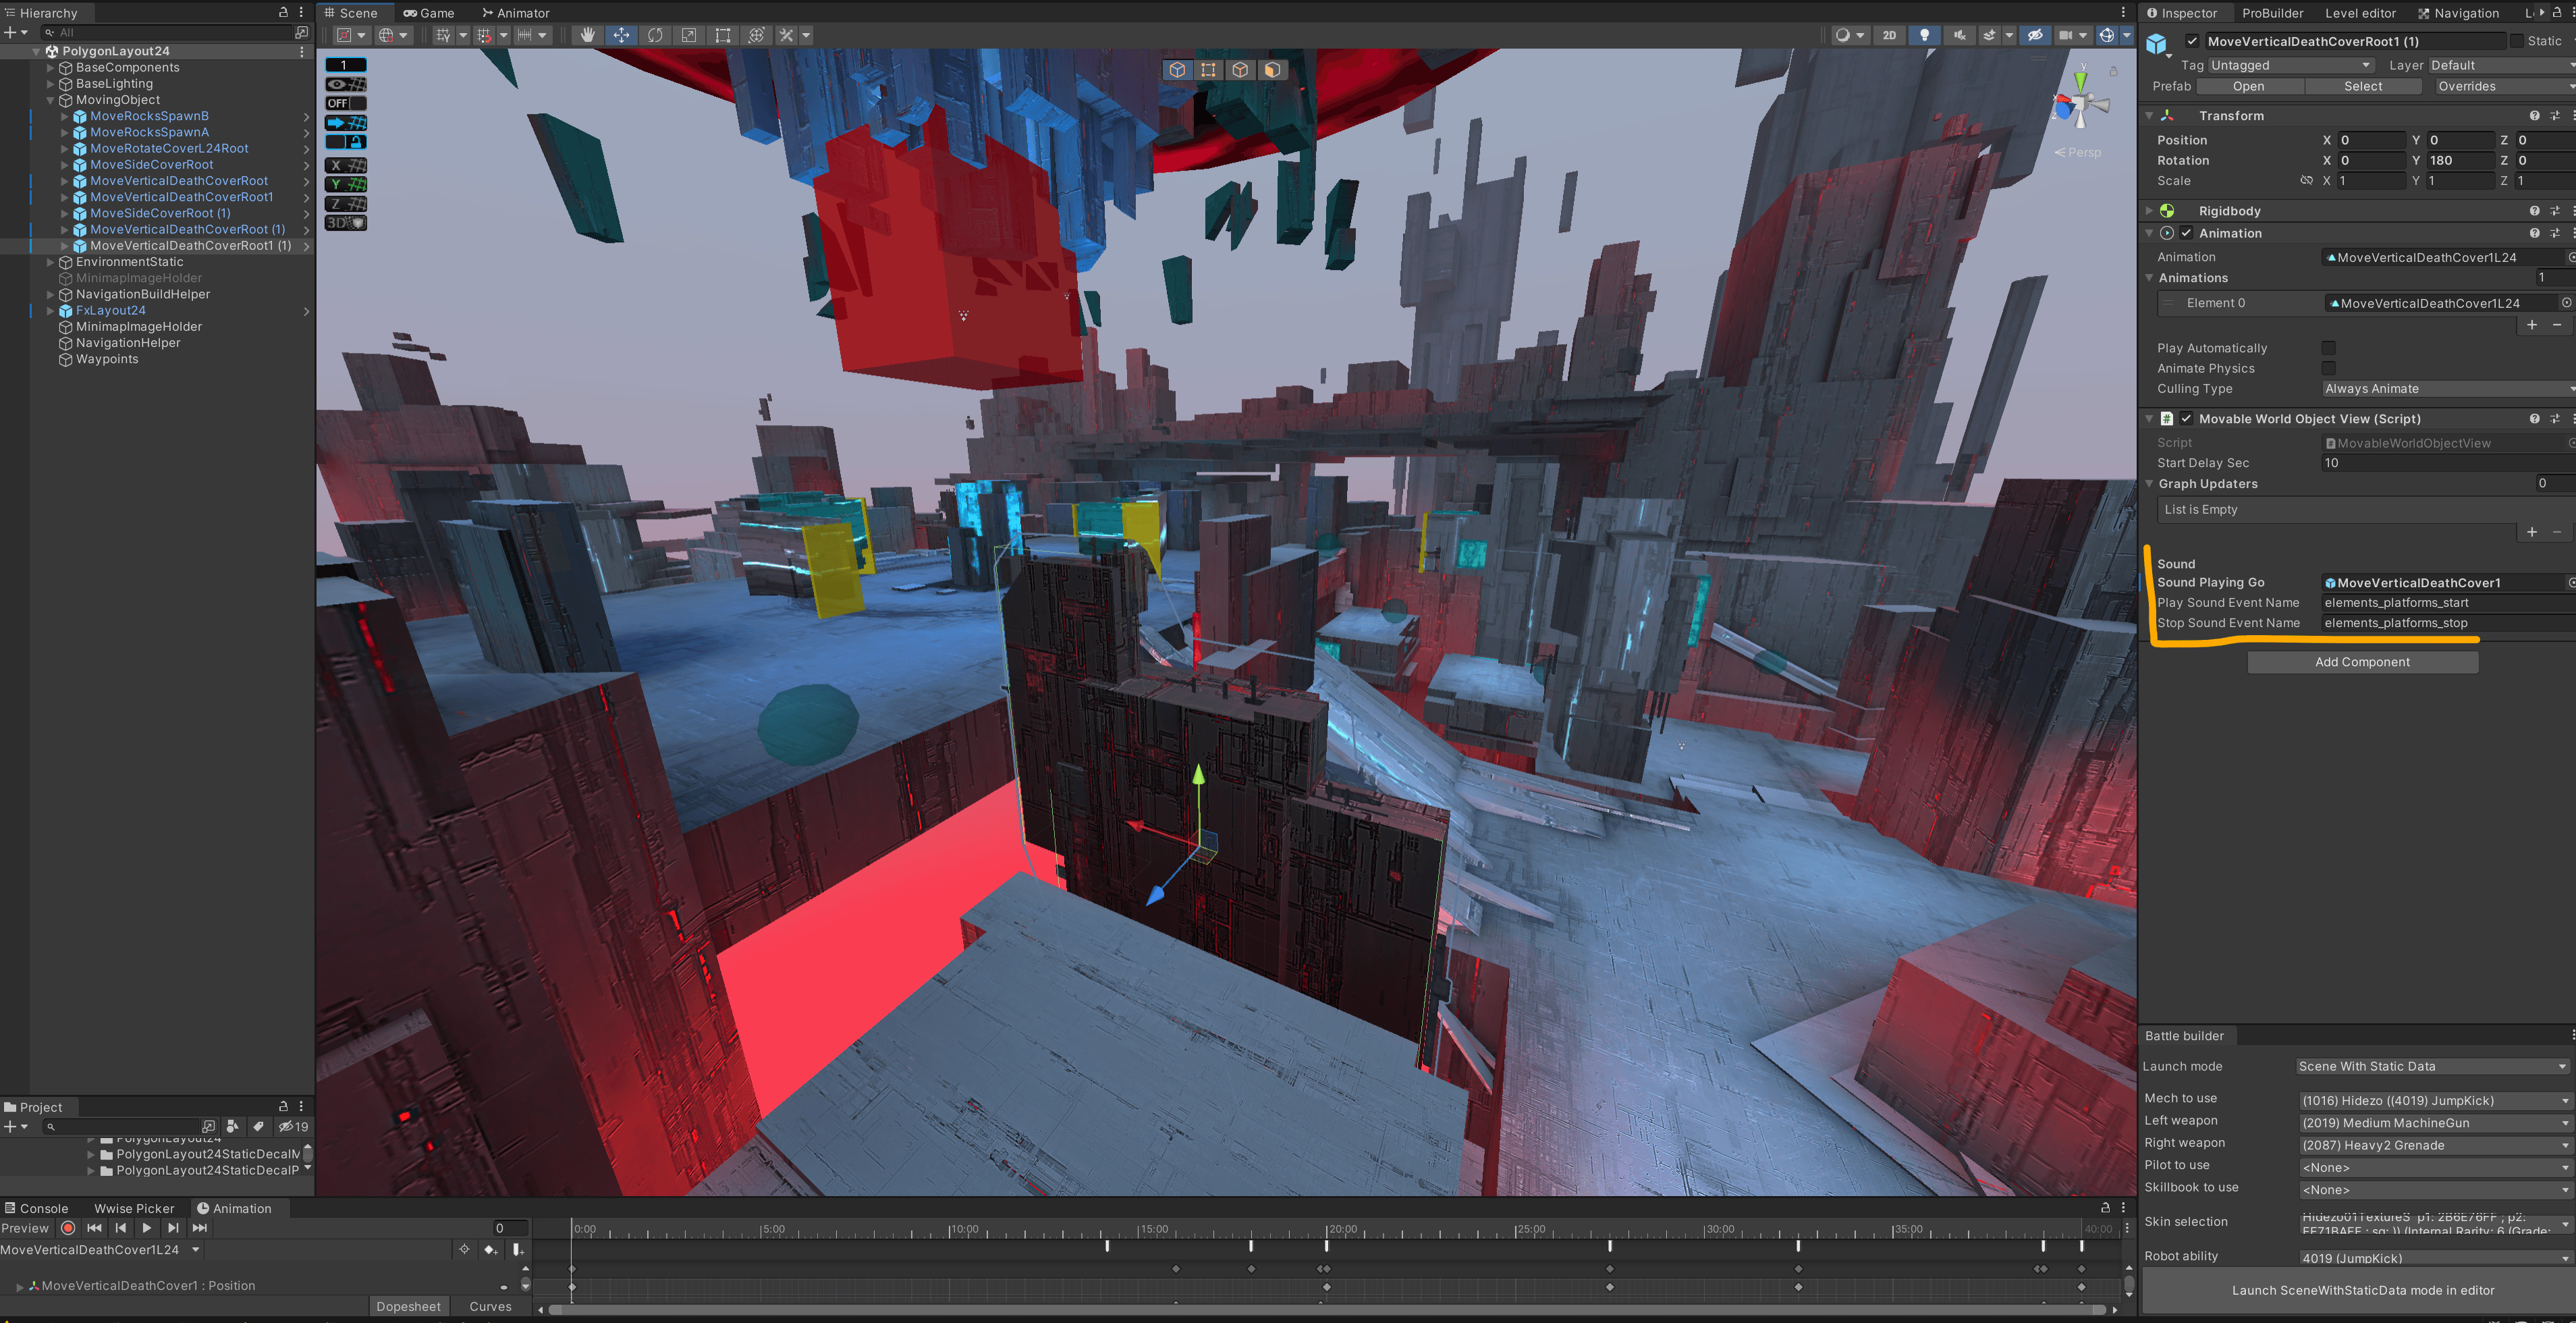
Added sound to Movable World Object View script on the Singularity map
Dangerous moving object sound on the Singularity map
When everything was ready, I did a final playtest of the maps. And finally, the most awaited stage had come - handing over the maps to the QA Team. I created a document describing the new mechanics and issues that may arise, and with hope in my heart I submitted the maps for testing. It was not without issues, but mostly they were small and quickly fixed.
In the next step, I brought the videos and builds to our Game Writers to agree on the final map names and rename the Level Presets from Dev names to Prod names. And, as a nice finishing touch, I provided input for the Motion Design Team who created great trailers for the release of the new maps Singularity, Equilibrium and Constant.
Conclusion
YouTube trailer comments, Discord feedback, and analytics data showed that players loved the new maps. Community feedback always motivates us to improve the project, experiment and implement new ideas. Therefore, I am sure that the team and I will continue to develop the approach with moving interactive objects in the future.
Thank you for reading this long article to the end. I hope that you found it not only interesting, but also useful.