Creating the Sculptures of RAID: Shadow Legends Champions
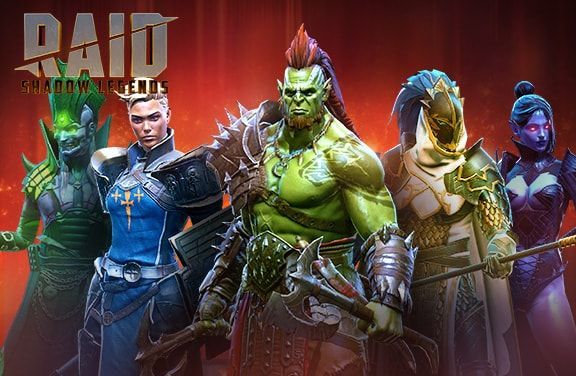
RAID: Shadow Legends is a mobile MMORPG set in an exciting dark fantasy world. It’s the most large-scale and complicated project ever produced at Plarium Ukraine. The game is developed and maintained by more than 200 employees. Since launch, RAID has gained an audience of 76 million players across 195 countries!
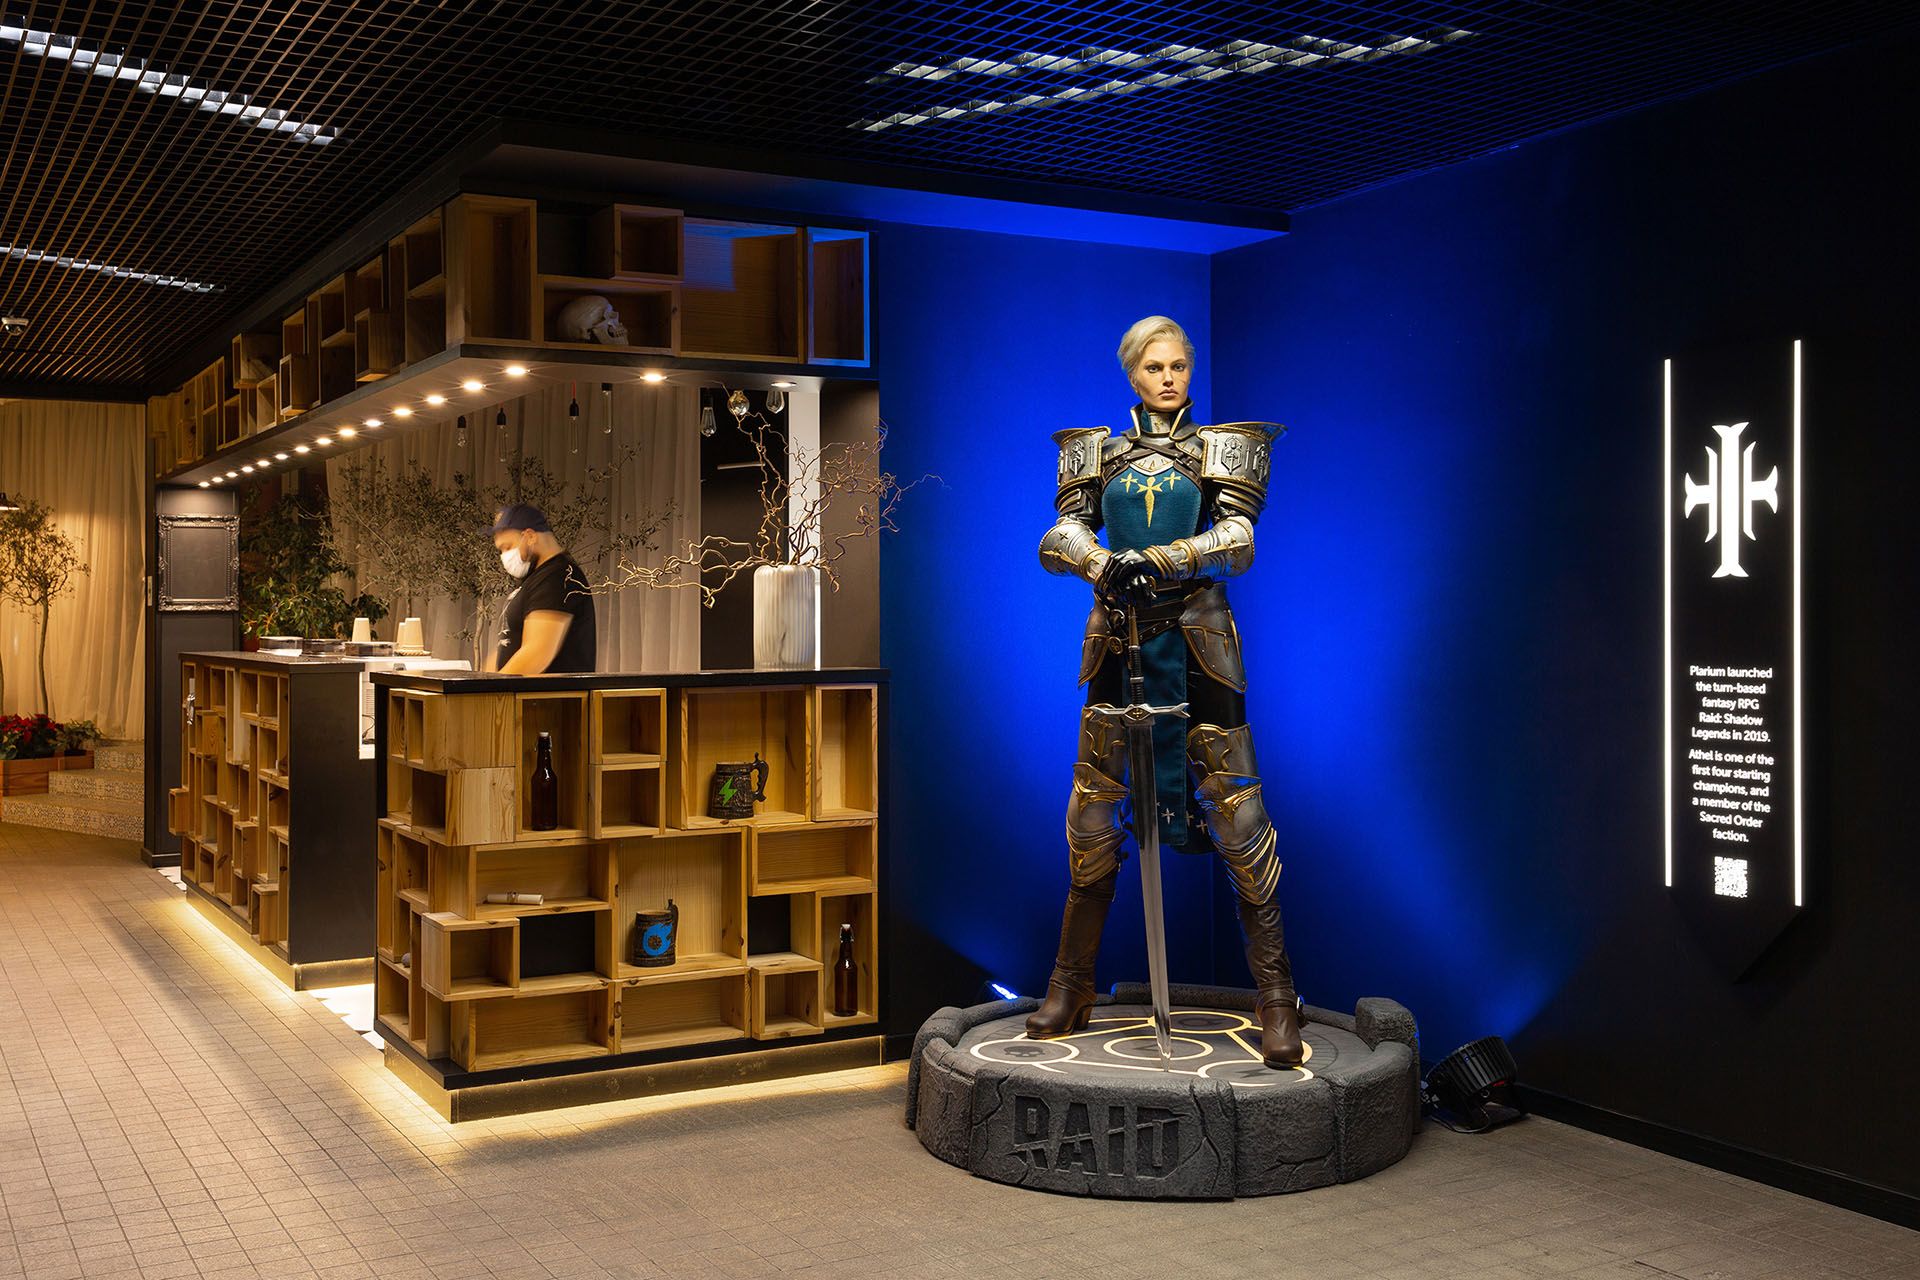
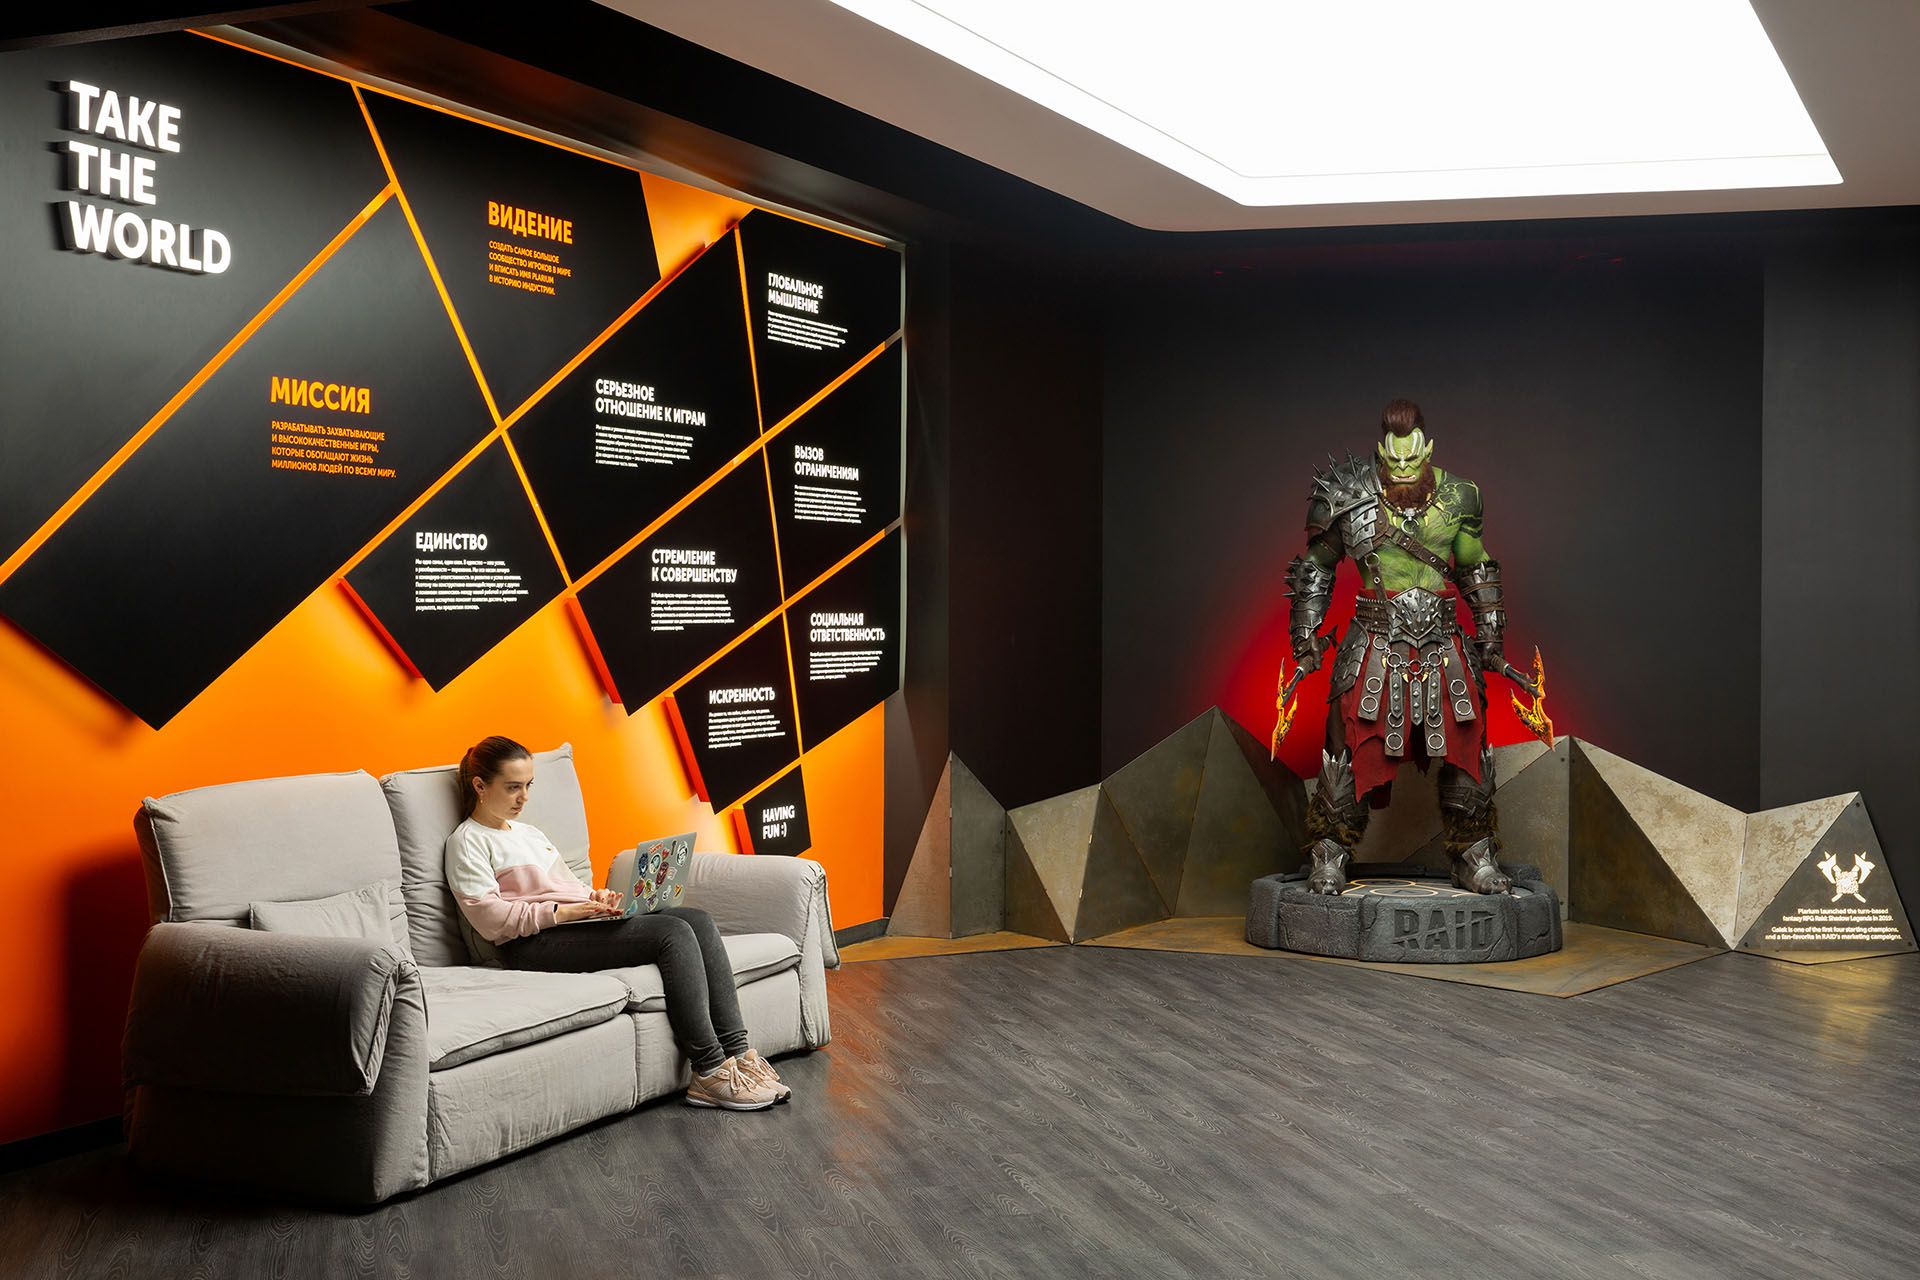
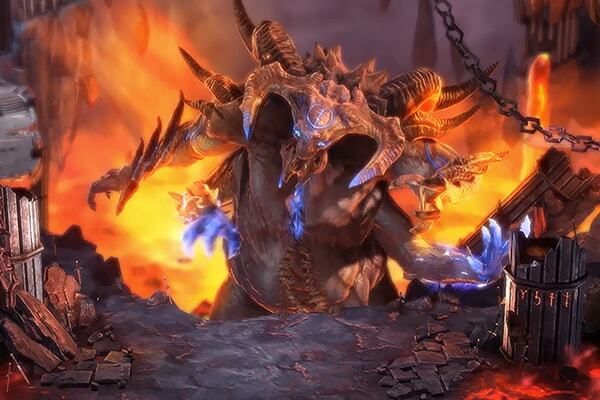
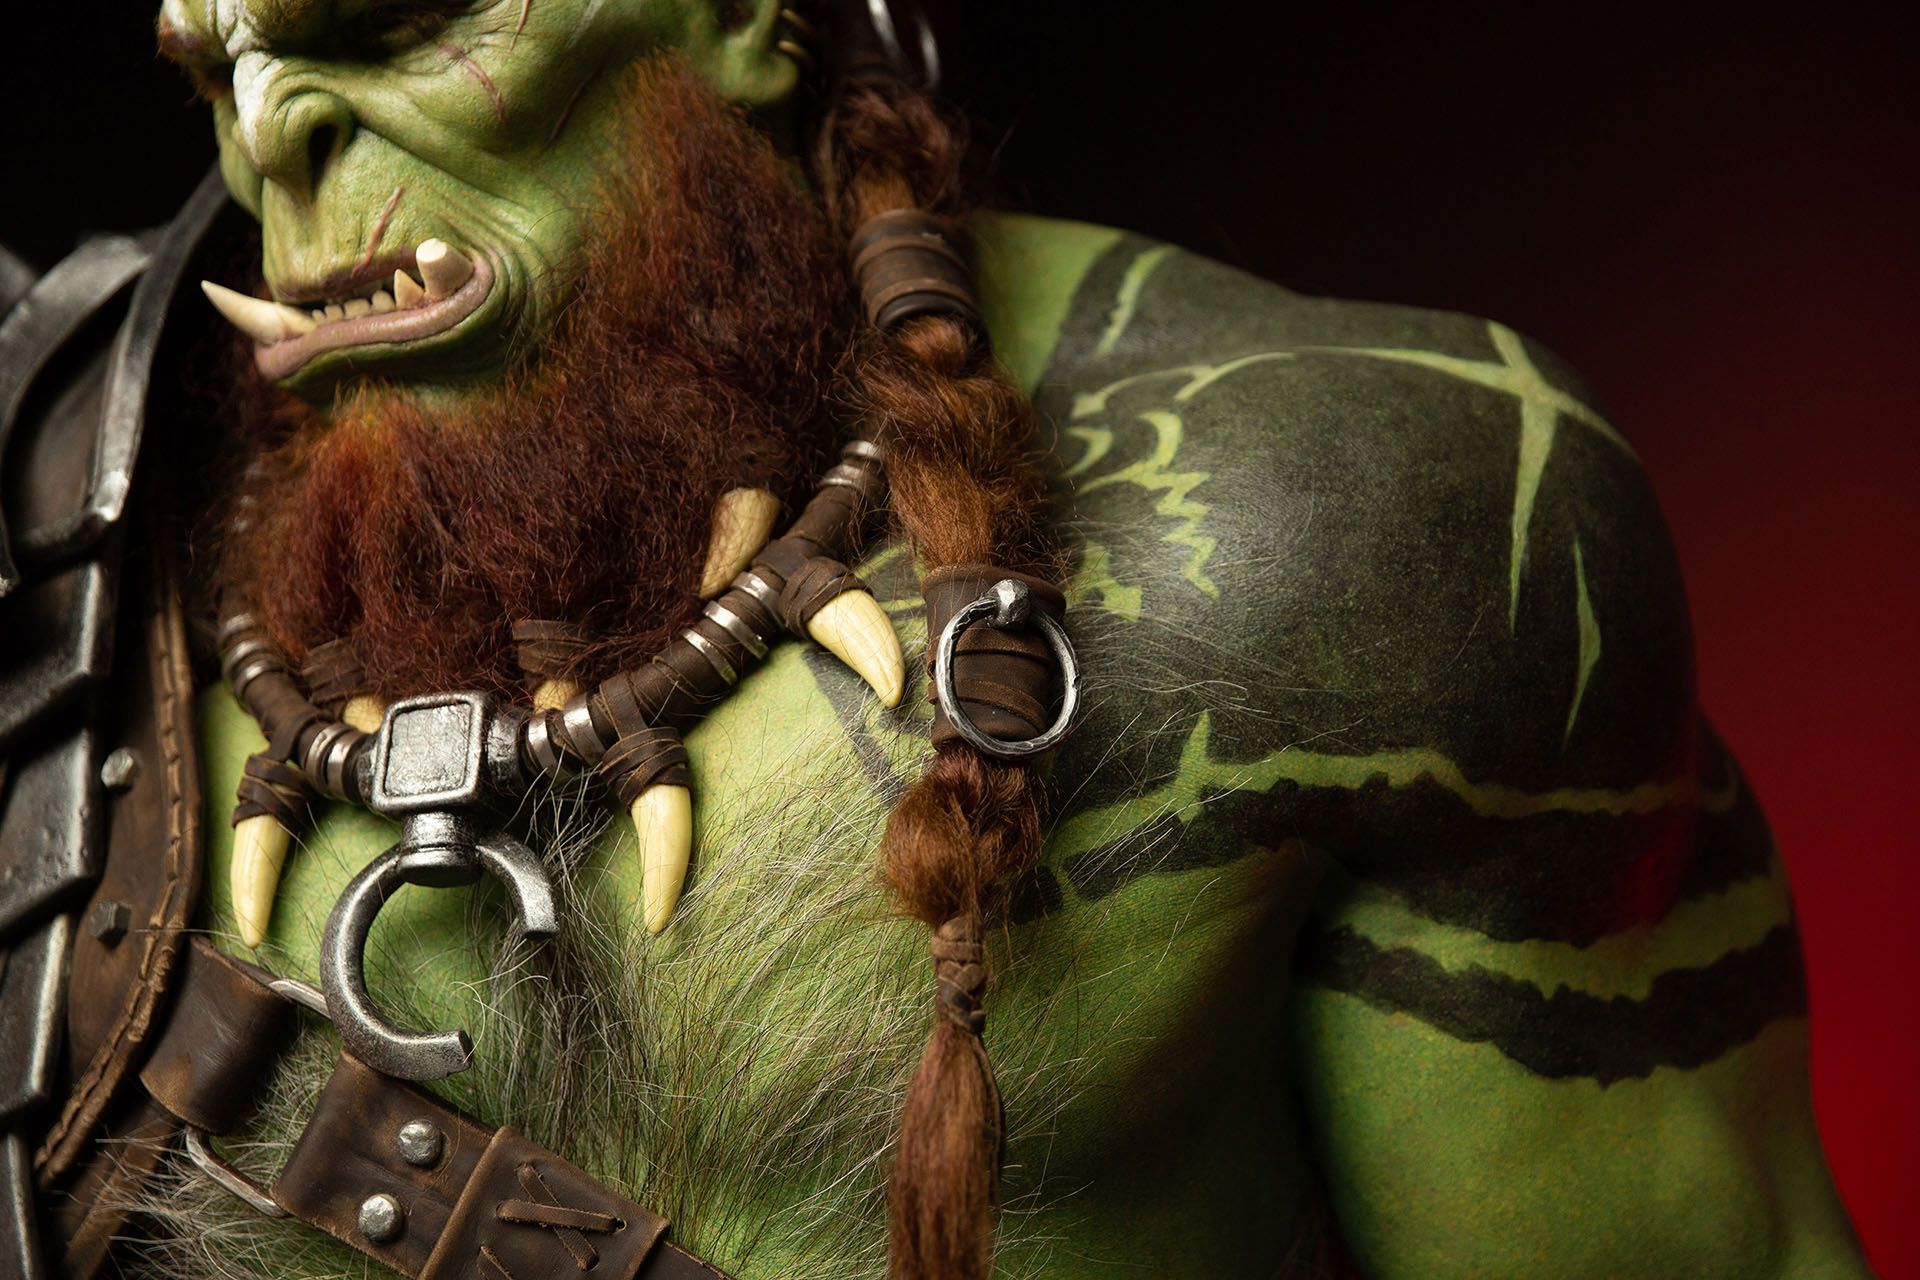
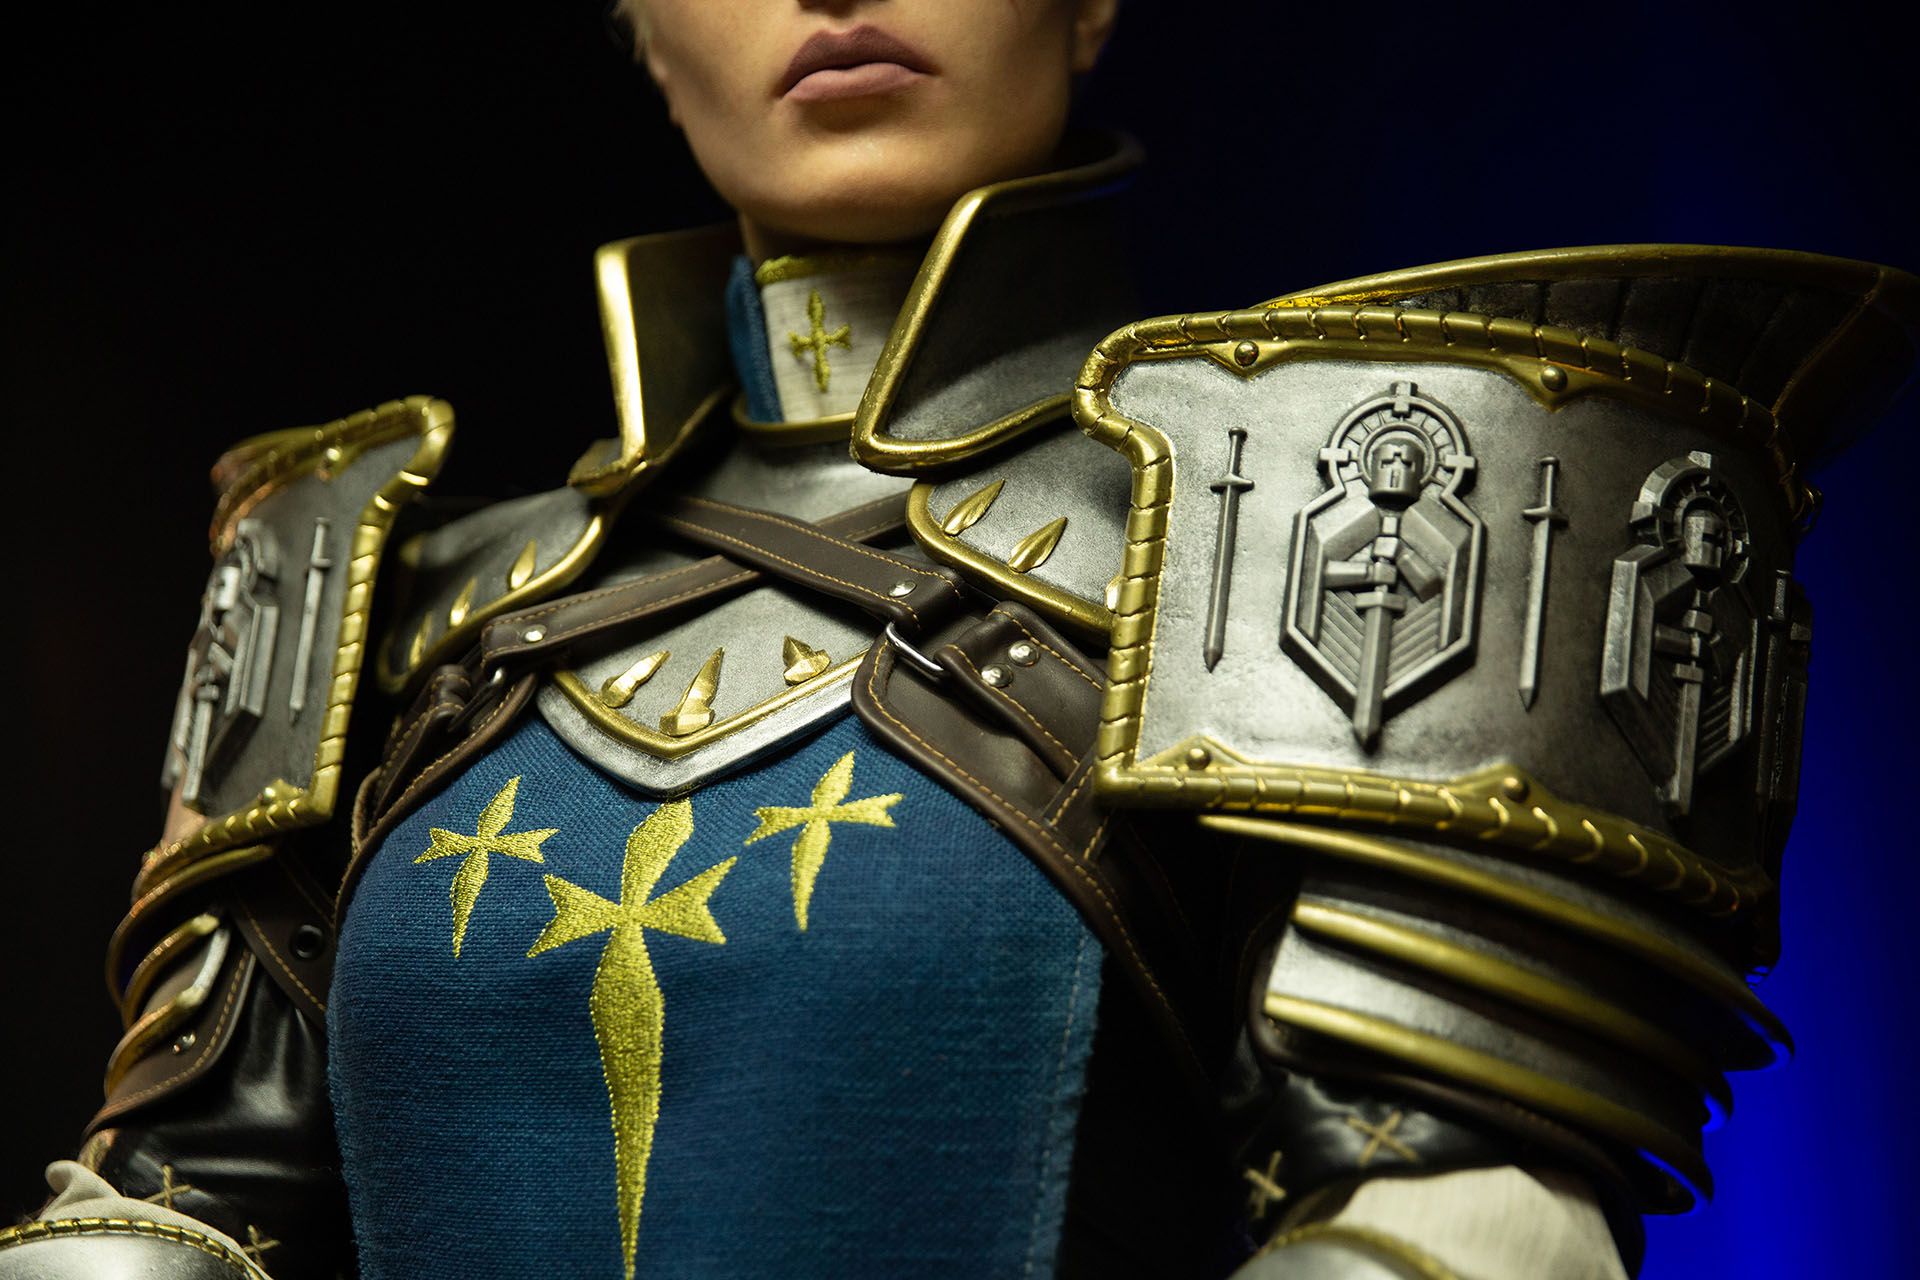
One of RAID’s advantages among other mobile projects in this genre is the high quality of its visual content. The world of RAID is inhabited by more than 500 characters, and every piece of armor and every scar is backed by the game’s story. To have an opportunity to connect with this story in real life, we installed the two most recognizable Champions at our Plarium Kharkiv studio: the orcish warrior Galek, and the knightly Athel of the Sacred Order.
How to Bring Digital Characters into Reality
It’s not the first time we installed sculptures of in-game characters at our studio: the entrance to Plarium Kharkiv is guarded by Cerberus, a robot from our first MMO strategy game, Total Domination. It’s made of metal, weighs 800 kg, and speaks three languages. But Cerberus is a giant sci-fi robot, while our heroes from RAID: Shadow Legends are a pair of fantasy warriors. We weren’t going to be able to take the same approach.
First Step: Gather a Dream Team
Creating sculptures is a complex, multi-stage process. While artists and CG specialists at Plarium Kharkiv could handle the creation of the Champions’ digital designs, we were going to need to find some sculptors who could turn data into reality. After some searching, we found just the team: the Ukrainian Creative Association “Armor”, skilled craftsmen who have even worked with Warner Bros. Entertainment. Between Armor and Plarium, more than 20 experts were involved in this ambitious project.
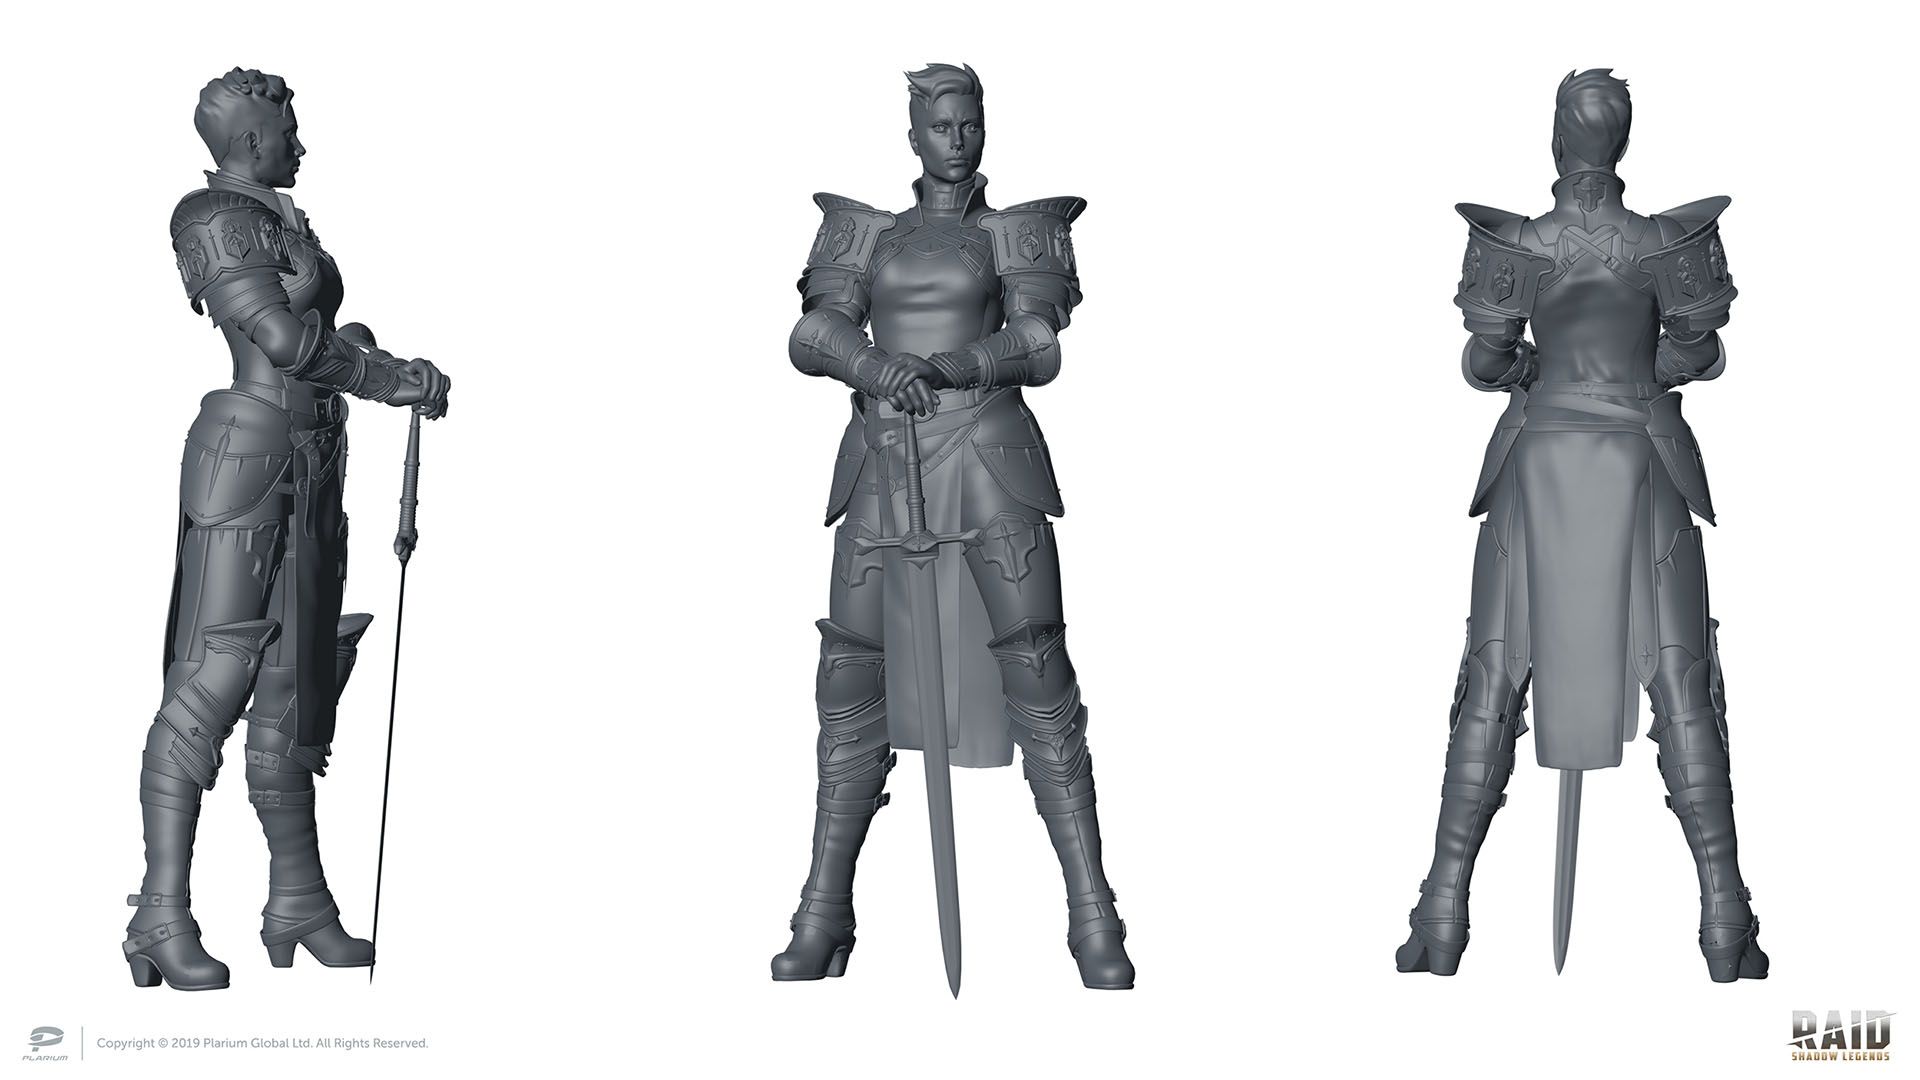
Second Step: Refine 3D Models
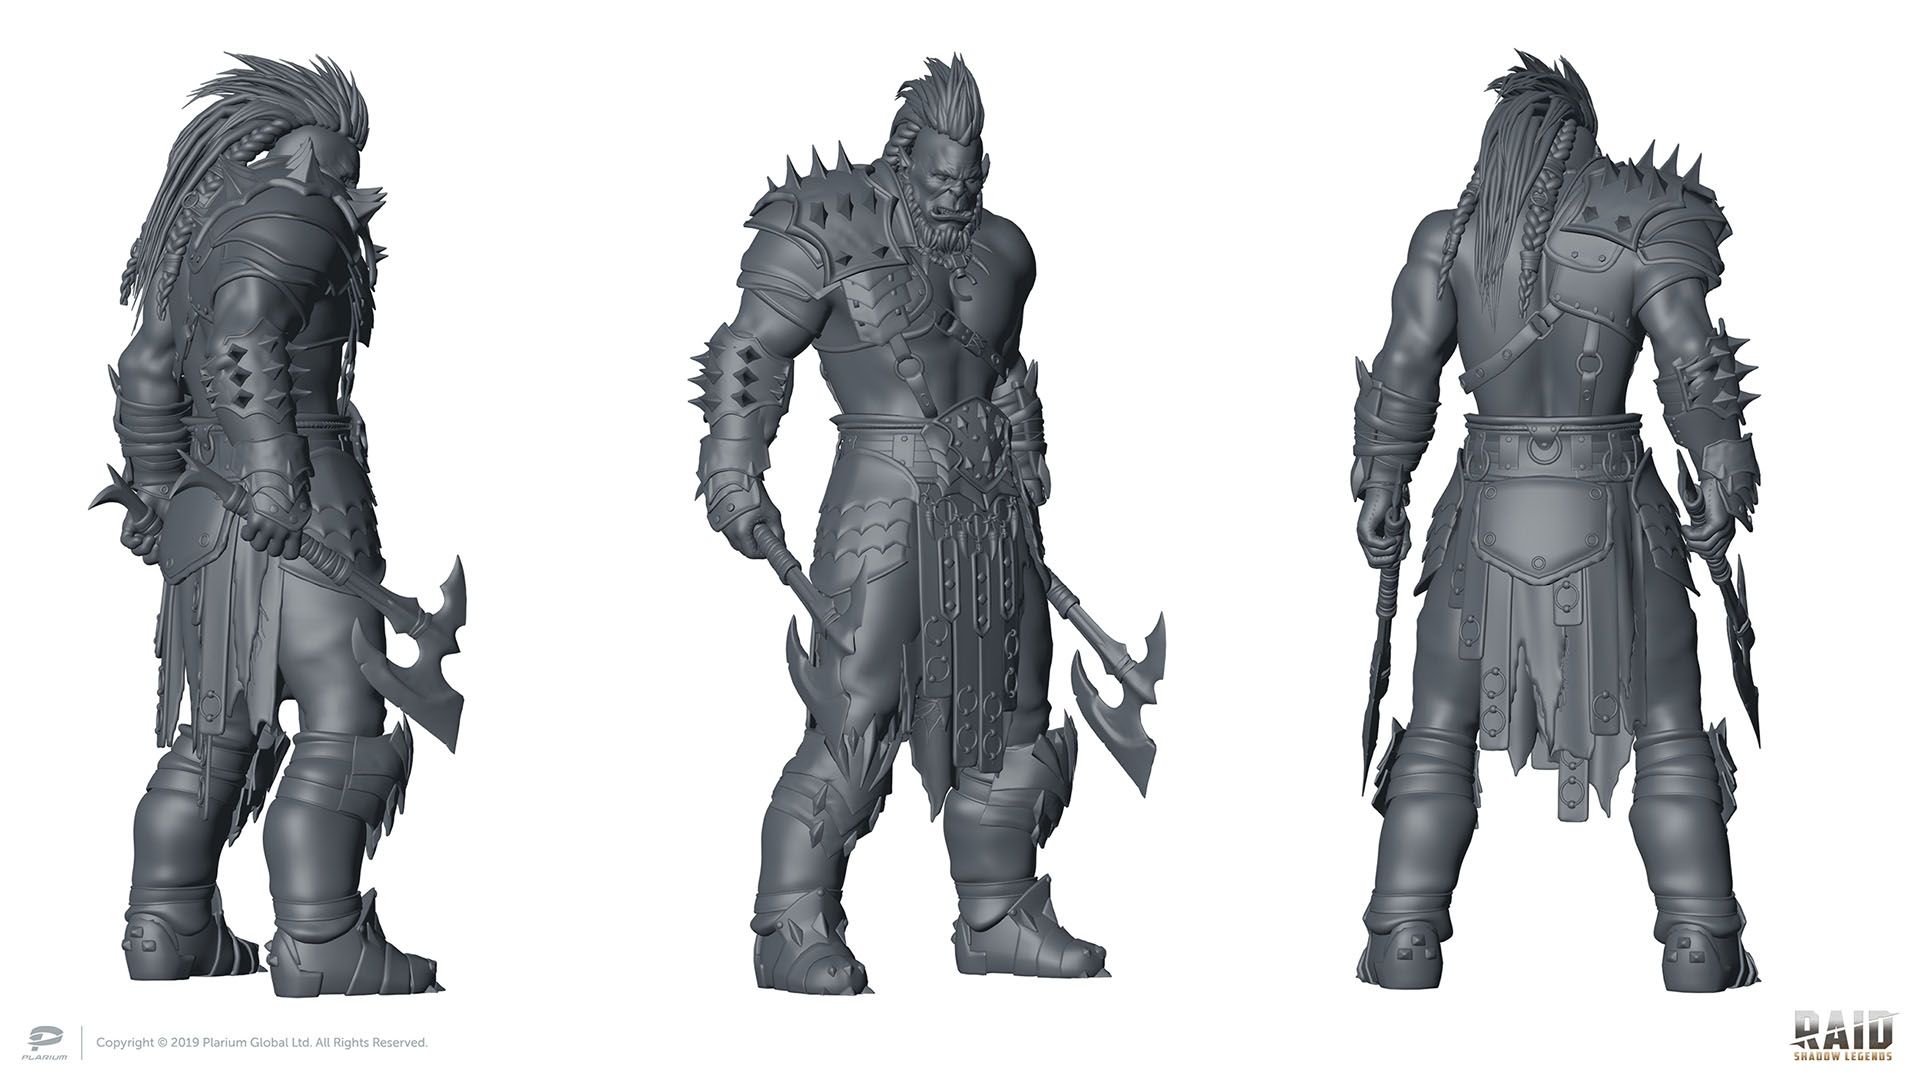
These sculptures were going to be huge, and so we were going to need to use a level of detail we’d never even approached before. This stage had us hunting down the highest-resolution assets we had on hand, which turned out to be a pair of high-poly 3D models we’ve previously used in our cinematics.
As expected, these ultra-high-detail models were good for cinematics, but lacked some minor details that would be clearly visible on a 2-meter statue. Athel’s actual body was undefined - her model just showed her clothing, there were no extra polygons underneath - and the gear on Galek’s back had been neglected since it really didn’t get much screen time. CG specialists from our Video Production Department stepped in to help, refining dozens of minor details in the physique and the equipment of our champions.
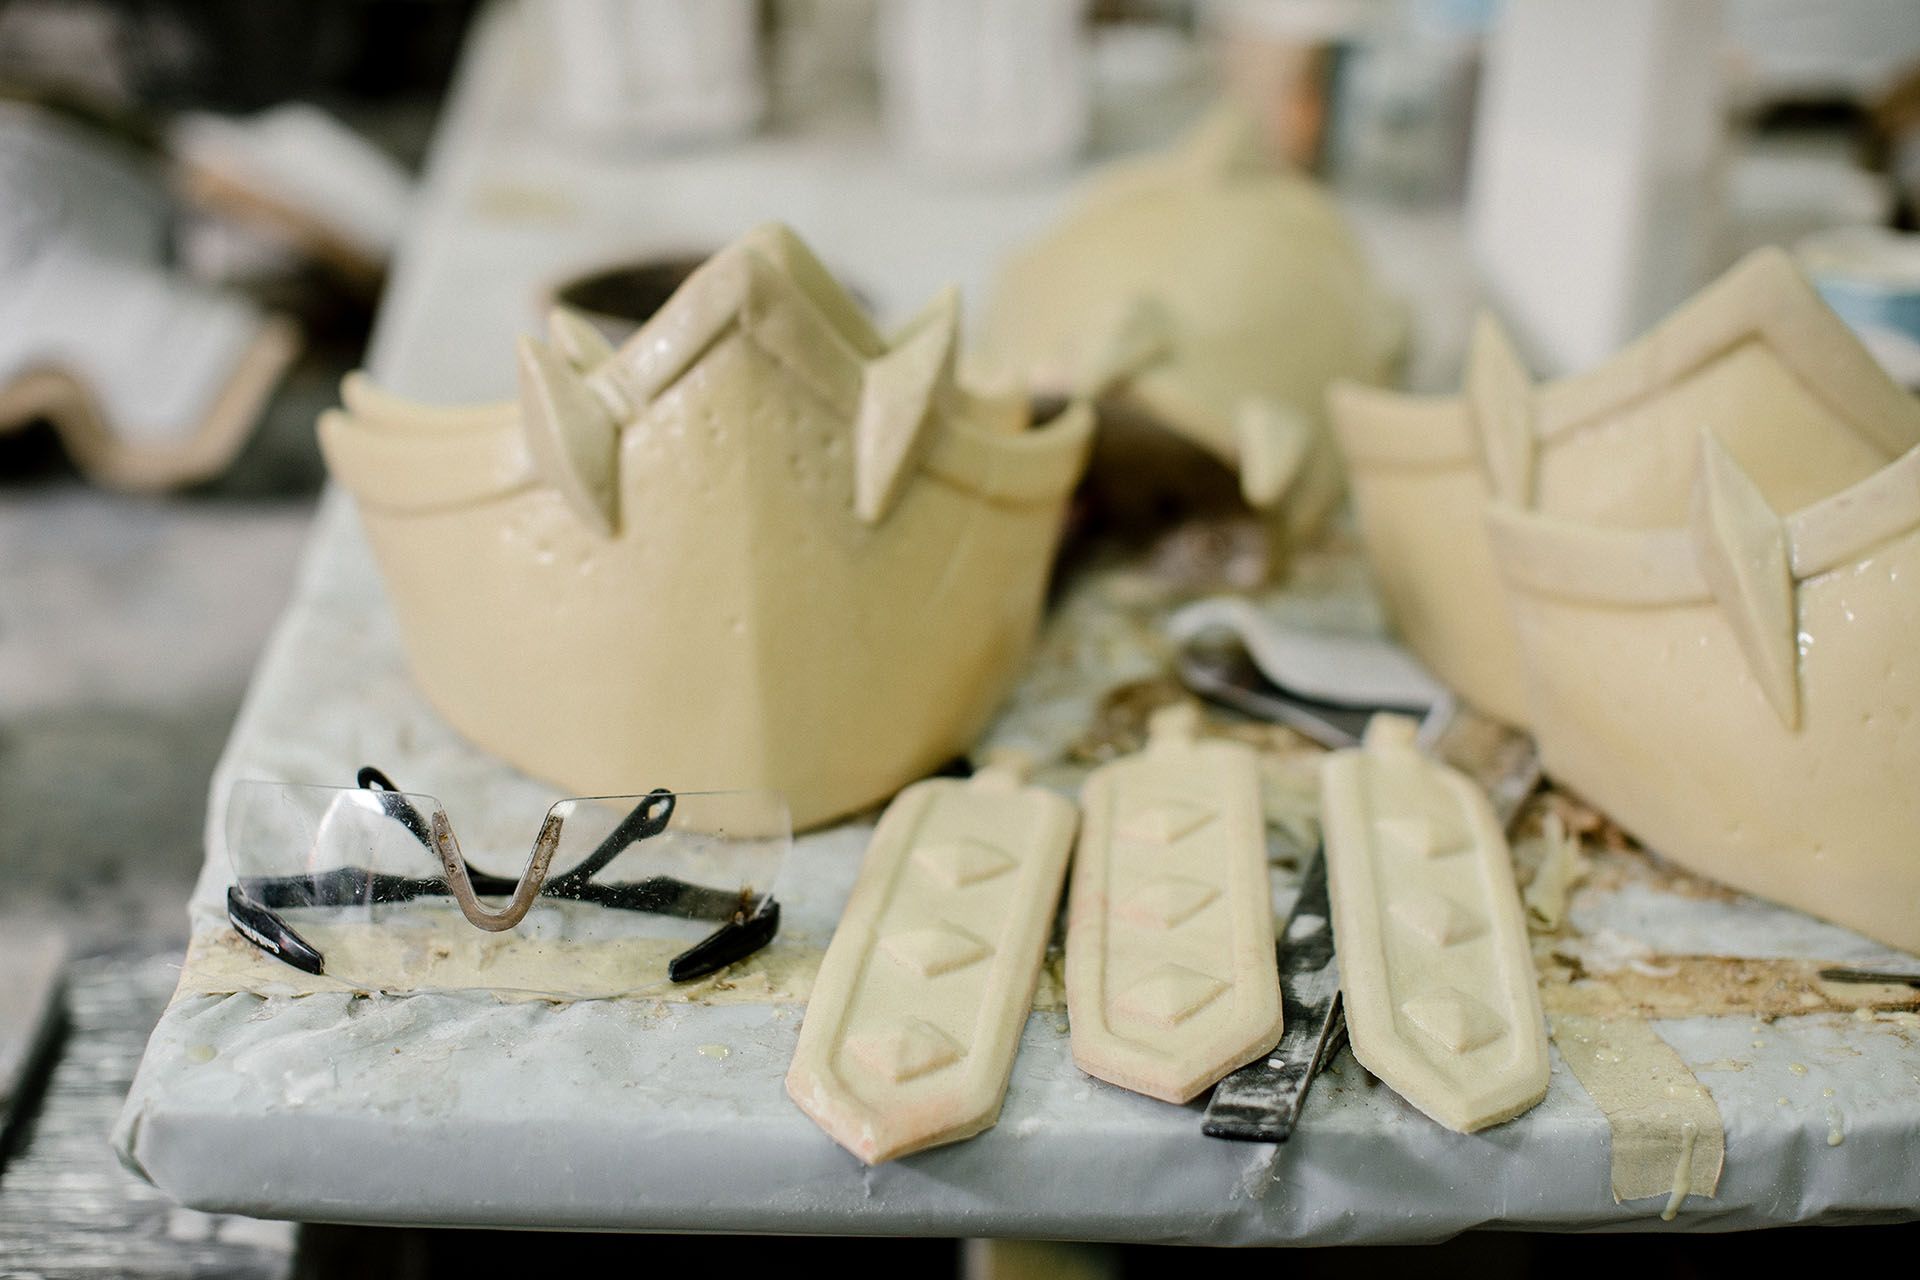
Three-dimensional models were required for 3D printing and milling of rough versions of the sculpture called blanks, or workpieces. These workpieces were going to be built in two major phases: first, they were going to print out and construct the bodies of our characters, then they were going to work on the armor and mount it on the sculptures. The main body parts would be made of extruded polystyrene foam, while the blanks for the armor would be made of medium density fiberboard (MDF).
Third Step: Render 3D Models
The models alone were enough to make the workpieces, but to get all the details just right, we would also need to produce some high-quality renders to exhibit the characters’ scars, clothing, and armor elements. To make sure all those details were visible, the renders needed to have neutral lighting and the maximum possible resolution.
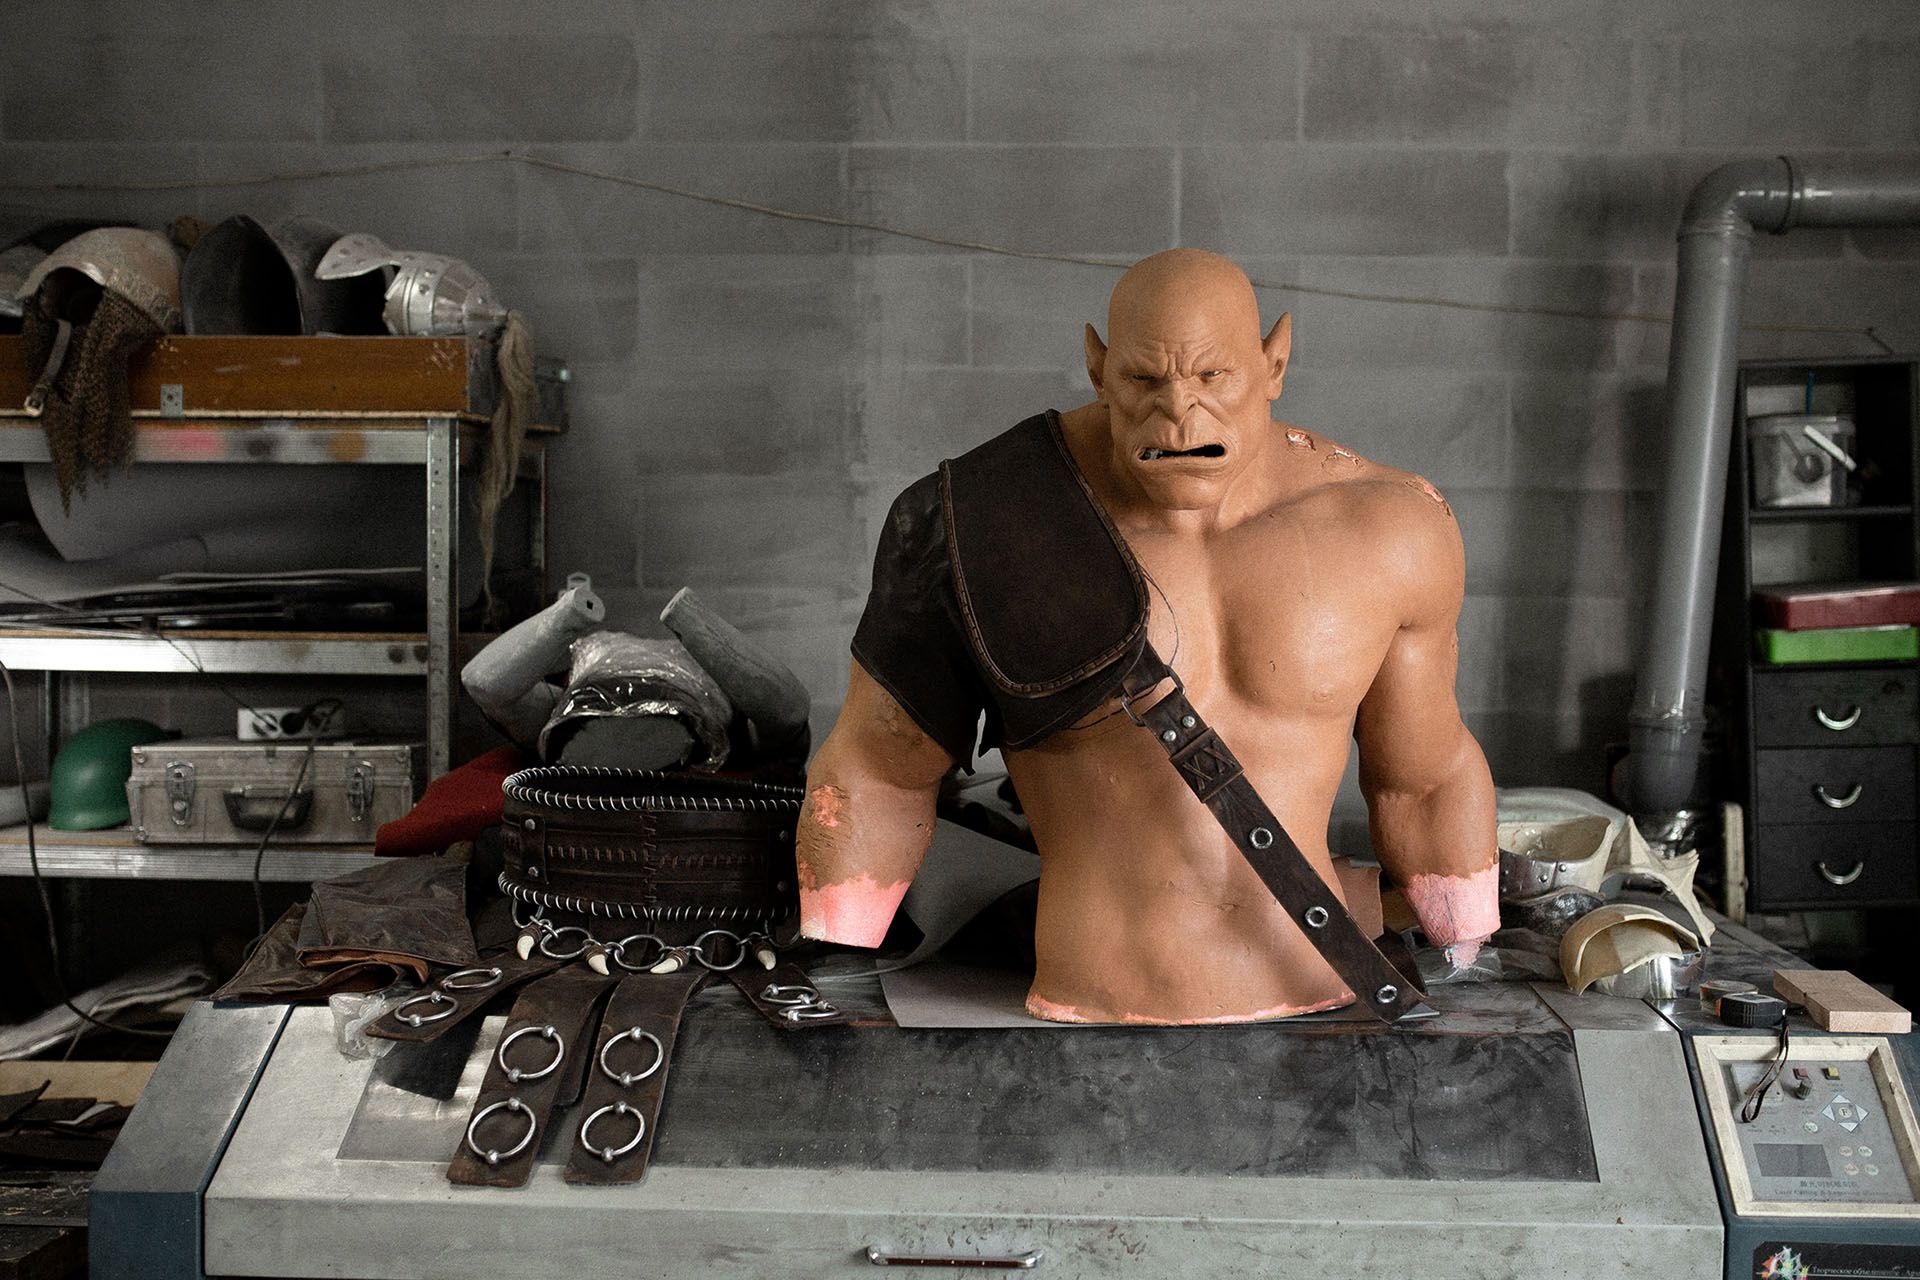
That done, it was time for Armor to get to work. After being printed and milled, the workpieces were coated with fiberglass. Checking against renders, the sculptors plastered the workpieces with modeling clay, starting from the basic shape then adding the textures and details. When sculpting was complete, they applied one final layer of fiberglass, which perfectly captured the surface of each workpiece. This fiberglass formed the basis of a mold, which they poured silicone into to form the final sculpture.
Well, the nearly-final sculpture - they were the right texture, shape, and design, but they were also in a bunch of pieces. These pieces were gathered up and installed on a skeleton made of metal and sealing foam, at which point we finally had the full form of our sculptures. All that was left was the window dressing… though, there was a fair amount.
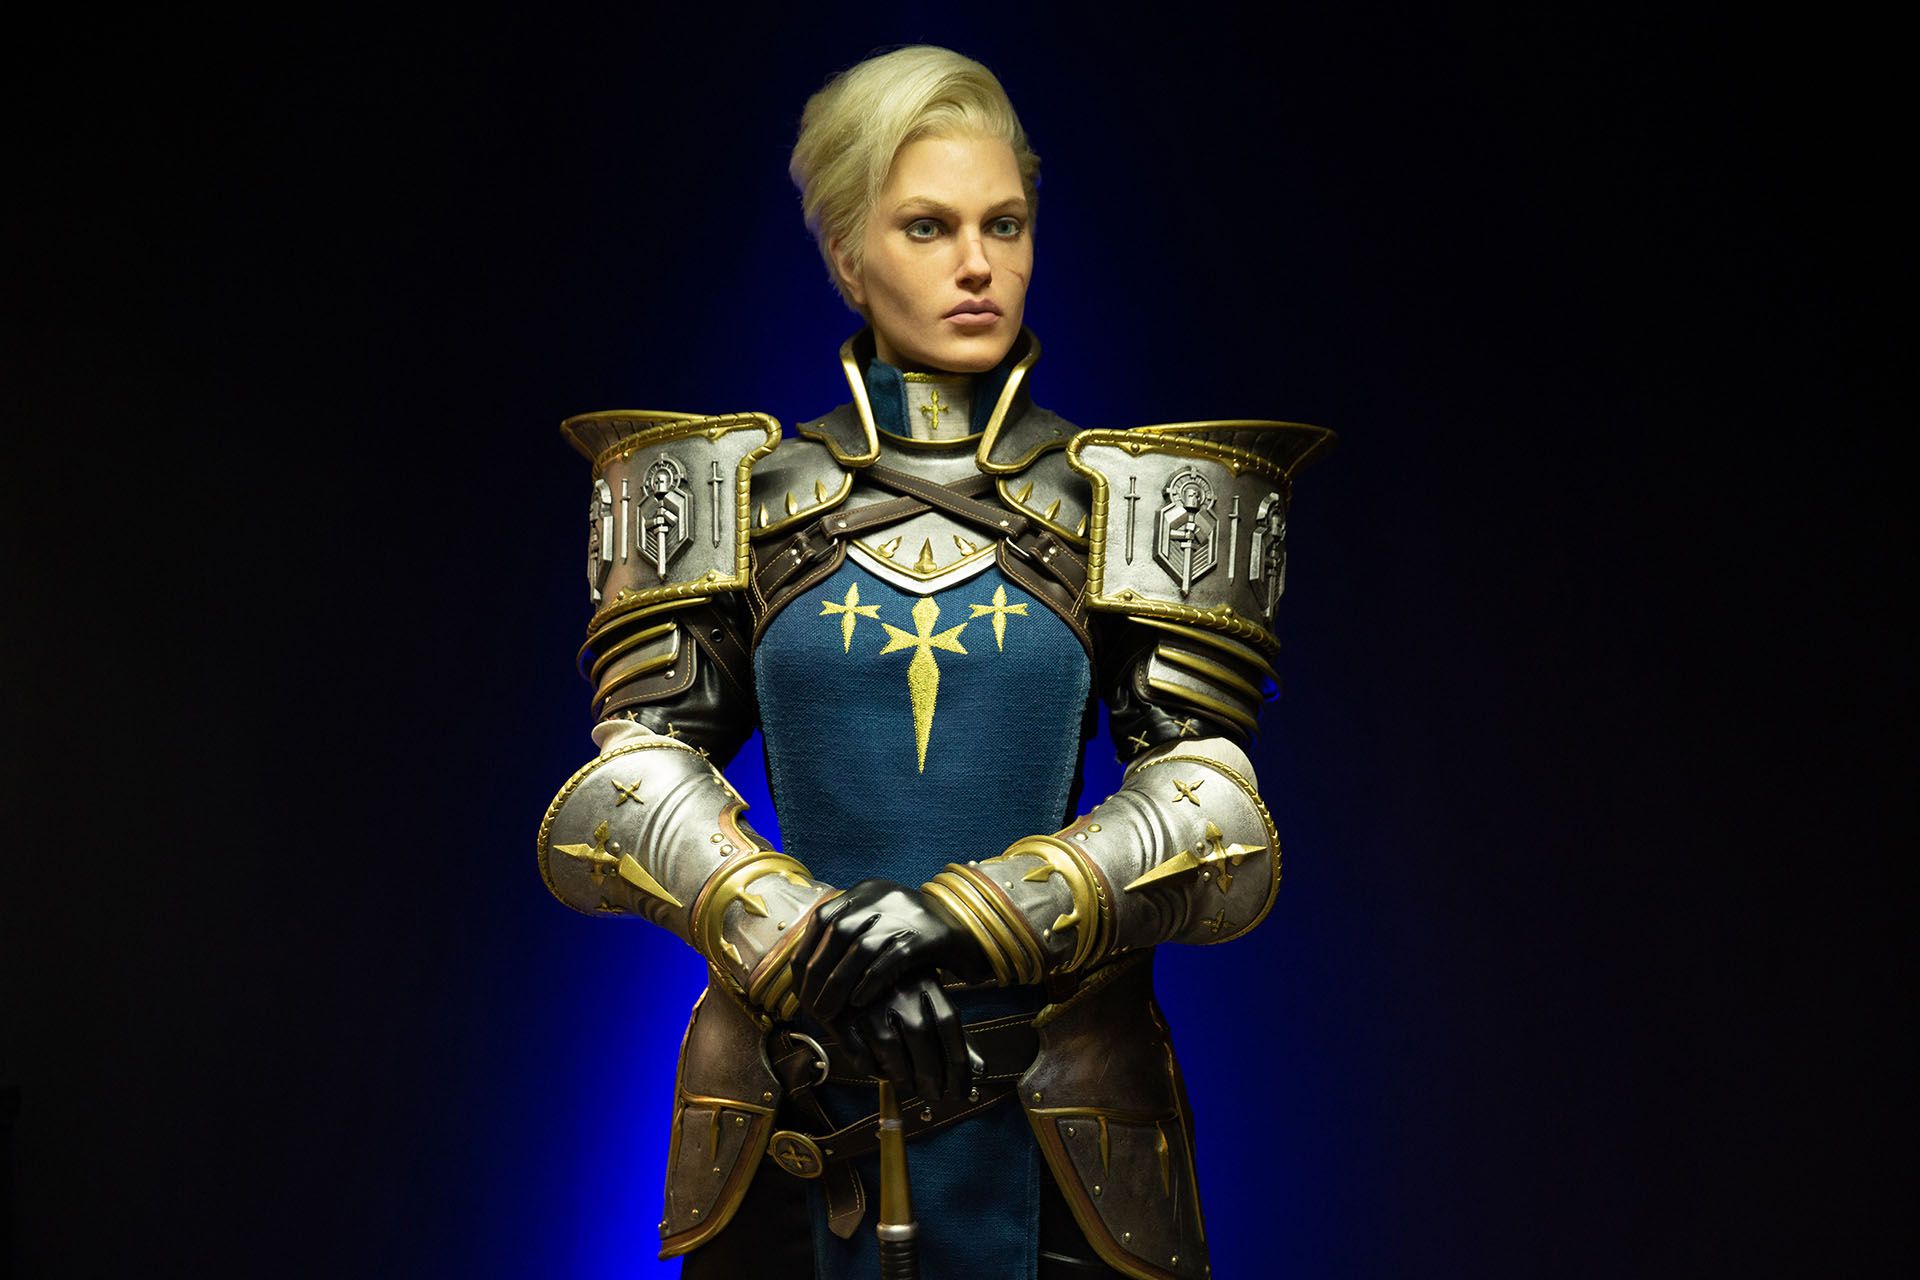
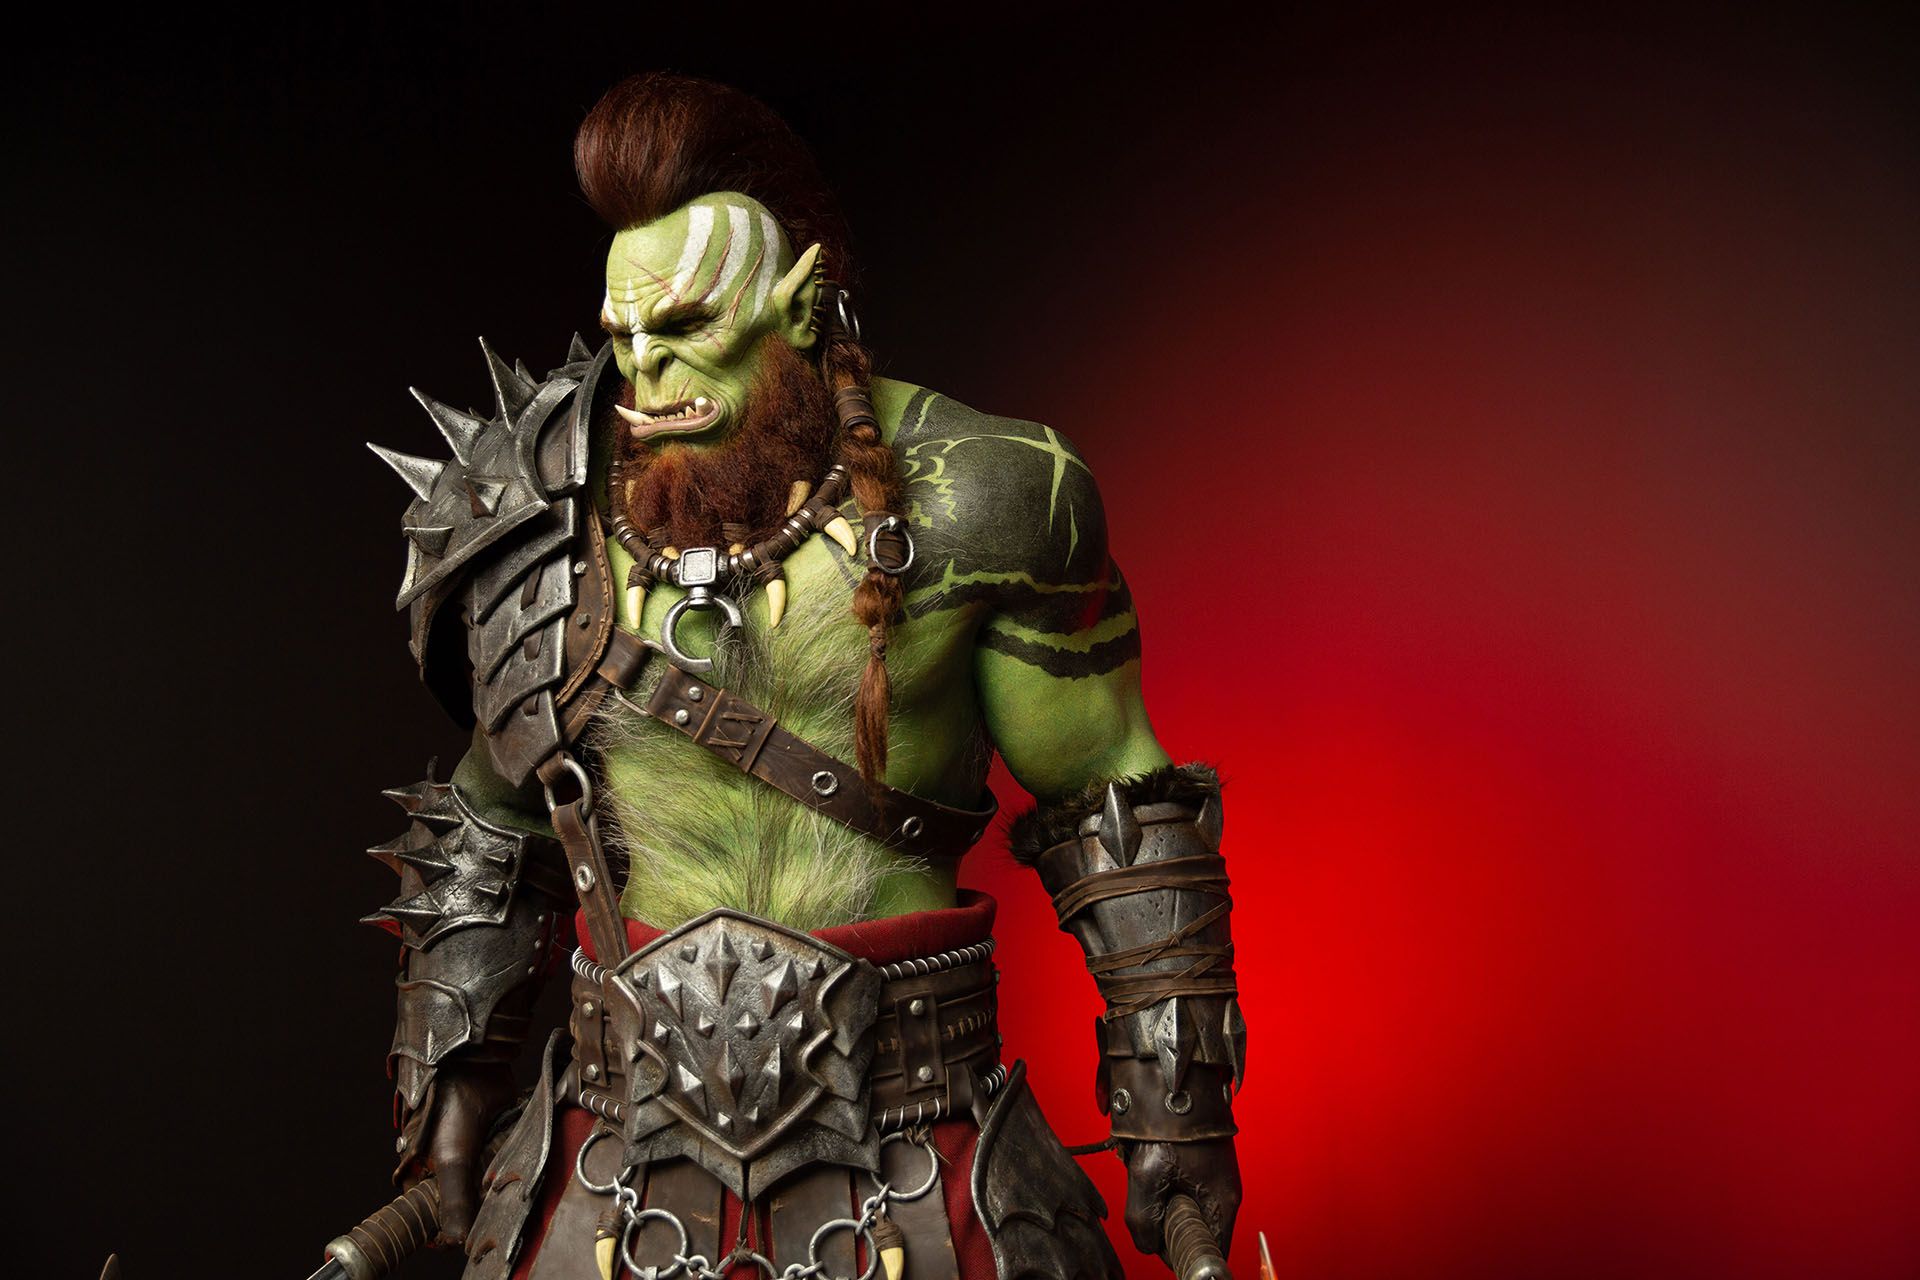
First, the sculptors dyed the silicone and applied the postiche: hair, eyelashes, eyebrows, and beard. Athel just has natural human hair, but, sadly, orc hair is astonishingly rare on planet Earth, so the sculptors had to improvise for Galek: a combination of horse hair, buffalo hair, goat hair, and synthetic Kanekalon fiber formed his mighty fuzz.
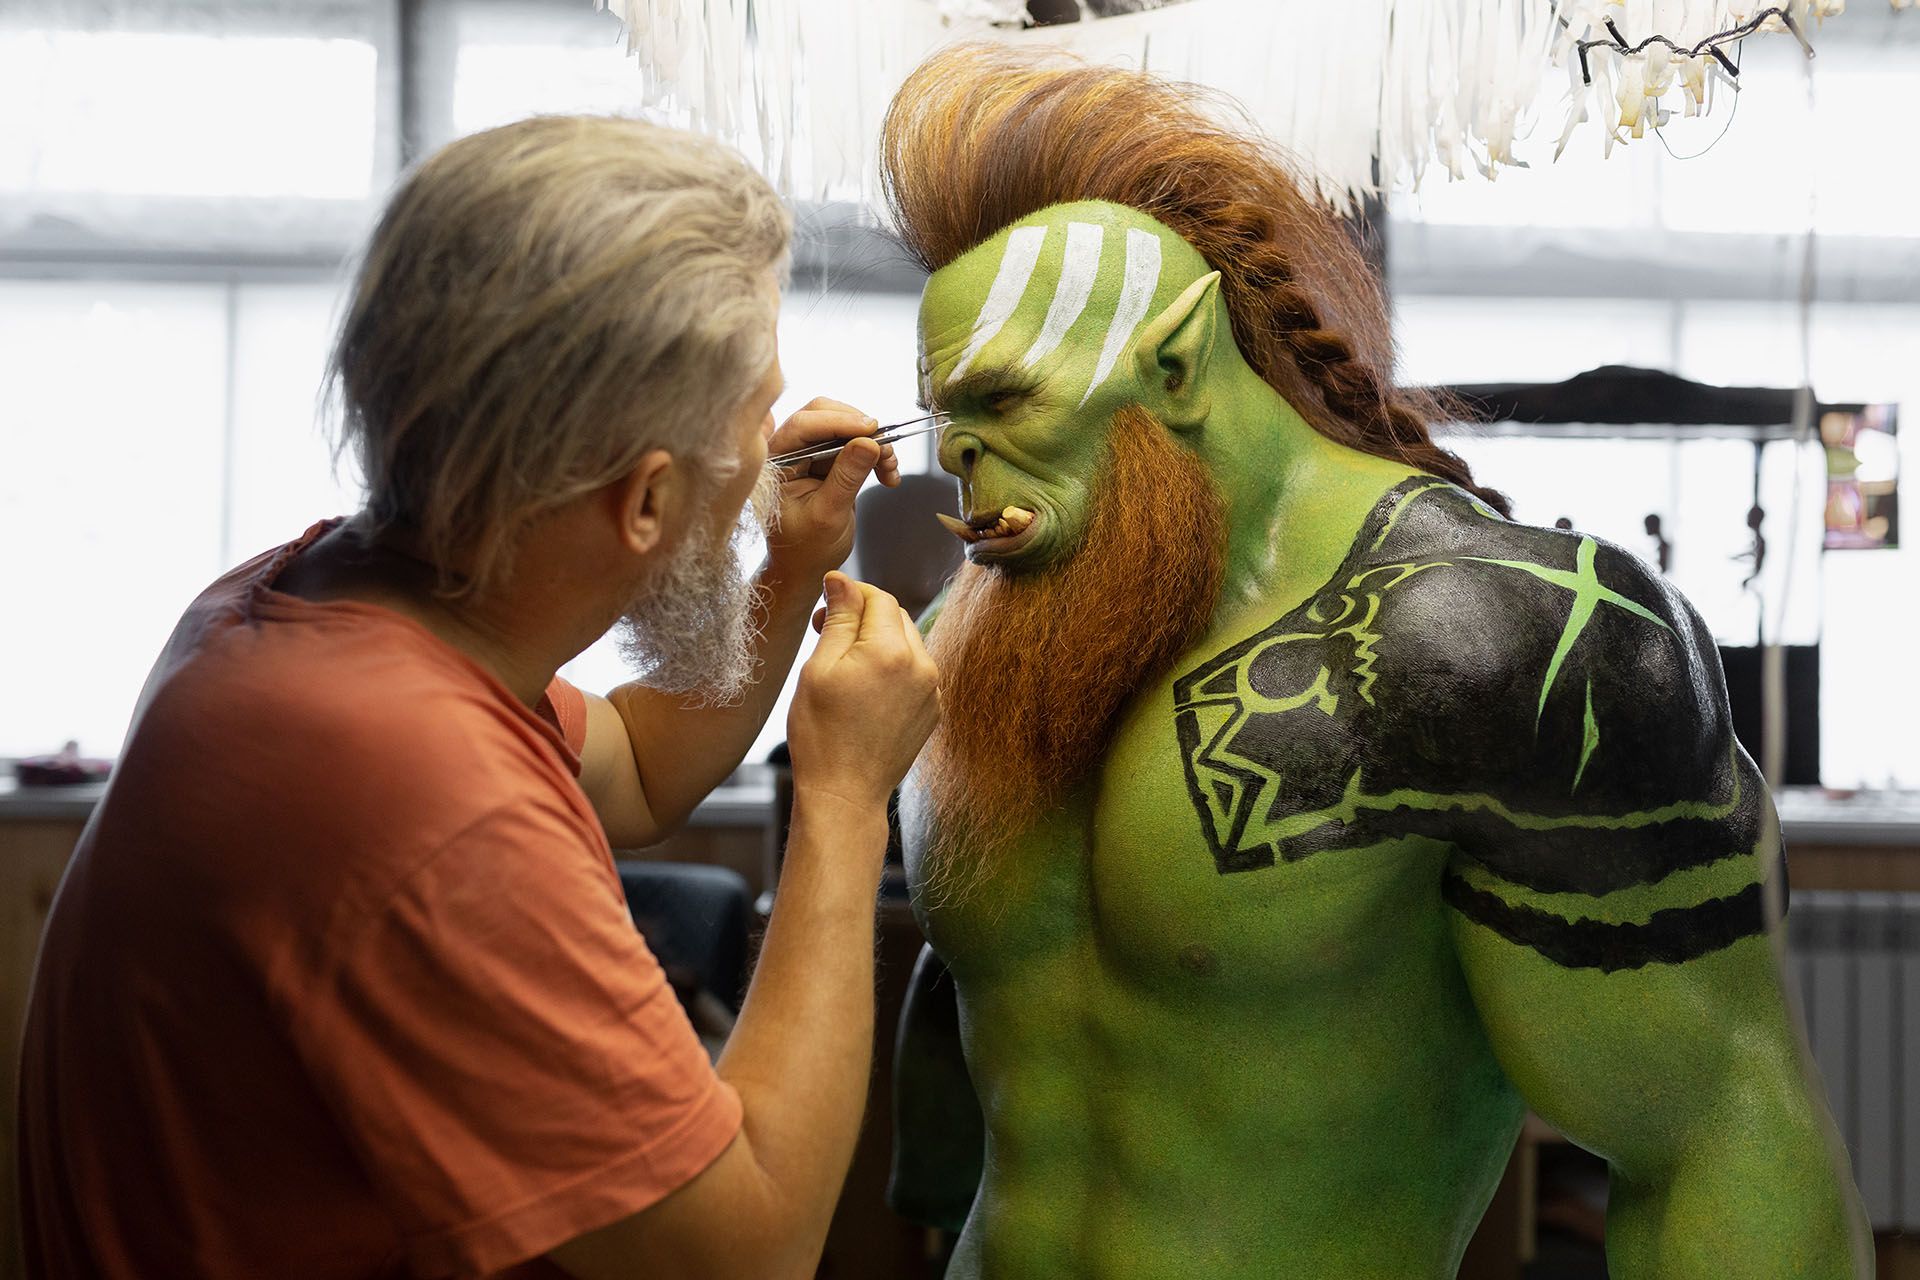
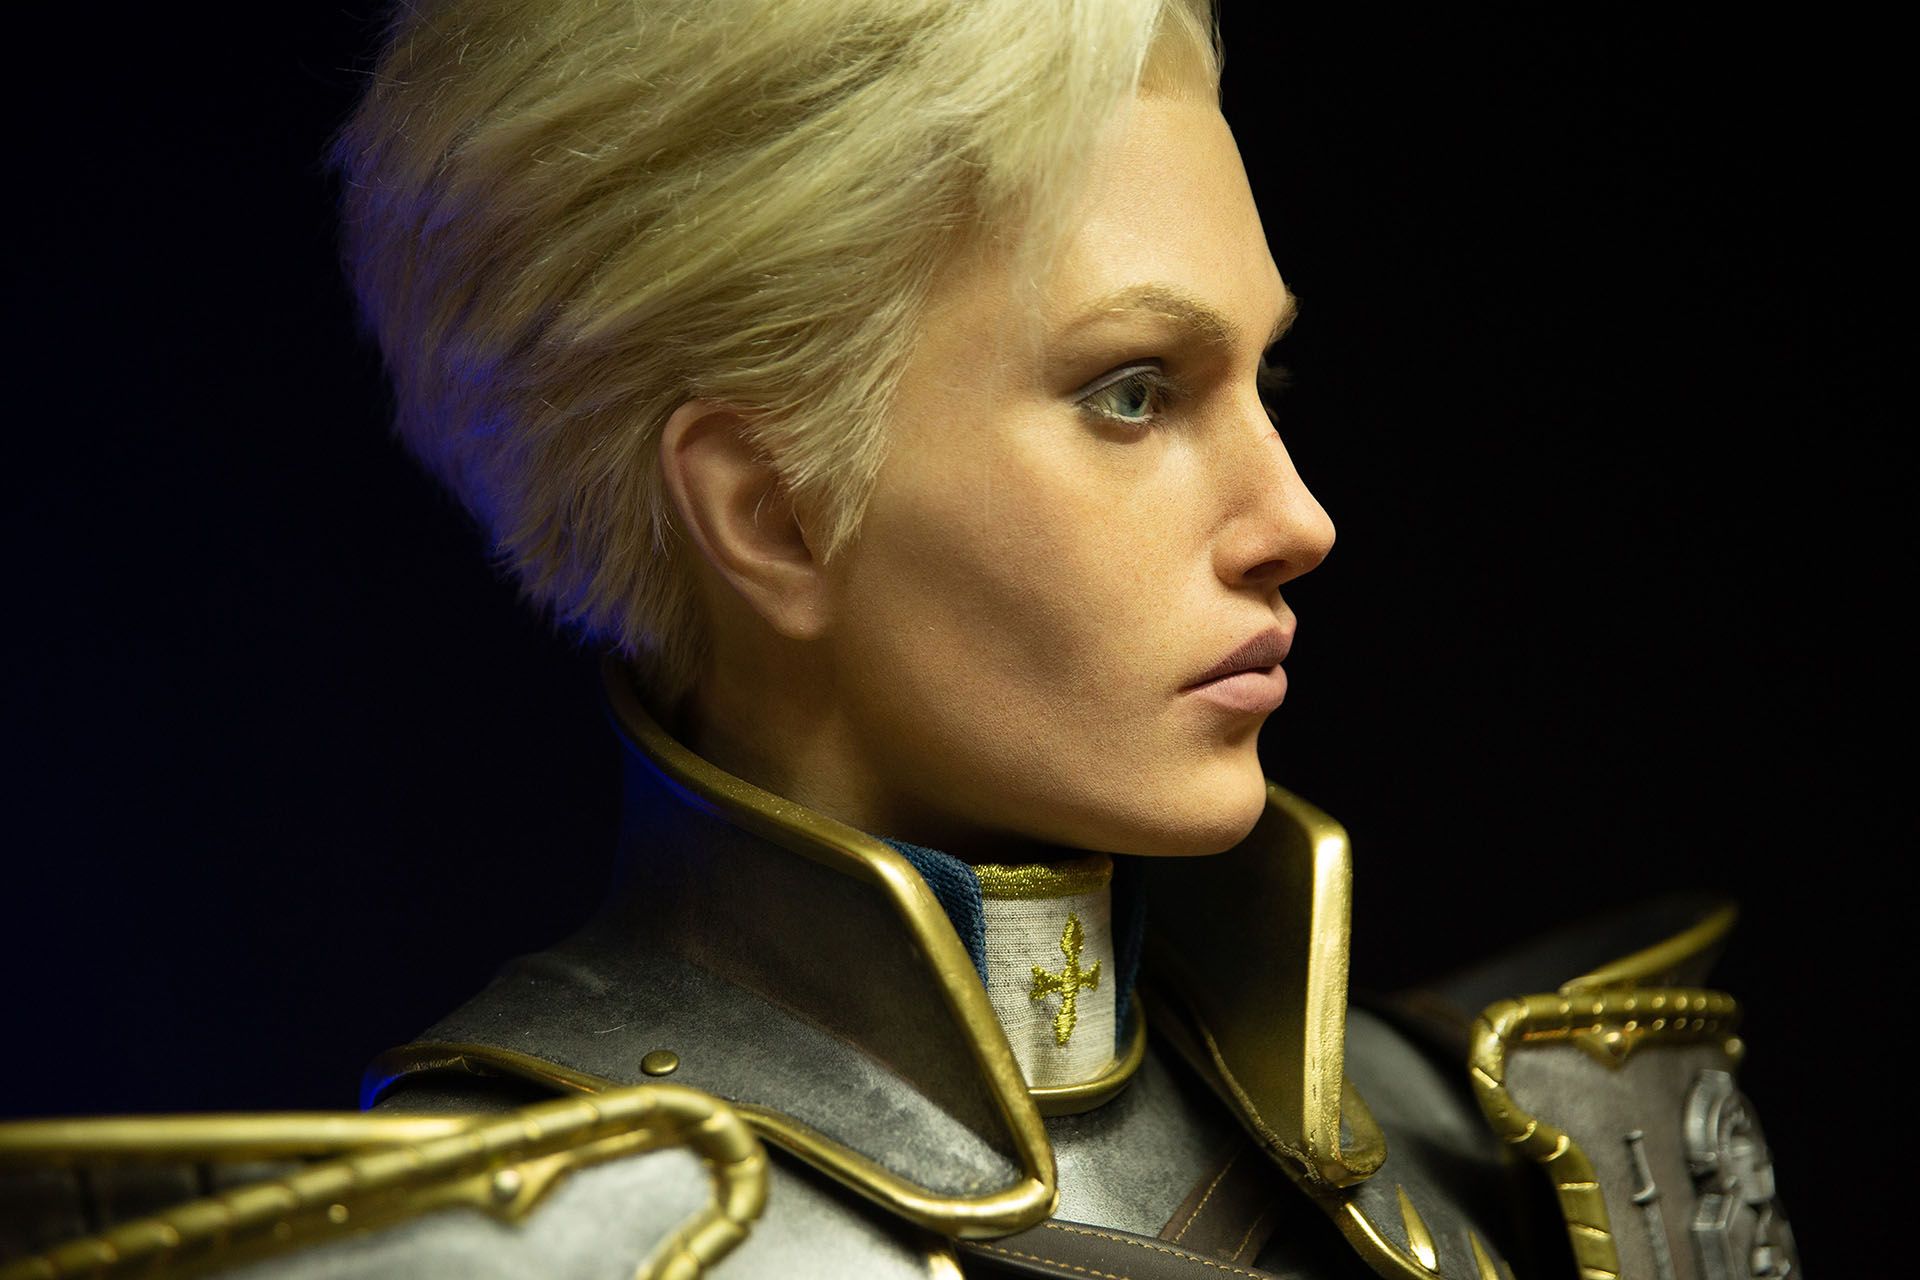
From there, the process looked a lot like preparing an actor for a movie set: haircutting, hairstyling, and makeup. The sculptures were so lifelike at that point that they were even able to use ordinary, everyday makeup for Athel; if beauty trends happen to change at some point, we’ll be able to renew her makeup accordingly.
The next stage was tailoring the characters’ clothes. The physical thickness of clothing doesn’t matter much in 3D render - if it needs to be thicker or thinner, it just gets adjusted. But, it turns out that, in real life, if you have a bunch of different materials on your clothes, each material is actually another layer of clothing. All those layers can distort a character’s silhouette like a puffy winter coat. So, instead of going the most realistic direction, they used inserts of different materials and stitched them together to get the right appearance for Athel.
Fourth Step: Overcome Armor Obstacles
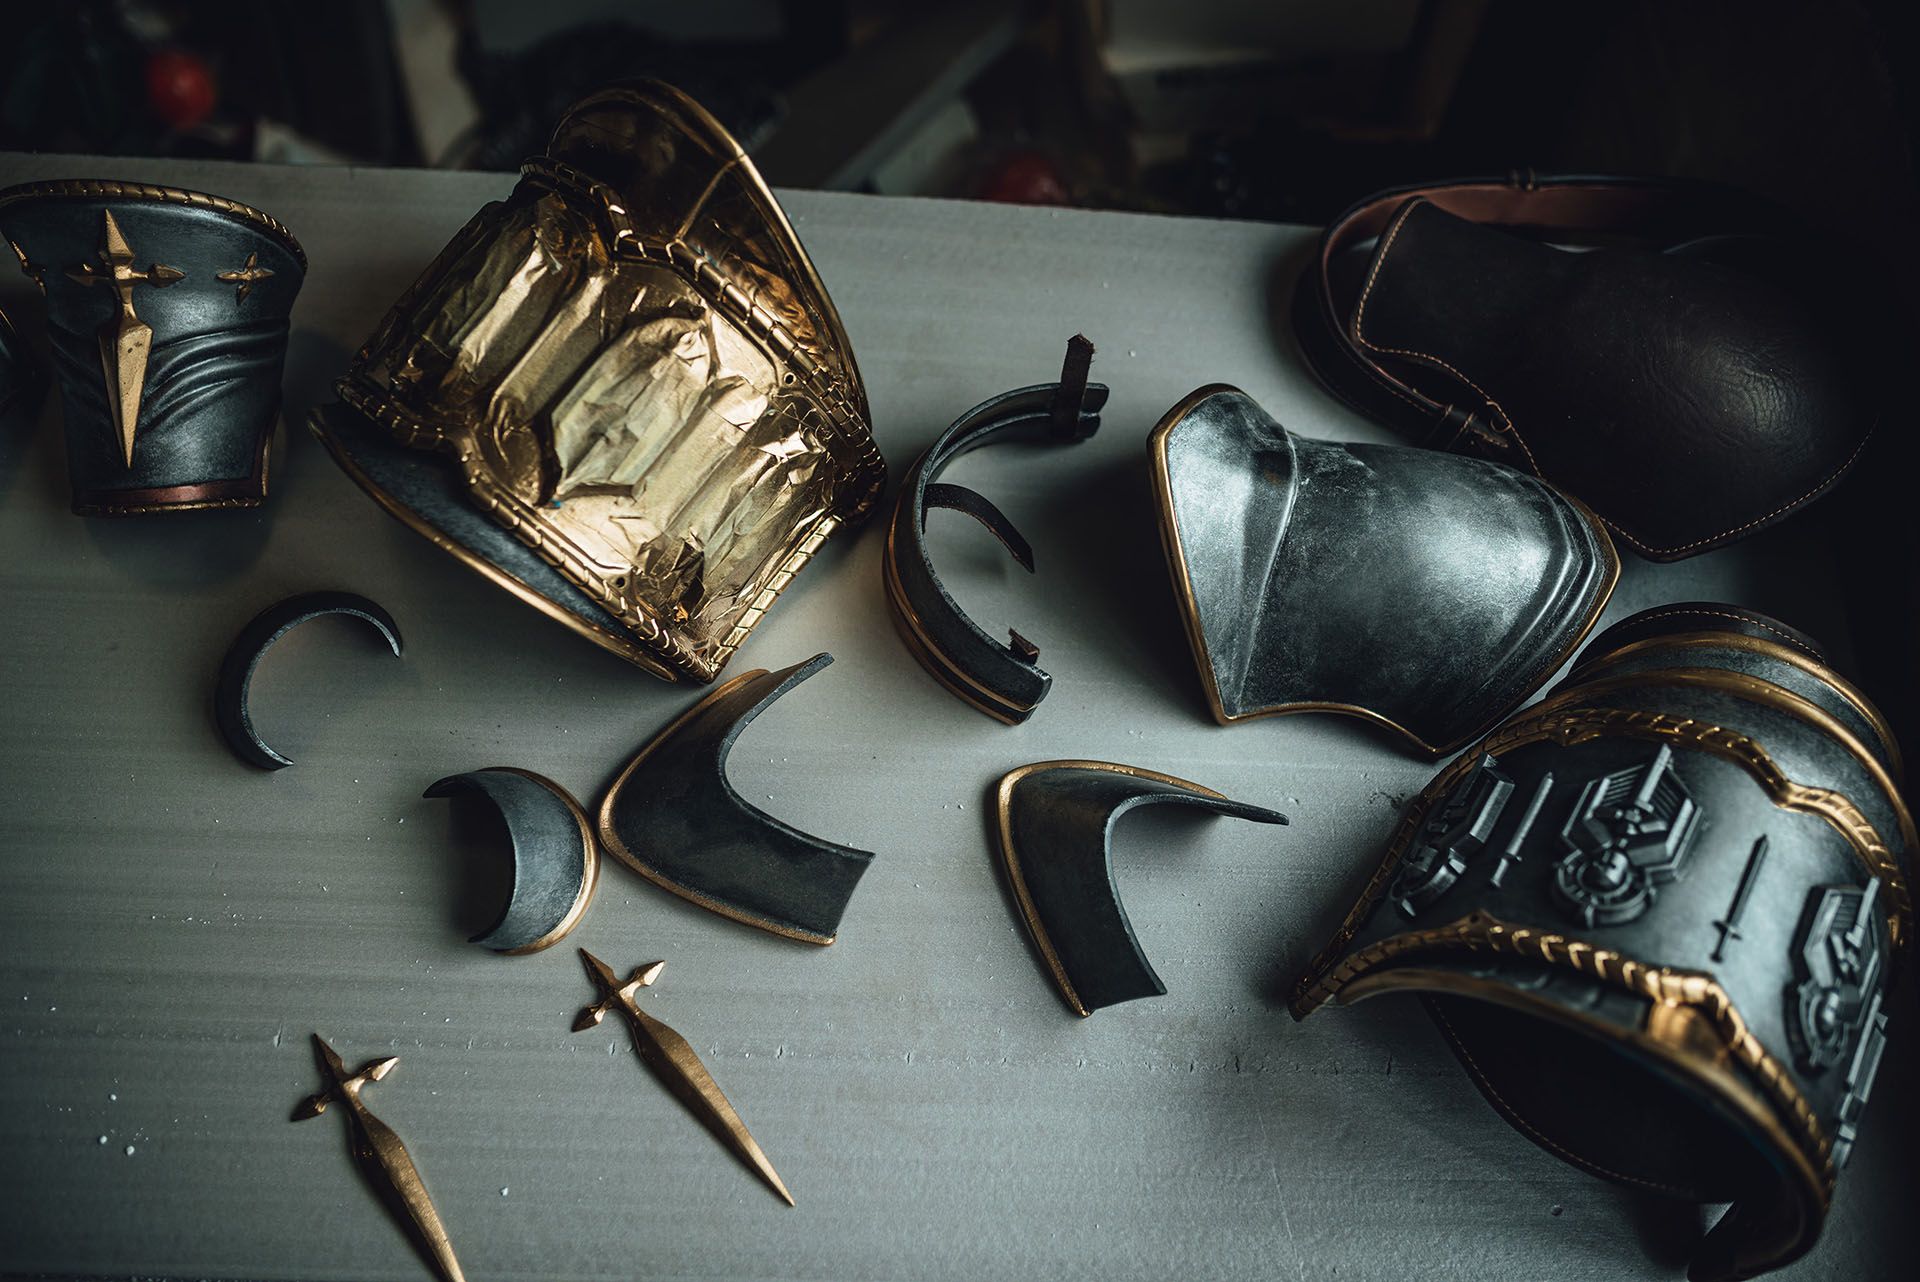
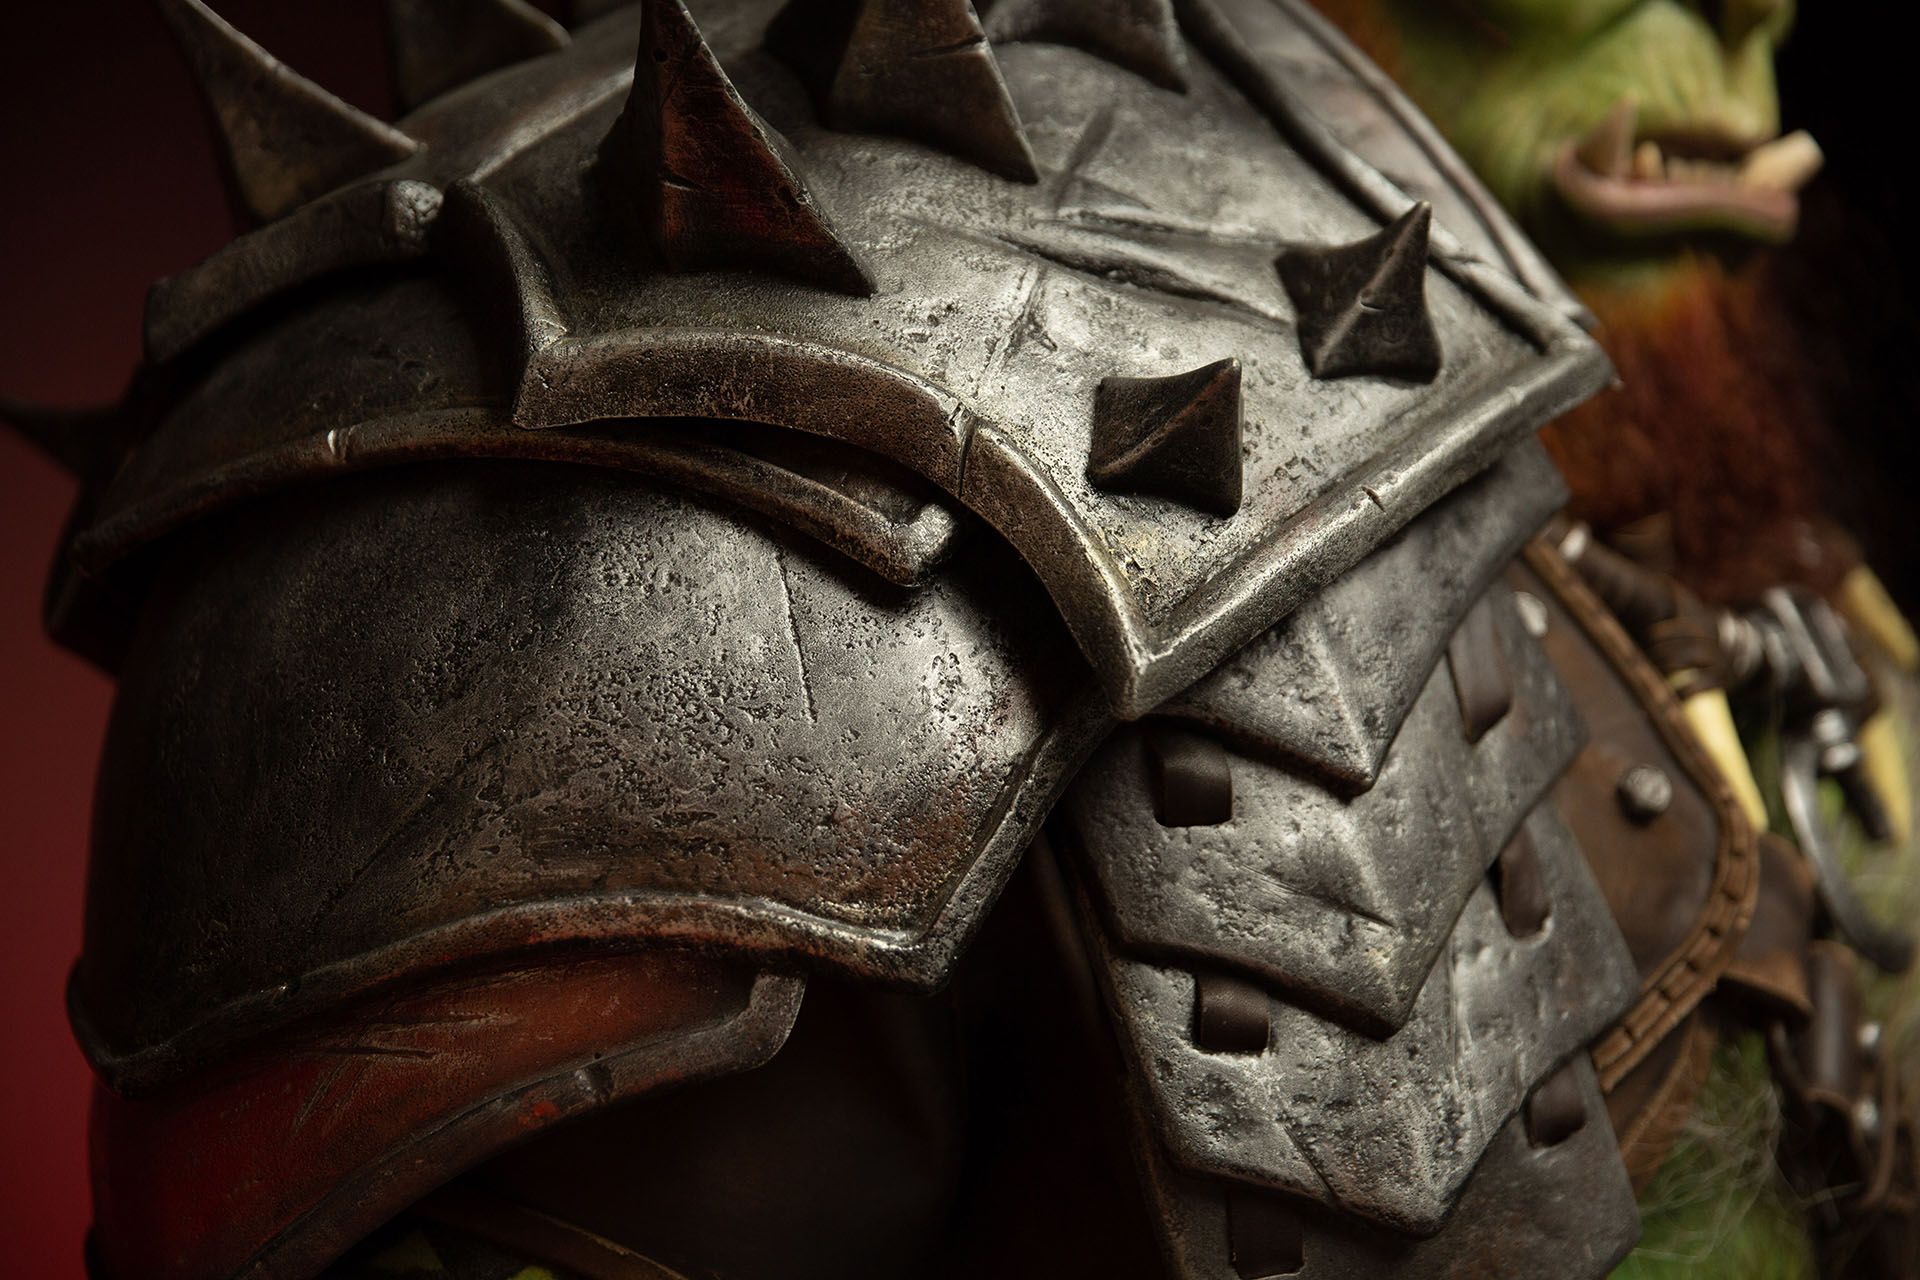
Casting and armor assembly required incredible care and effort. Each character’s armor consisted of tons of components, some very small, and it proved to be really difficult to get our Champions dressed for battle. Small embellishments or overlapping plates can simply be mirrored or duplicated on a digital model, but every single object had to be built manually for our recreations.
Each detail was cast using polyurethane, then was primed, polished, and painted to look metallic before it could finally be assembled. To give you an idea of the complexity of the process, Galek had more than 600 armor details while Athel had over 750.
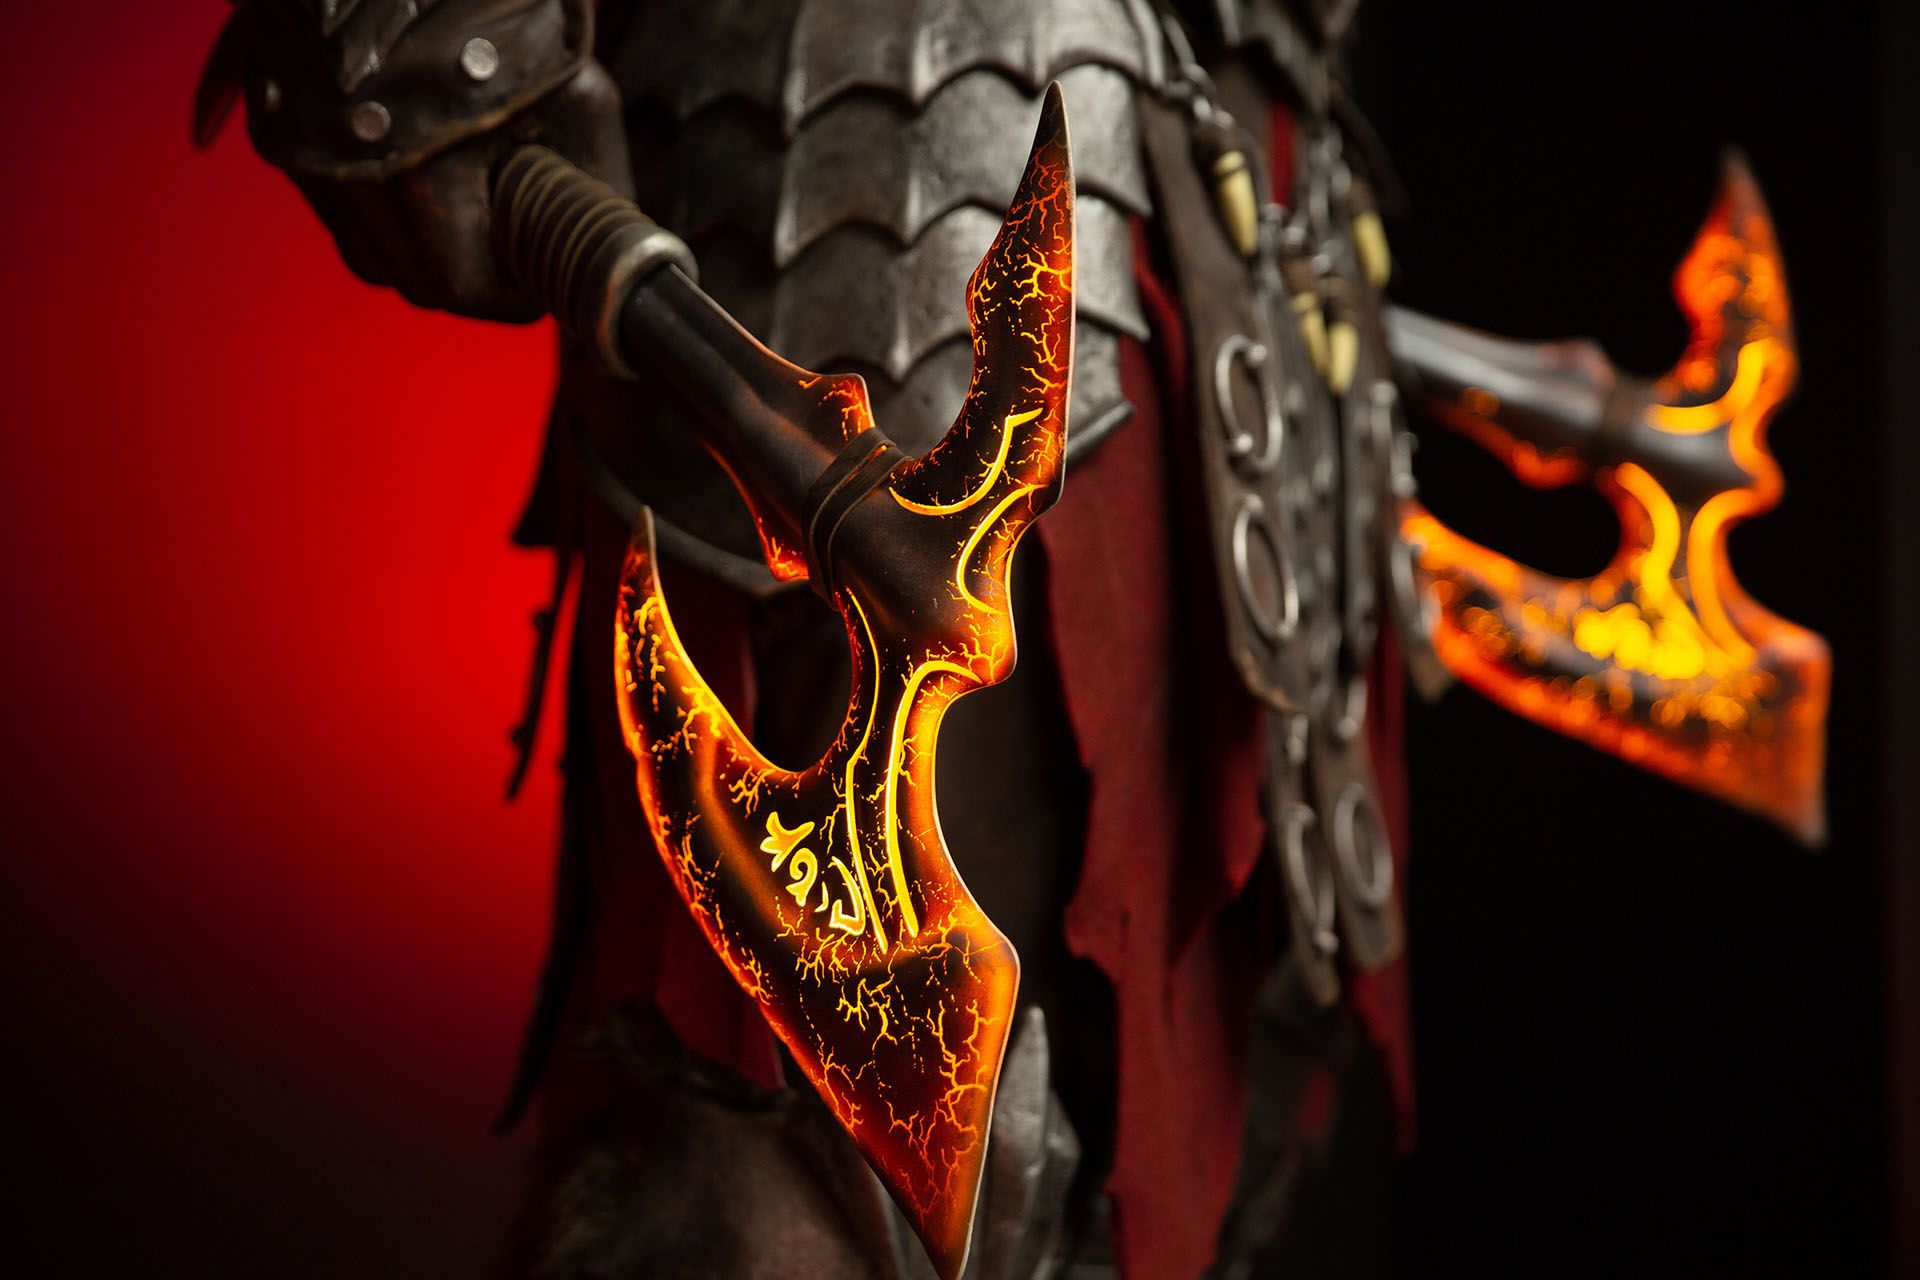
Creating Galek’s axes was another huge hurdle. As you might know from in-game, Galek’s magic allows him to set his favorite choppers aflame, and they glow red-orange from the heat of his fury. In real life, though, we’re a bit short on magic, so we had to use more mundane methods to get that sweet glow. This caused a problem: the lights we installed didn’t propagate along the axe blades the way we wanted. When we adjusted the positions of our LEDs, we got better lighting but you could see the light sources through the blades of the axe - the effect was ruined.
However, after some tinkering, our sculptors were able to design a special array for mounting the LEDs inside the axes, rendering the light sources invisible to the naked eye and making it so that the light they emit spreads evenly along the axe’s surface.
Final Step: Prepare a Location for the Sculptures
As soon as we came up with the idea of creating the sculptures, we started thinking about where they would end up. By the time the sculptures were ready to place, we’d picked out a few spots where employees liked to hang out but a couple of gargantuan statues could fit into the surroundings without anyone tripping over them. Galek would be positioned beside the wall of company values, while Athel would be standing guard over one of our coffee points.
But, it wasn’t that simple. These new statues were huge, and it would take some careful work to make sure they weren’t disruptive. Our solution was to invite some interior designers to come in and fit the sculptures in the environment without blocking thoroughfares or the common places where employees like to chat.
We also paid special attention to lighting. We wanted to make sure every photo taken near these sculptures looked great, no matter what kind of photo or what camera is taking it. We checked with lots of devices, from professional-level cameras to outdated smartphones, and adjusted the lighting to match. After a bit of work, we had it so that both the sculptures and the people standing next to them were well-lit enough for group photos, but the lights weren’t so bright that they were blinding anyone.
We managed to get all this done with a startling amount of secrecy. At the start of the lockdown our studio switched over to a remote work format, so by the time our sculptures were ready to set up, there was almost nobody in the office to see it before it was announced. However, Valentin Demchenko, the Concept Artist that designed both Galek and Athel, was quite surprised when he made a timely visit to the studio and stumbled upon the ultimate fruits of his labors.
“I looked at every armor element, every tiny belt, and had a flashback to the day when I painted all that stuff... It’s the best reward for a Concept Artist, when you can actually touch your creation in real life.”